Expert guidance on exterior painting costs, preparation, products, colors, stucco, siding, Florida weather, HOA approval, and hiring a professional painter.
Exterior painting in Northeast Florida has to hold up against intense UV exposure, heat and humidity, frequent afternoon rain, mildew and biological growth, salt air near the coast, stucco cracking, wood deterioration, and HOA or ARB color requirements that many other regions never have to plan around. As Exterior Painters Jacksonville, FL homeowners have relied on since 2001, this hub organizes practical, homeowner-facing guides built from more than 25 years of painting homes throughout Northeast Florida — so you can find the specific answer you need, whether that's what a repaint should cost, why your paint is failing, or which color your HOA will actually approve.
Exterior paint in Jacksonville must withstand intense sunlight, high humidity, frequent rain, mildew growth, and — in coastal areas — salt exposure. These conditions place more stress on a coating than homeowners typically experience in other parts of the country, which is why a paint system that performs well elsewhere doesn't always perform well here. It's also why exterior painters Jacksonville, FL homeowners hire need real, local experience with these conditions, not just general painting skill.
Most homes need exterior repainting somewhere in the range of every 7 to 12 years, though the real answer depends heavily on surface type, sun exposure, and how the previous coating was applied. A long-lasting result depends more on proper washing, repairs, scraping, sanding, caulking, and priming than it does on paint alone — preparation is what determines whether a coating lasts a decade or fails in three years.
The correct process also varies by surface. Stucco, James Hardie® fiber-cement siding, wood trim, brick, aluminum, and previously painted surfaces each have different preparation requirements and call for different coating systems. And in many Jacksonville-area communities, exterior color changes require HOA or Architectural Review Board approval before work can begin, which affects both your color choices and your project timeline.
Understand the process, timing, preparation, and what a professional project actually includes.
Research pricing, estimates, product tiers, and why quotes on the same home can vary by thousands.
Peeling, fading, bubbling, chalking, mildew, cracks, wood rot, and other signs of coating failure.
Exterior colors, sheens, HOA approval, paint brands, and Florida-specific product decisions.
Most homeowners move through the same sequence when planning an exterior repaint. This roadmap follows that journey from first noticing a problem to standing in front of a finished home — use it to jump straight to the stage you're in.
Fading, chalking, peeling, or cracking that signals it's time to plan. See Paint Failure & Repairs.
Florida's UV, humidity, and salt air accelerate coating breakdown in ways most climates don't. See Florida Climate & Paint Life.
Understand what drives pricing before you start collecting bids. See Costs & Estimates.
Coordinate body, trim, and accent colors, and confirm HOA requirements early. See Colors, Design & HOA Approval.
Match the product to your substrate and exposure rather than picking on price alone. See Paint, Primer & Sheen.
Learn what separates a repaint that lasts a decade from one that fails in three years. See Planning Your Project.
See how prep, repair, and product selection come together on actual Northeast Florida homes. See Featured Projects.
Get a written, on-site estimate with prep, repairs, and products defined up front. Request an estimate.
Not every exterior surface behaves the same way, and treating them identically is one of the most common causes of early paint failure. Here's a quick overview of how preparation and coating requirements differ by substrate, with links to the detailed guide for each.
Cracks as homes settle, needs masonry-compatible coatings and breathability.
See stucco guides →Fiber-cement boards with joints that must stay sealed; cut edges need priming.
See siding guides →Panelized wood siding prone to seam and edge deterioration if unprotected.
See siding guides →Natural wood movement and moisture sensitivity call for breathable coatings.
See siding guides →The most vulnerable common substrate; rot has to be repaired before coating.
See siding guides →Can be painted with the right flexible, heat-reflective product and prep.
See siding guides →Block, concrete, and other cementitious surfaces share stucco's core requirements.
See stucco guides →Large, sun-exposed panels that fade and chalk faster than shaded walls.
See color guides →These two quick paths point you straight at the right cluster based on your home's surface or the problem you're seeing.
Painting estimates and product labels use terms that aren't always defined anywhere homeowners can find. Here's what the most common ones actually mean, in plain language.
A water-based coating built on acrylic resin, valued for flexibility, color retention, and breathability. It's the standard base for most premium exterior coatings used on stucco, siding, and trim.
A thick, highly flexible coating that stretches and bridges hairline cracks as a wall moves. Well suited to stucco with extensive fine cracking, but less breathable than acrylic, so it isn't the right fit for every wall.
A primer formulated to bond to cementitious surfaces like stucco and block, and to block the alkalinity in those materials that can attack ordinary paint. Commonly used on bare, weathered, or repaired stucco.
A Sherwin-Williams high-build masonry coating used on concrete and stucco surfaces. It's a coating in its own right, not an elastomeric product, and is often the primary system on sound stucco.
A premium Sherwin-Williams exterior acrylic finish with dirt- and rain-shedding technology, suited to Florida's humidity and frequent rain. Used as a topcoat on siding, trim, and some upgraded stucco systems.
A powdery residue that rubs off on your hand when the coating underneath is breaking down. It's a sign a coating has reached the end of its service life and needs to be addressed before repainting.
The gradual loss of color intensity from UV exposure. South- and west-facing walls fade first and fastest, and dark, saturated colors fade faster than light ones under Florida sun.
A white, powdery mineral deposit that migrates to the surface of stucco or masonry as moisture moves through the material and evaporates. It signals moisture movement that should be understood before painting.
Thin, shallow cracks from normal shrinkage and settlement, most common on stucco in its first few years. Cosmetic in most cases, but still need repair before painting rather than being coated over.
A condition where a layer of stucco separates from the layer beneath it or from the substrate, sometimes producing a hollow sound when tapped. More serious than a hairline crack and needs its own repair scope.
A primer designed to adhere to glossy, dense, or otherwise hard-to-bond surfaces, giving the finish coat something to grip. Common on previously painted trim or metal.
Thin metal or membrane material installed to direct water away from joints, transitions, and penetrations. Failed or missing flashing is a common hidden cause of wood rot and moisture intrusion.
Visible overlap lines left when a wet edge of paint dries before the next section is applied. Usually a sign of rushed application rather than a product defect.
The measured thickness of a coating once it has fully dried, which determines how much actual protection and durability the finish provides. Two full coats are what typically achieve the manufacturer's intended thickness.
Water entering behind a painted surface through a failed joint, crack, or flashing detail. It's the underlying cause behind a large share of peeling, staining, and wood rot on Florida exteriors.
A flexible sealant applied to joints, seams, and transitions to keep water out and give trim a clean, finished line. Not permanent — Florida sun and thermal movement work it open over time.
Gaps built into stucco, masonry, or siding systems to allow the material to expand and contract with temperature without cracking. These joints need flexible sealant, not rigid caulk or paint film.
Rolling a coating into a sprayed surface to work it into the texture and profile of stucco or fiber cement. Improves adhesion and evens out coverage compared to spraying alone.
Priming the exposed, factory-cut edges of fiber-cement boards where they've been trimmed on site. These edges are more porous than the factory face and need sealing to resist moisture.
A panelized wood siding with vertical grooves milled to resemble individual boards. Common on older Florida homes and prone to seam and edge deterioration if caulking and coating aren't maintained.
A composite siding material (James Hardie® being the most common brand) made from cement, sand, and cellulose fibers. Durable and paintable, but installed as individual boards with joints that must stay sealed.
A coating with a cement or masonry-compatible base, formulated for stucco, block, and other concrete-based surfaces rather than wood or metal.
A surface-level fungal growth that appears as dark green or black staining, typically on shaded, poorly ventilated elevations. Must be killed and cleaned before painting — coating over it traps live growth underneath.
Structural decay in wood caused by sustained moisture exposure, usually starting at end grain or behind failed caulk. Paint protects sound wood but cannot restore wood that's already rotten.
The level of gloss in a paint finish, ranging from flat to high-gloss. Higher sheen generally cleans better but reveals more surface imperfection, which is why sheen selection varies by surface and use.
The review and sign-off process many master-planned communities require before an exterior color change. Typically involves submitting body, trim, and door colors for approval before painting begins.
A preparatory coating applied before the finish coats to improve adhesion, block stains, or even out surface porosity. Essential on bare, repaired, or dramatically color-changed surfaces; unnecessary on every surface by default.
The underlying material being painted — stucco, wood, fiber cement, metal, and so on. Coating and preparation decisions should always be made based on the specific substrate rather than applied uniformly.
A professional exterior repaint follows a predictable sequence: recognizing the signs it's time, assessing the surfaces involved, getting a real written estimate, selecting products and colors, securing HOA approval where required, completing preparation and repairs, painting, and finishing with a walkthrough. Skipping steps in that sequence — or compressing them to hit a lower price — is where most early failures start.
Homeowners comparing bids often assume the spread in price comes from the paint itself. It almost never does. It comes from how much of this process is actually included: whether prep gets the time it needs, whether repairs are scoped honestly, and whether the crew plans for a final walkthrough or just leaves when the last coat goes on.
The starting-point overview of exterior painting costs, process, and what to expect working with a Northeast Florida painting contractor.
Exterior painting estimates vary based on home size and height, surface condition, the extent of repairs needed, substrate type, accessibility, the number of colors involved, the product system specified, how much masking and protection the property requires, HOA documentation, and the number of coats applied. Two estimates on the identical house can differ by thousands of dollars, and almost never because one painter is using dramatically cheaper paint.
The guides below approach cost from different angles — a general Jacksonville pricing overview, exterior-specific cost drivers, what a real estimate should spell out, why professional bids differ, and how repairs and product tier move the number. Read the one that matches the question you're actually asking.
The current, comprehensive cost breakdown for Jacksonville homeowners planning an exterior or whole-home repaint.
Northeast Florida's climate is genuinely harder on exterior coatings than most of the country's. UV intensity here runs strong for most of the year, breaking down cheaper resins and pulling color out of pigments unevenly — south- and west-facing walls almost always fade first and fastest. Heat accelerates that breakdown further, and the daily temperature swing between a hot afternoon and a cooler evening drives thermal expansion and contraction in siding, trim, and stucco that works joints and caulk open over years.
Humidity and near-daily summer rain keep surfaces damp far longer than they look, which does two things: it extends how long a surface needs to dry before it can be safely coated, and it feeds mildew on shaded, poorly ventilated elevations. Homes near the Intracoastal and the coast add salt air on top of all of that, which corrodes hardware and accelerates coating breakdown further.
None of this means exterior paint is a losing battle in Florida. It means preparation and coating selection matter more here than they do in a milder climate, and a system chosen for this environment — applied over surfaces that were properly washed, repaired, and primed — performs dramatically better than one chosen without those factors in mind.
UV intensity, humidity, salt air, and afternoon thunderstorms — the forces breaking down builder-grade paint in Northeast Florida, and what beats them.
Peeling, blistering, bubbling, fading, and chalking rarely start with the paint itself. They start with what was underneath it: mildew that got coated over instead of killed, caulk that had already failed, a stucco crack that kept moving after it was painted, or bare wood that was already soft before the brush ever touched it. Understanding which failure you're looking at is the first step toward fixing it correctly instead of just repainting over the same problem a second time.
The guides below cover the most common failure patterns we're called to diagnose across Jacksonville, along with the repair work — carpentry, stucco repair, or both — that has to happen before a repaint will actually hold.
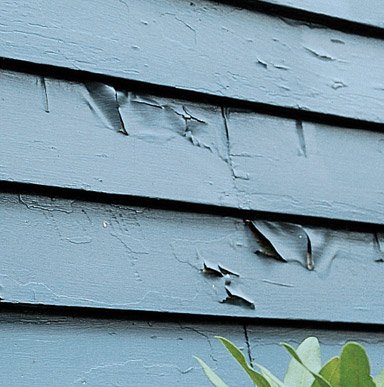
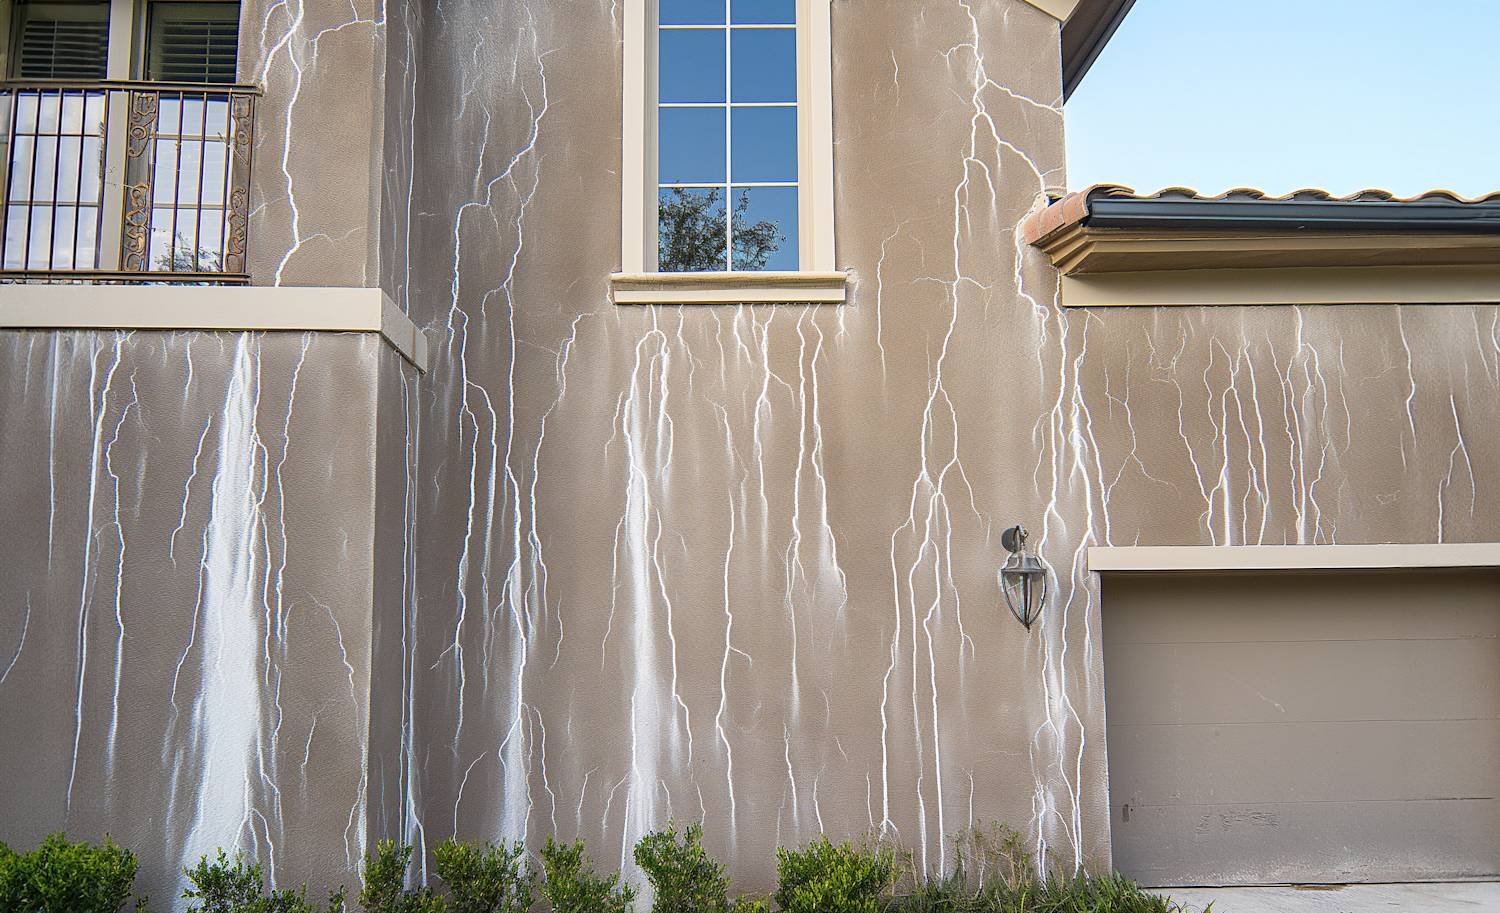
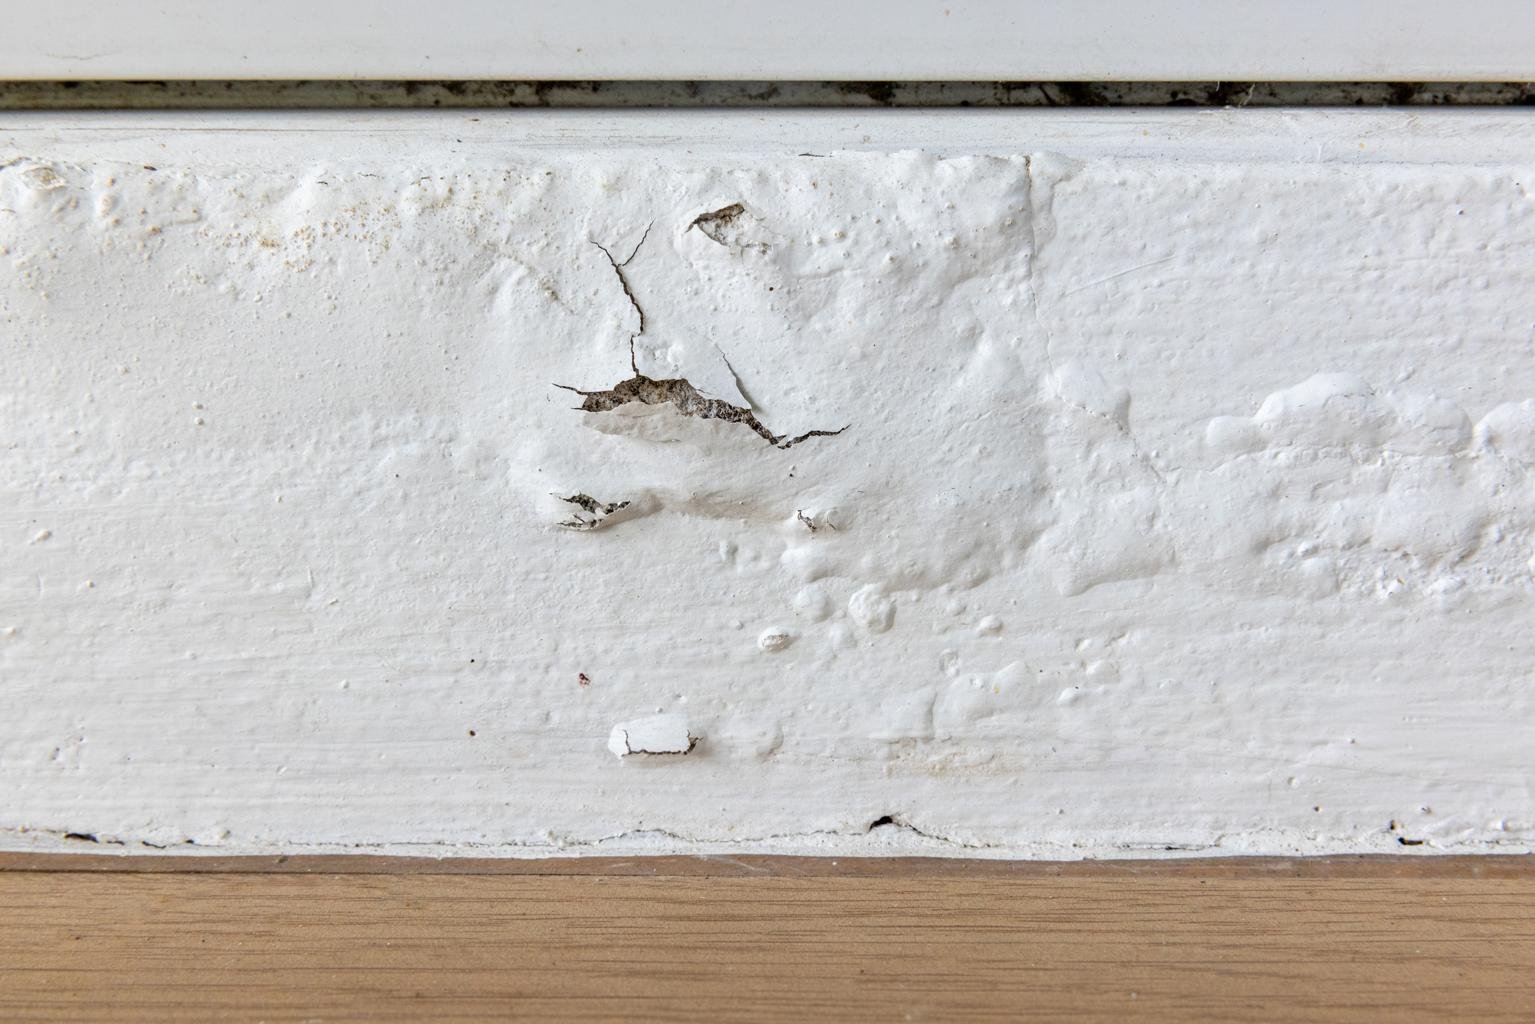
Three of the most common exterior coating failures we're called to diagnose in Northeast Florida.
A complete diagnostic walkthrough of the most common exterior paint failures we see across Northeast Florida homes.
Stucco is the most common exterior surface across Jacksonville and St. Johns County, and it behaves differently enough from other substrates to earn its own cluster. It cracks as homes settle, moves with moisture, chalks as coatings age, and can develop efflorescence where minerals migrate to the surface. It also needs to breathe — a coating that seals it too tightly can trap moisture behind the wall rather than protecting it.
Traditional cement stucco and synthetic stucco (EIFS/Dryvit) are not the same material and are not painted the same way, so it's worth knowing which one you have before assuming a guide written for one applies to the other. The acrylic-versus-elastomeric decision is also substrate- and condition-dependent rather than a fixed rule — the guides below explain when each makes sense.
The complete stucco painting reference — lifespan, prep, repair, product selection, and color considerations for Jacksonville stucco homes.
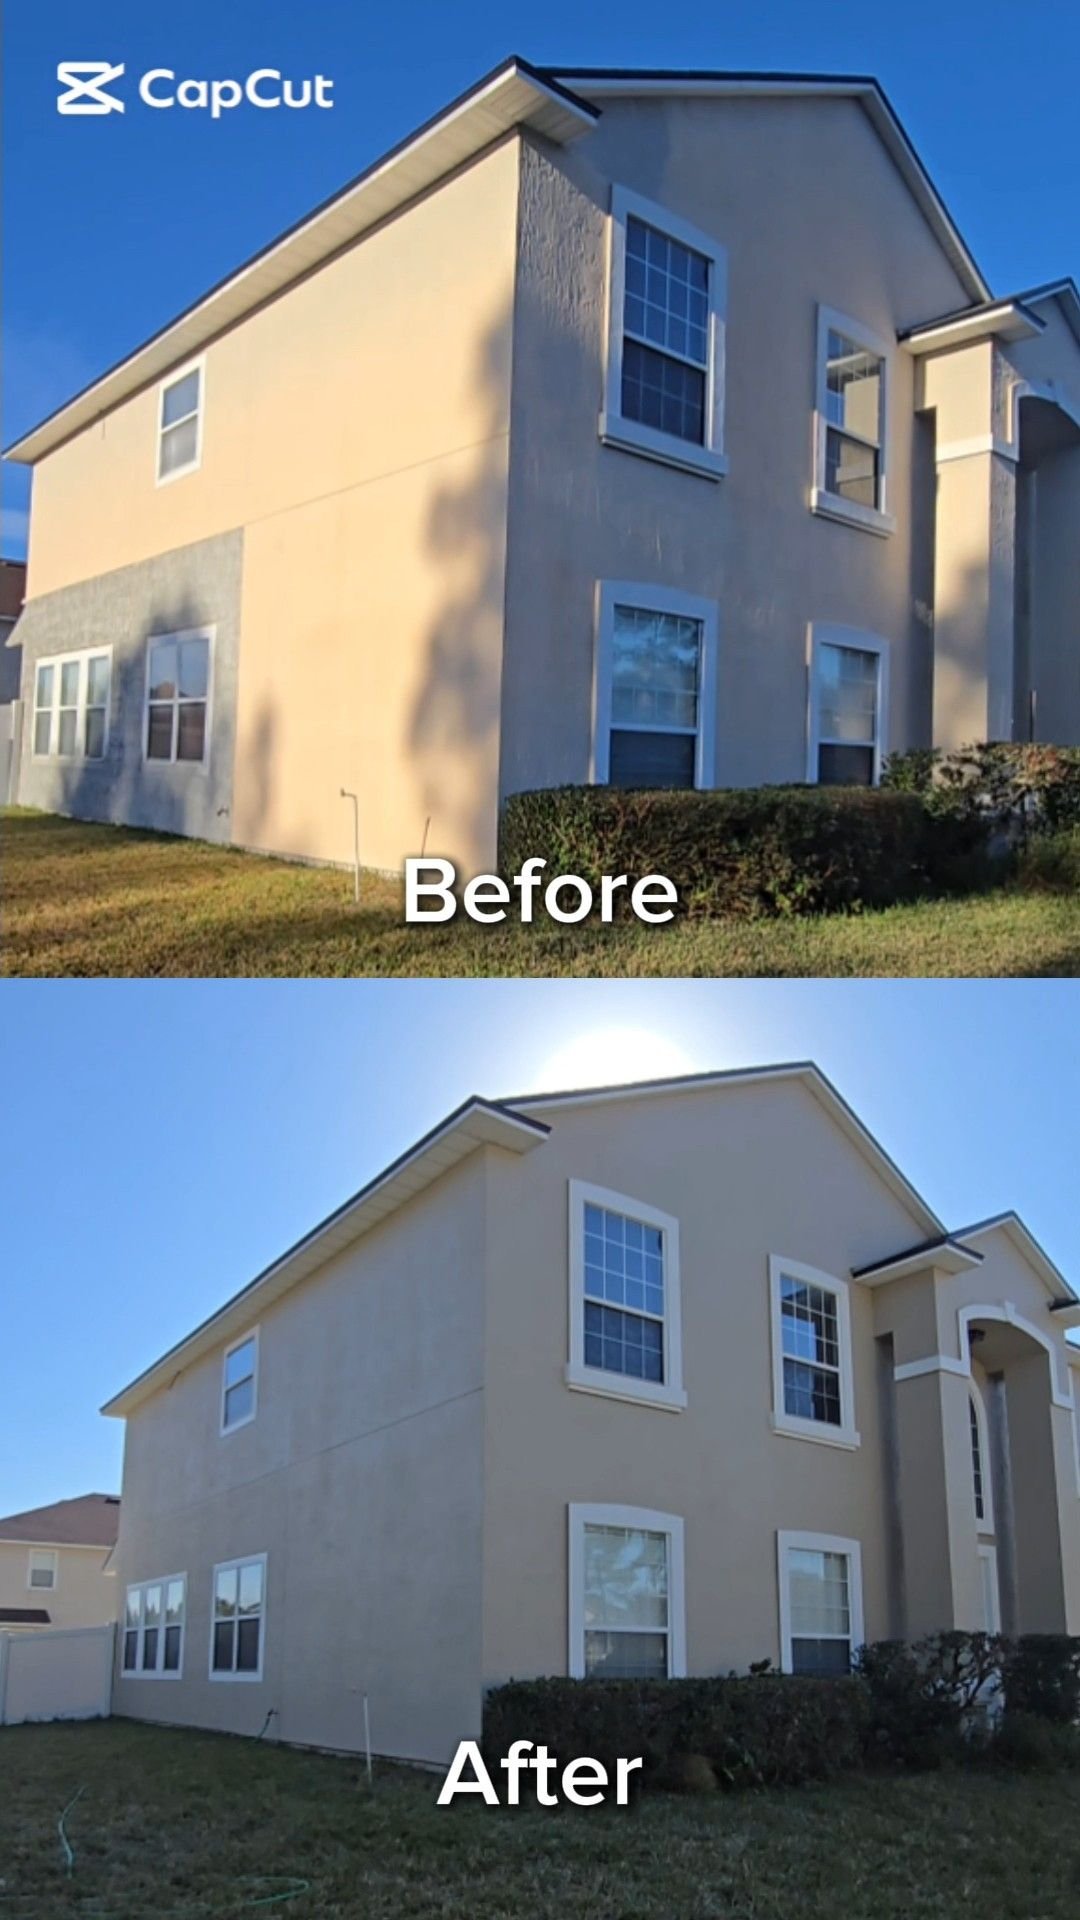
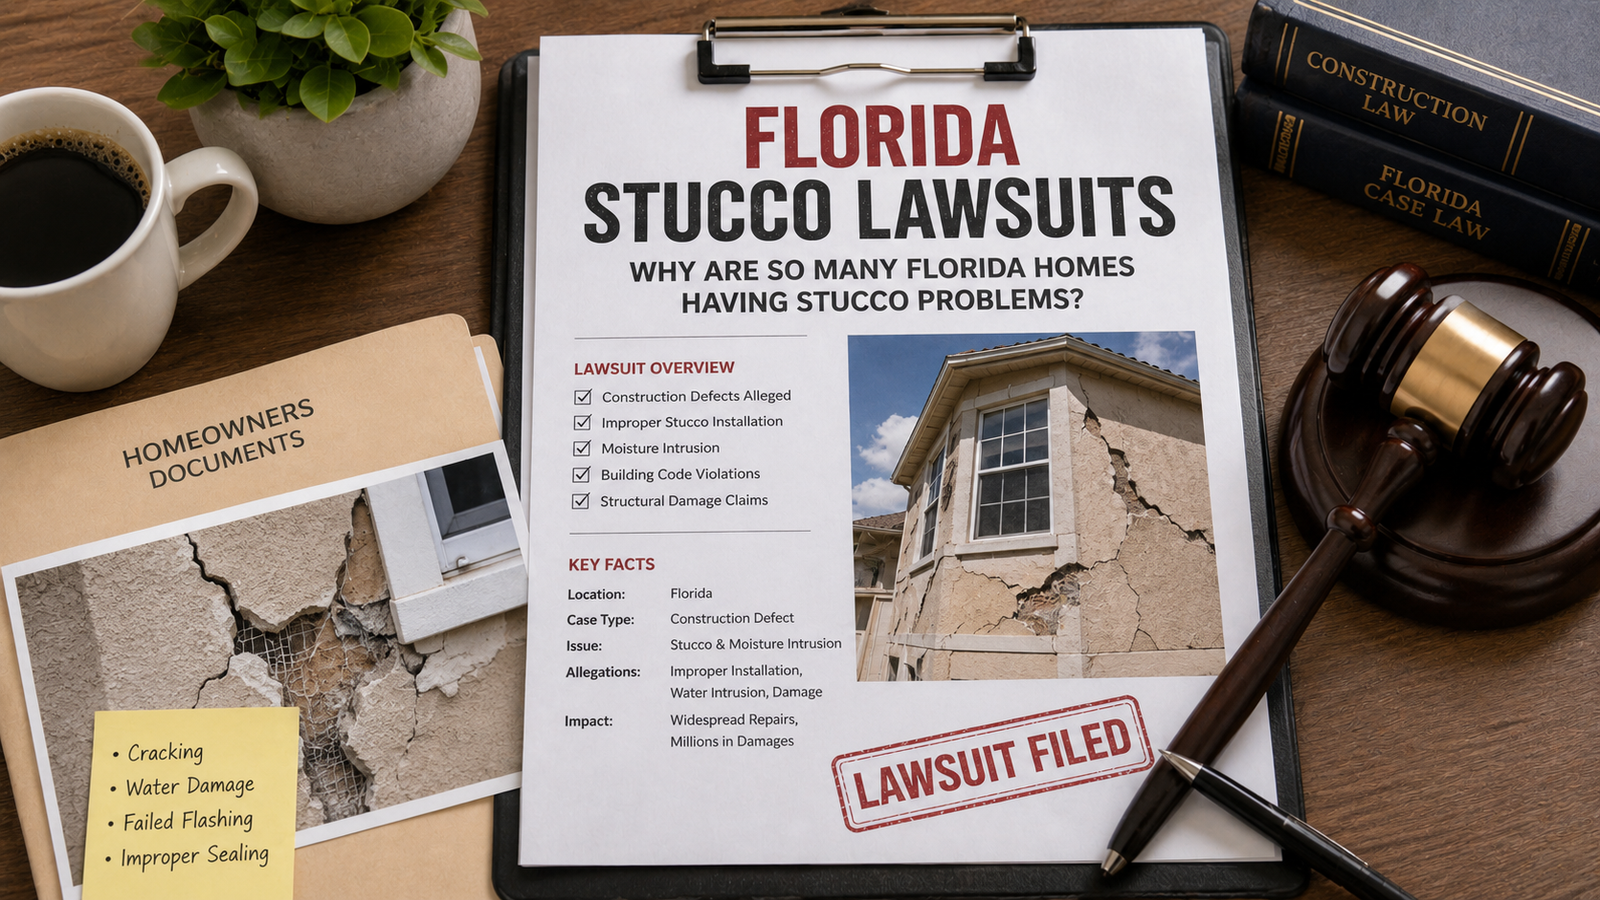
Outside of stucco, Jacksonville homes are clad in a genuine mix of materials — James Hardie® fiber cement, T1-11 and cedar wood siding, vinyl, aluminum, and brick — and each one fails differently and needs a different repair-and-coat approach. Fiber cement is a system of individual boards with joints that must stay sealed. Wood siding rots at end grain and behind failed caulk. Vinyl and aluminum need specific primers and flexible or heat-reflective products. Brick is porous masonry that needs to breathe, not get sealed shut.
There's no single "best" exterior paint — the right choice depends on the substrate, the existing coating, sun and salt exposure, the color chosen, the sheen needed, moisture conditions, and how much maintenance the homeowner wants to do between repaints. A product that performs beautifully on a shaded, north-facing Hardie wall isn't necessarily the right call for a south-facing stucco elevation two doors down.
The guides below help narrow that decision by comparing brands, product lines, and sheens, and by explaining where primer is actually necessary versus where it's being added to pad a bid.
A substrate-by-substrate product comparison for Jacksonville stucco, Hardie board, wood, and full exterior systems.
Exterior color decisions rarely happen in a vacuum. The roof, brick or stone accents, and hardscape are fixed and have to be worked around rather than replaced. Florida sunlight reads color more strongly than most climates and pulls out undertones that were invisible on a small chip, so a "neutral" greige can go pink or green across a full wall. Dark colors absorb significantly more heat and fade faster on sun-facing elevations, which matters both for appearance and for how hard the coating has to work.
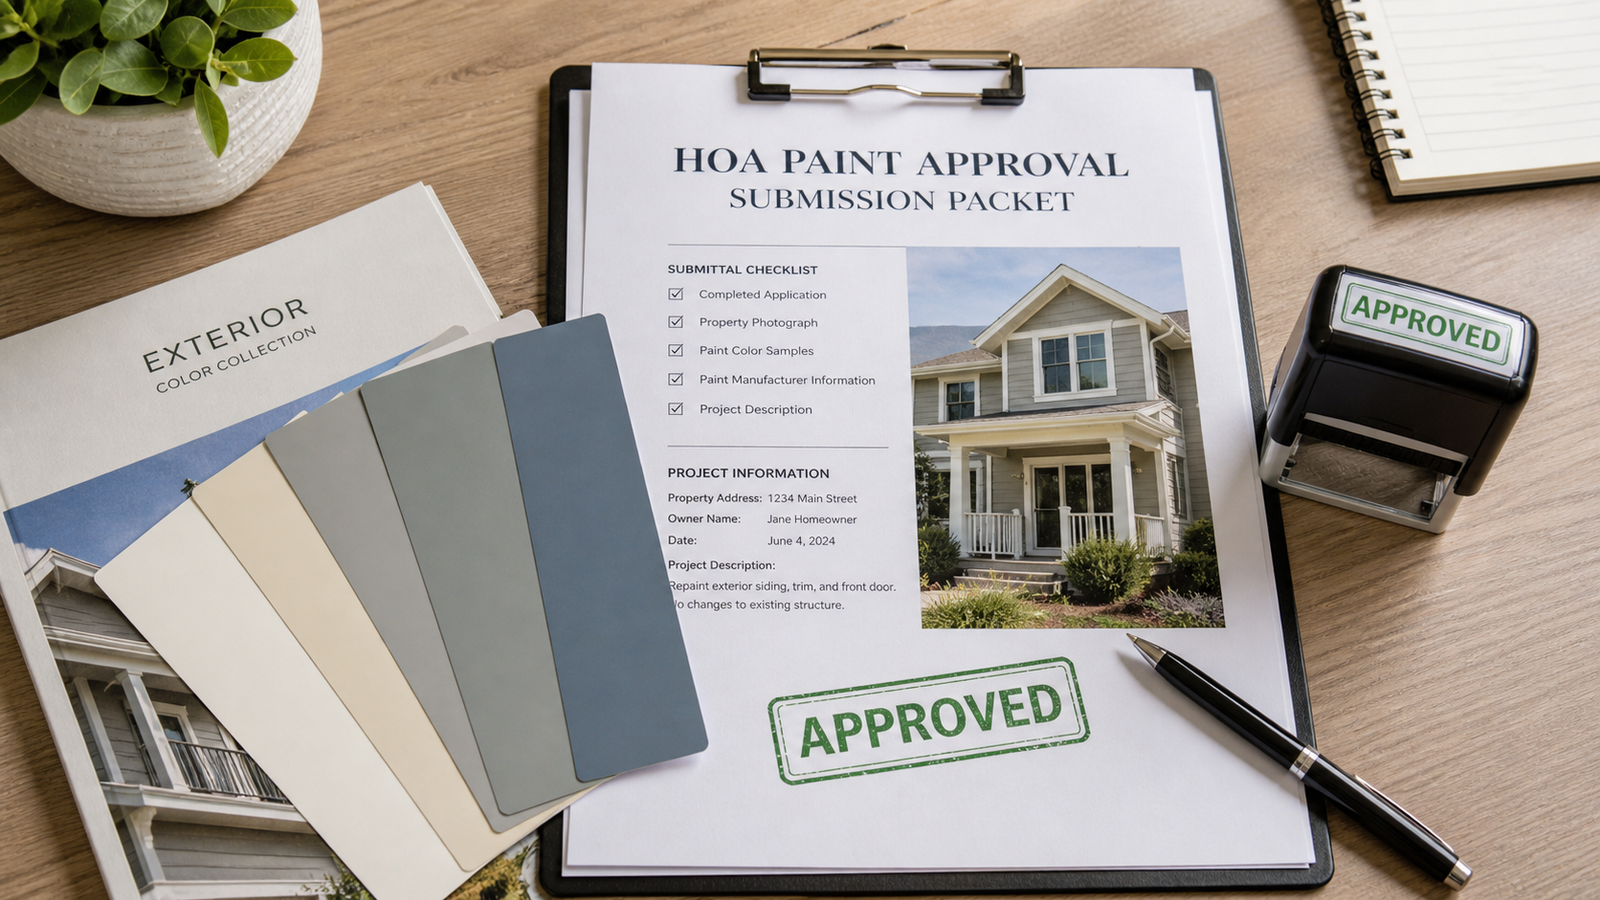
In many Jacksonville-area master-planned communities, none of that matters until the color is also approved. Most HOAs and ARBs require body, trim, and door colors to be submitted and approved before work begins, and that approval process needs to be built into your project timeline rather than discovered after you've already picked a color.
Colors that hold up in Florida sun and clear HOA review, organized by what's currently working across Jacksonville communities.

jacksonville-hoa-directory and jacksonville-hoa-paint-color-guide without the /about/ path segment. Our confirmed live directory link uses /about/jacksonville-hoa-directory/ — using that version below and flagging the color-guide URL for confirmation before publish.The gap between a painting company and a professional painting company shows up in specifics: whether they carry real insurance and can produce a certificate, whether the written scope names the exact prep and repair work included, how many coats are specified, what the warranty actually covers and excludes, how the crew communicates during a multi-day project, and whether they can show recent, comparable work.
This section is meant to help you evaluate any contractor, not just us — the questions below apply whether you're comparing three bids or deciding on the first one you received.
The full vetting framework: what to verify, what to ask, and the red flags worth walking away from.
/blog/licensed-and-insured-painters-in-jacksonville-fl/. Given our compliance rule against the word "licensed" in any copy or anchor text (Florida has no state painting contractor license for this scope), this URL needs either a title/content rewrite or a decision on whether to keep it in the cluster at all. Leaving it out of the list above pending that decision.Each cluster above doubles as its own learning path. Here's the recommended reading order if you want to go deep on one topic in particular.
Based on more than 25 years of painting homes throughout Northeast Florida, certain conditions show up again and again — often enough that they're less "problems" than predictable patterns of how homes in this climate age.
Based on more than 25 years of painting homes throughout Northeast Florida.
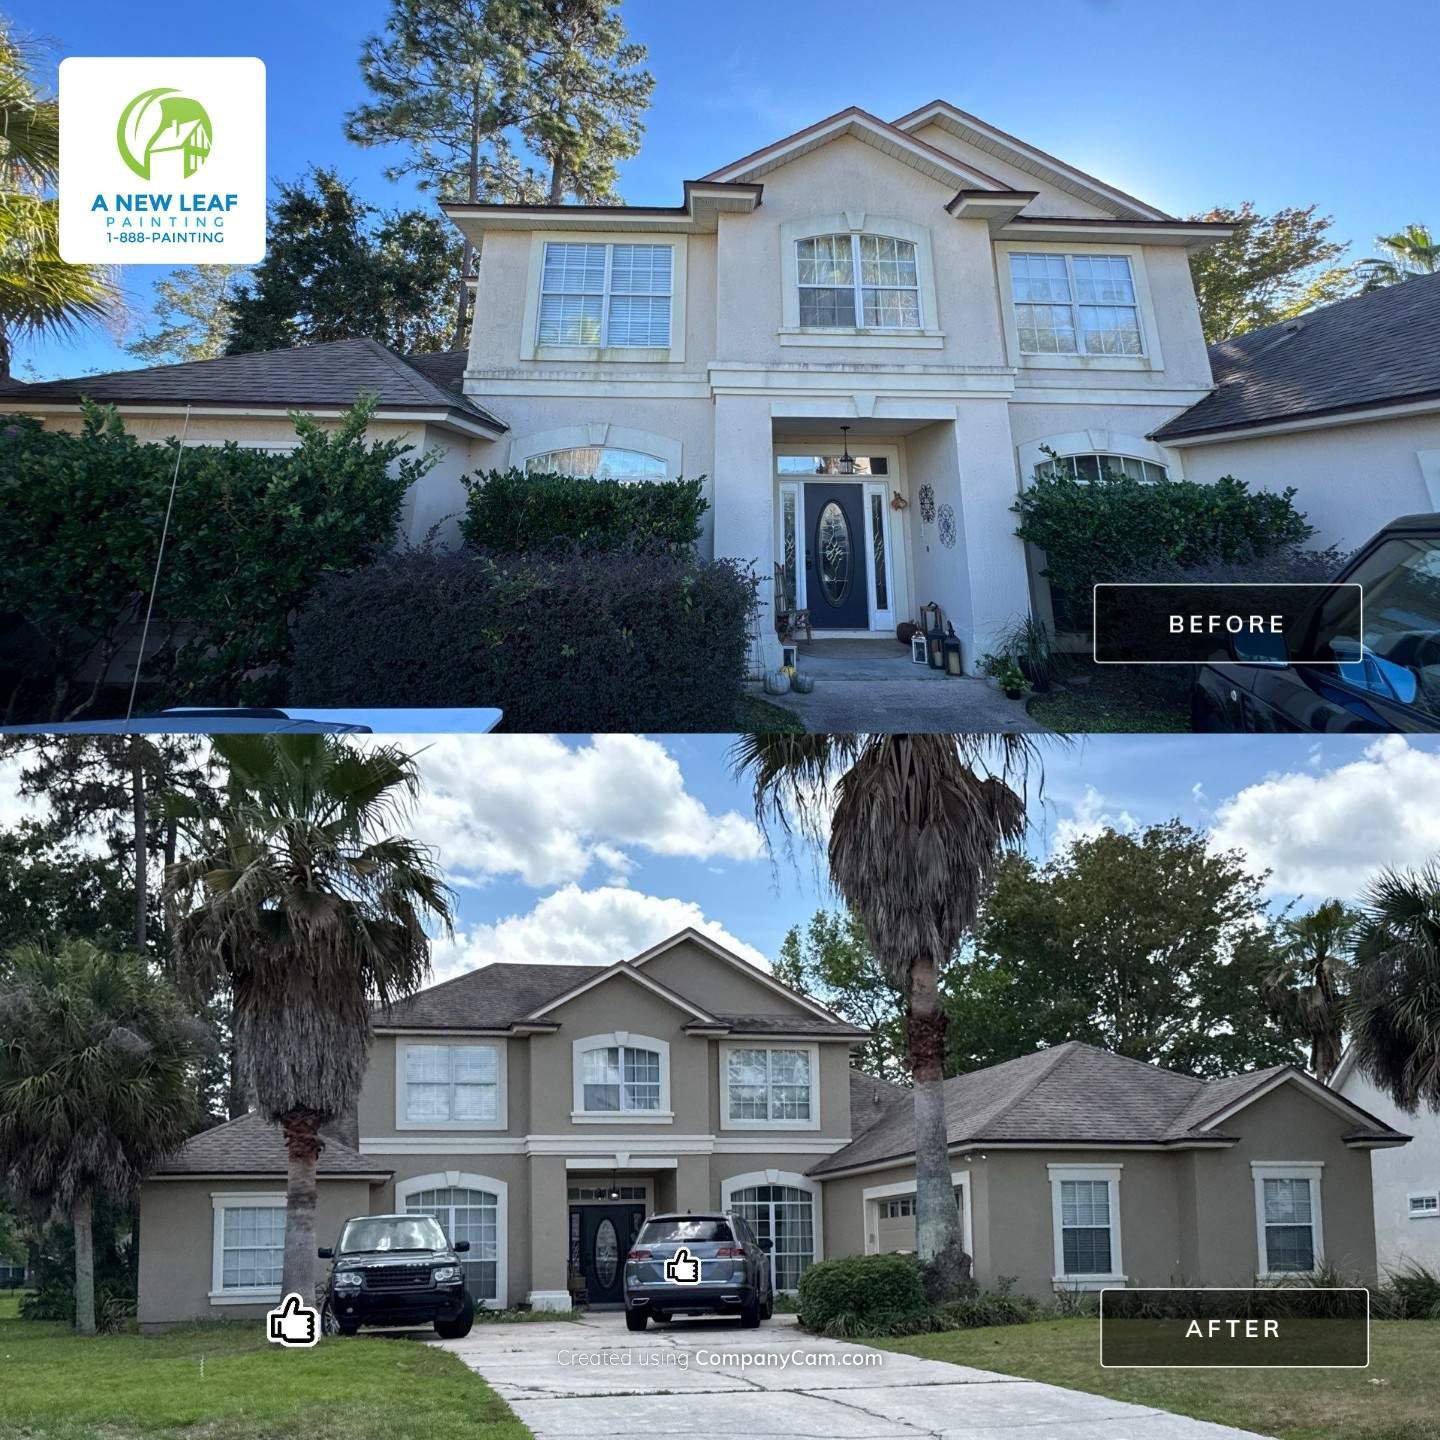
These are real exterior projects completed by A New Leaf Painting Contractors, shown to illustrate how preparation, repair, and product selection come together on an actual Northeast Florida home — not generic stock photography.
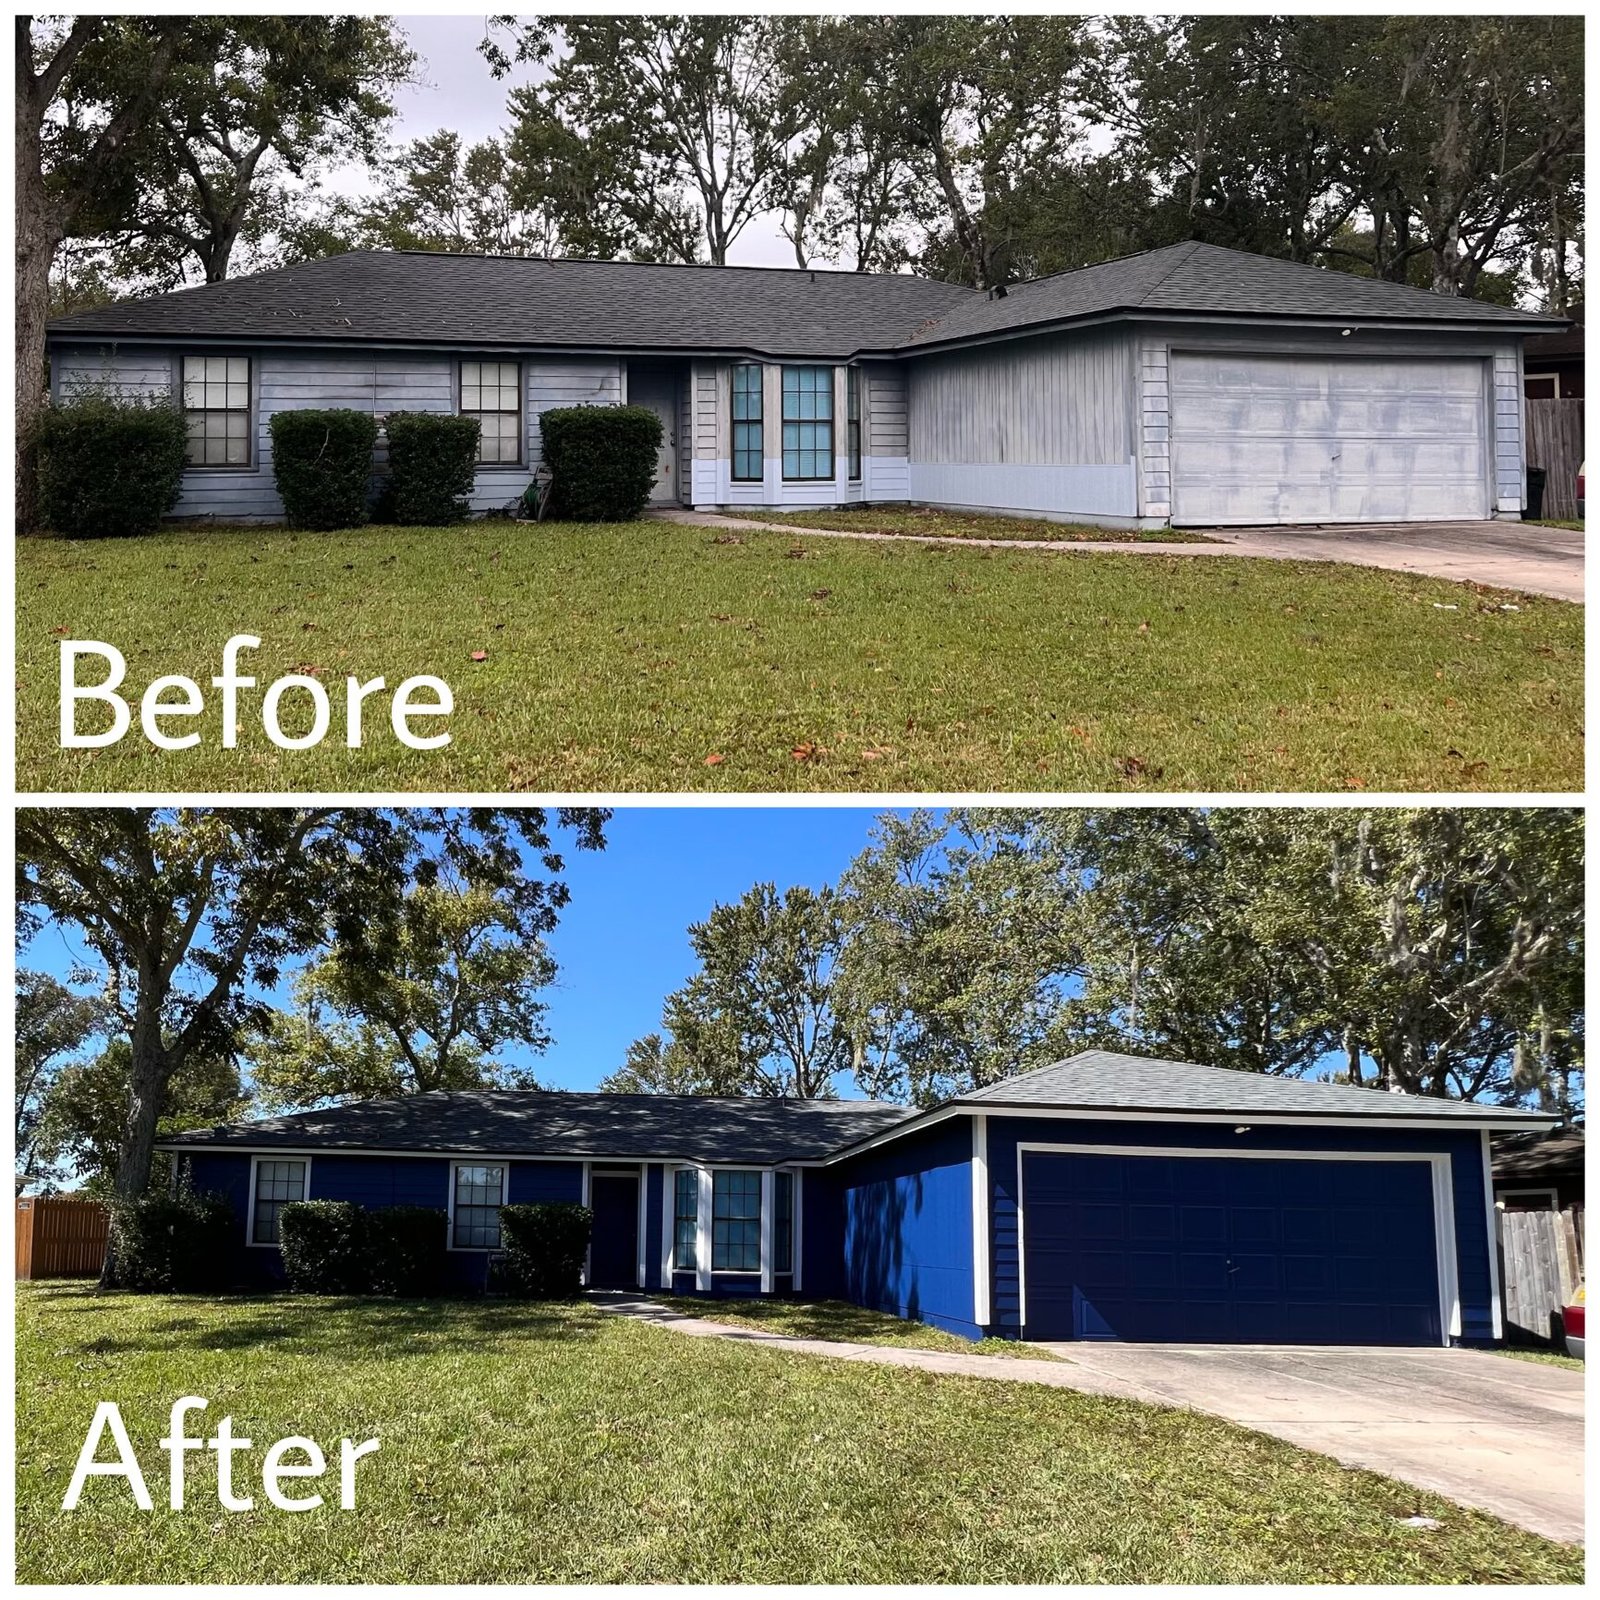
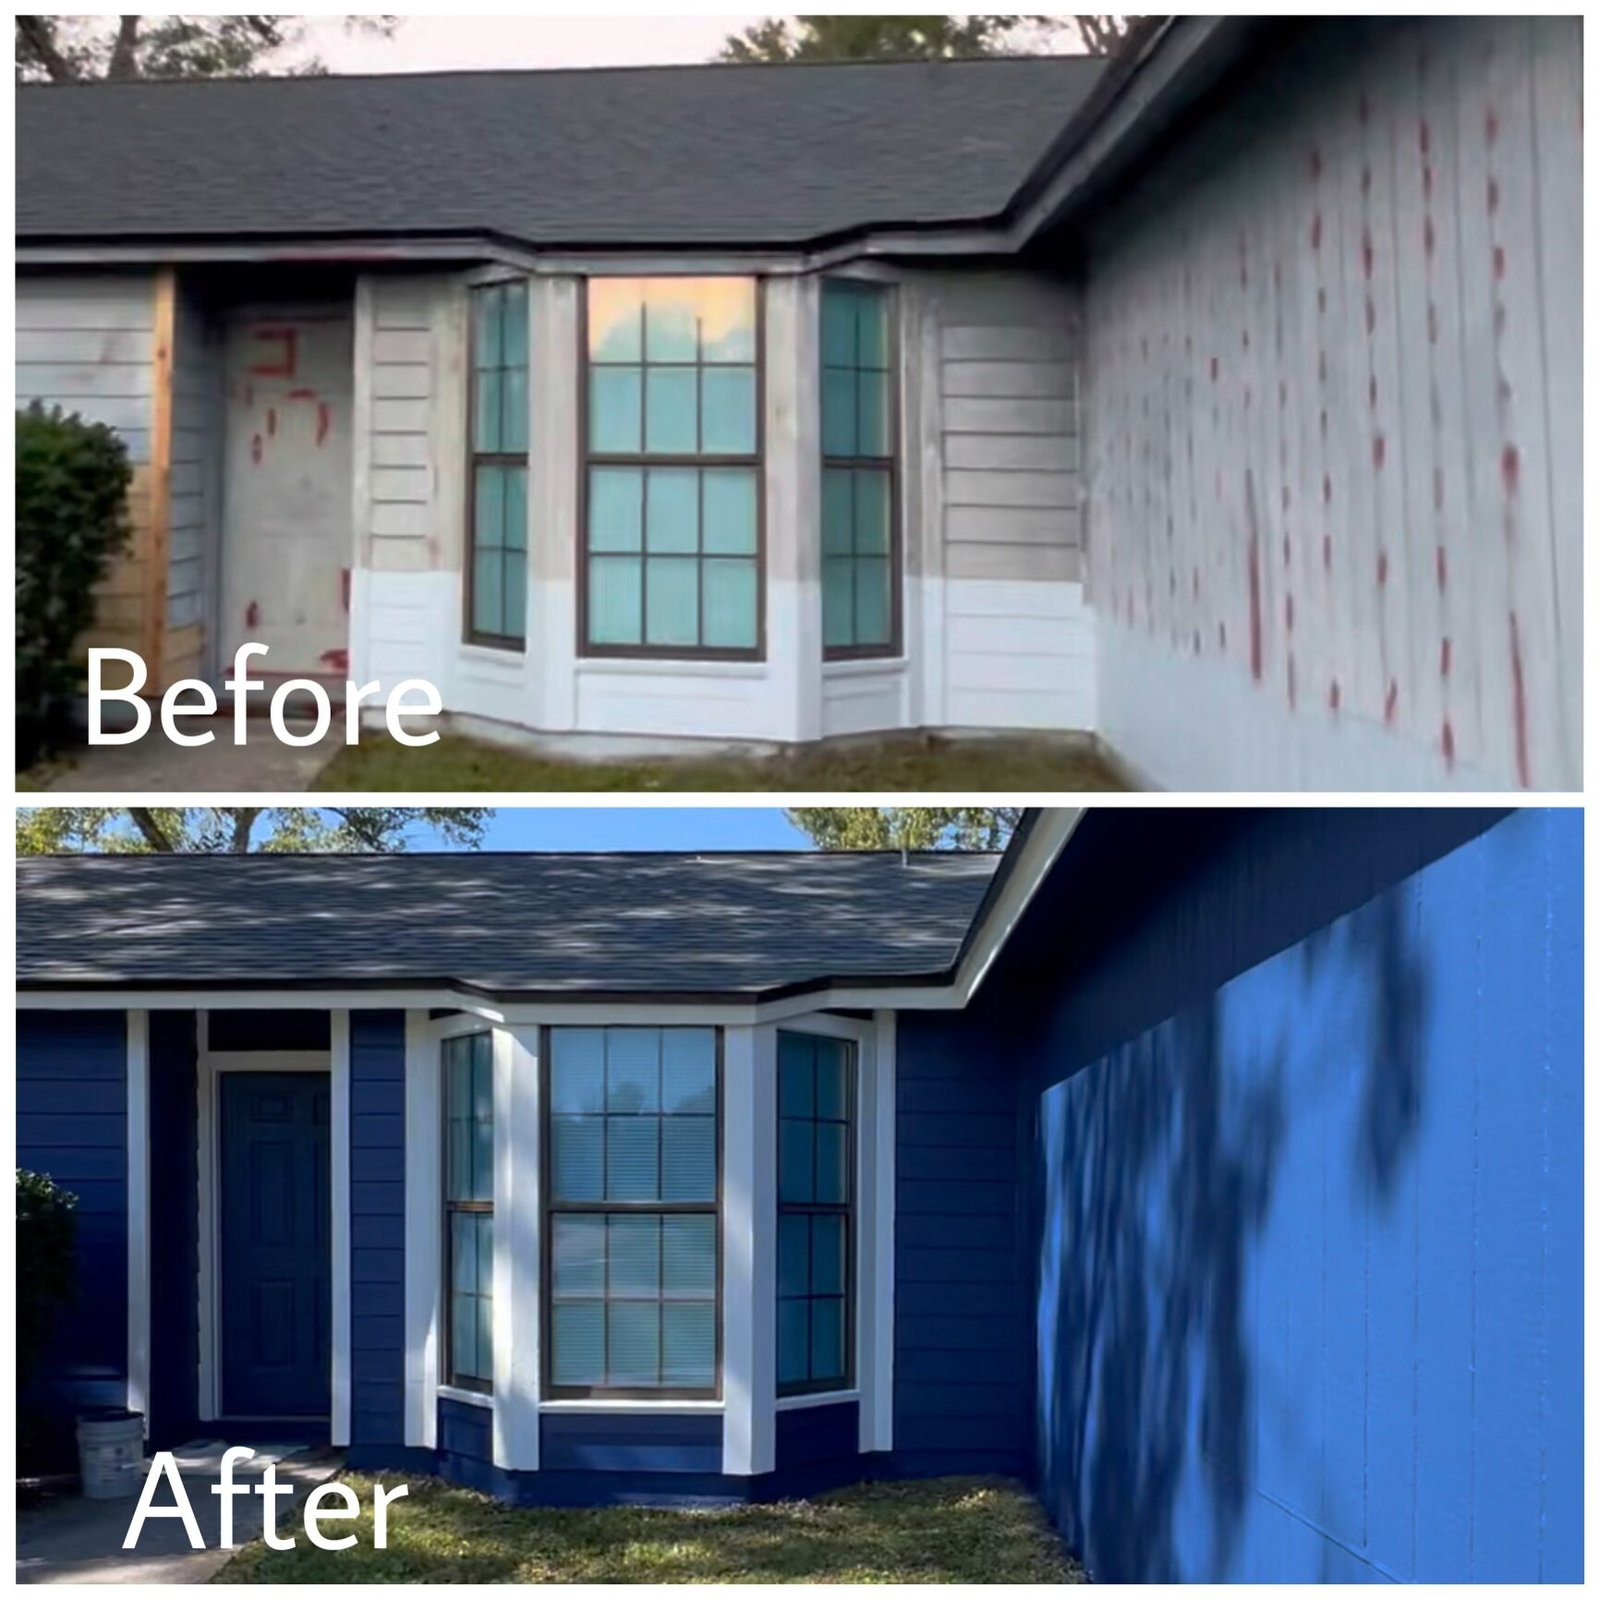
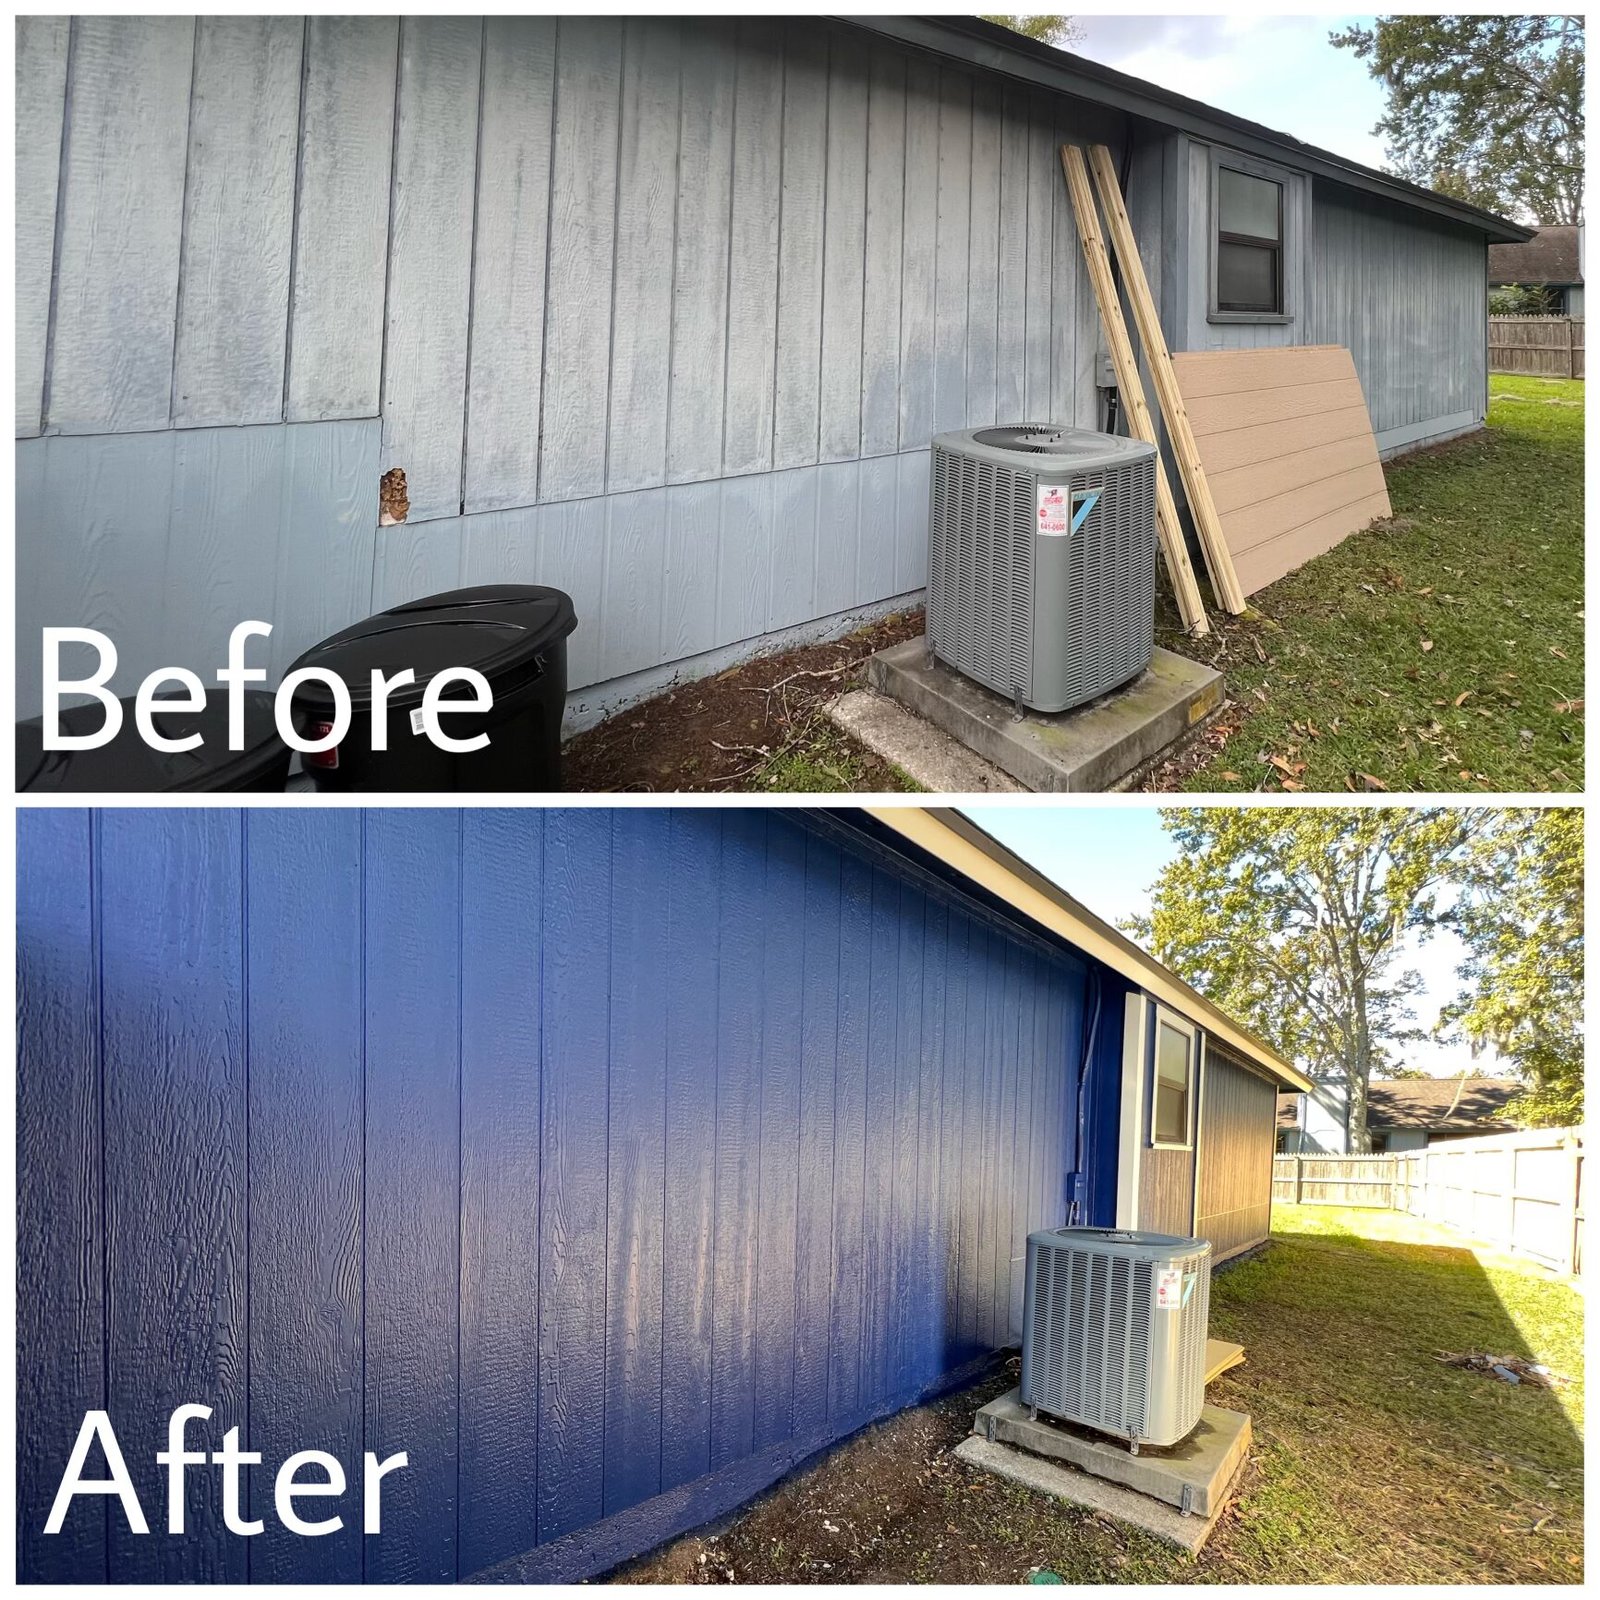
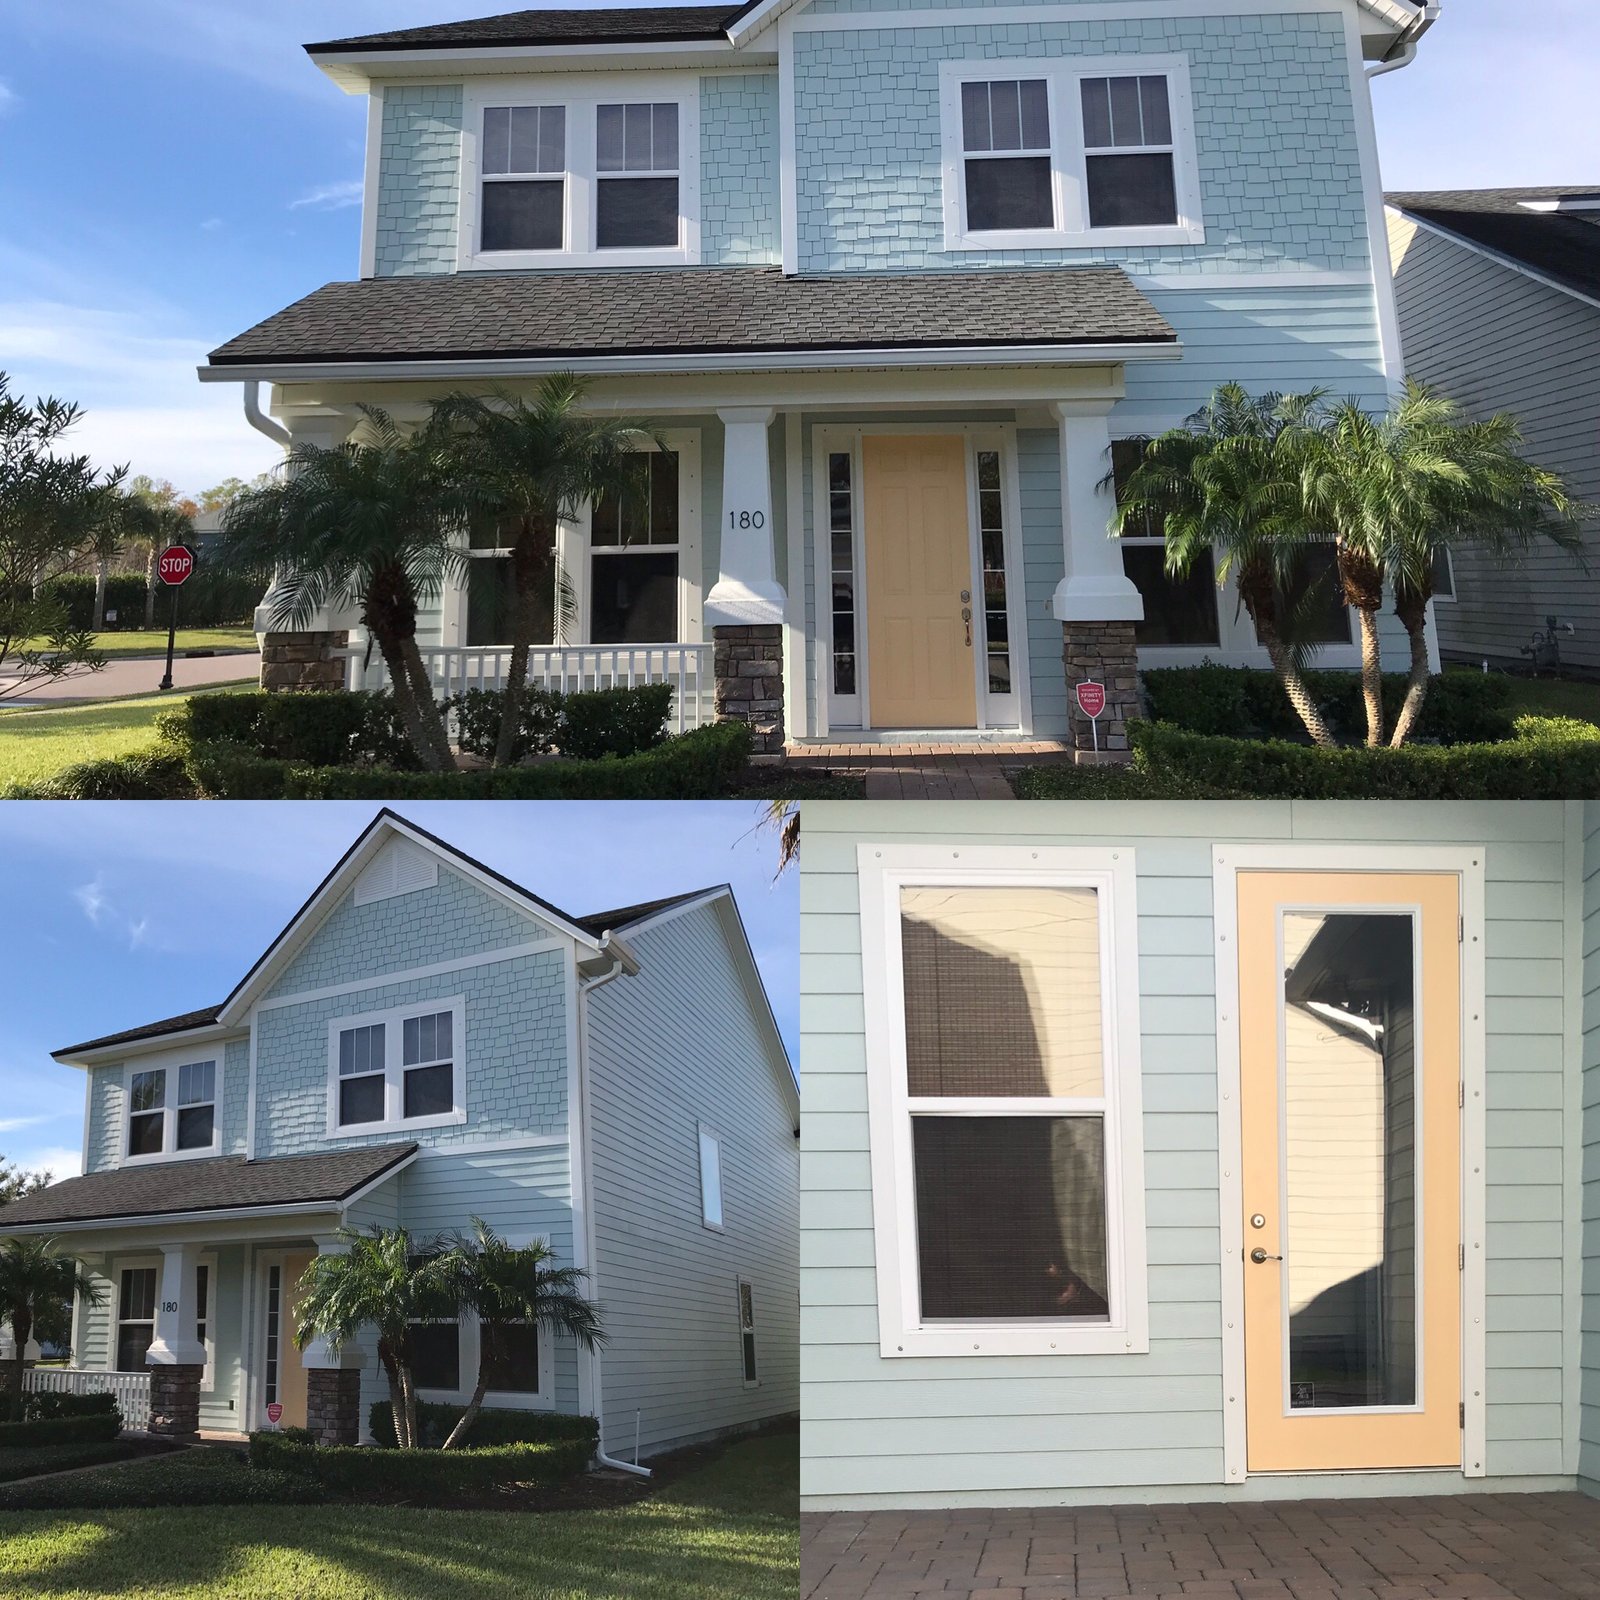
This home had areas of damaged and deteriorated T1-11 wood siding and exterior wood components that couldn't simply be coated over — portions required repair or replacement, alongside adjoining James Hardie® fiber-cement siding.
Prep & repairs: Damaged siding and wood components were removed and replaced, joints and trim transitions were caulked, and bare or newly installed siding was primed before painting.
Coating system: After repairs and priming, the exterior received a premium Sherwin-Williams siding system using Latitude® and Emerald® Rain Refresh™, selected according to the surface and project specifications.
Result: A cleaner, more uniform exterior with repaired siding, renewed trim, sealed transitions, and a consistent protective finish.
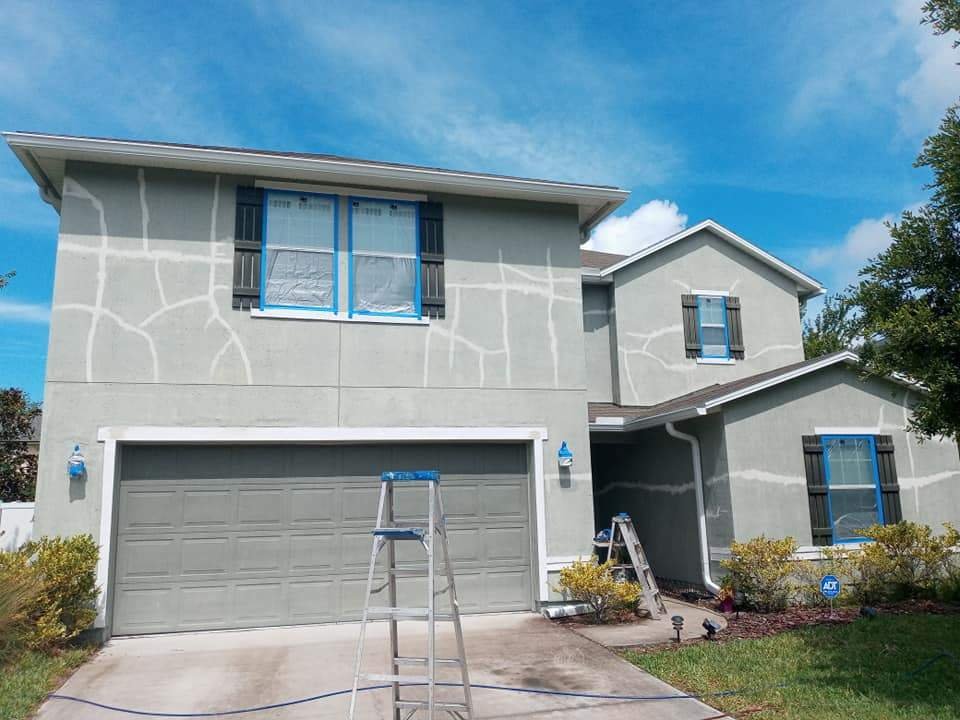
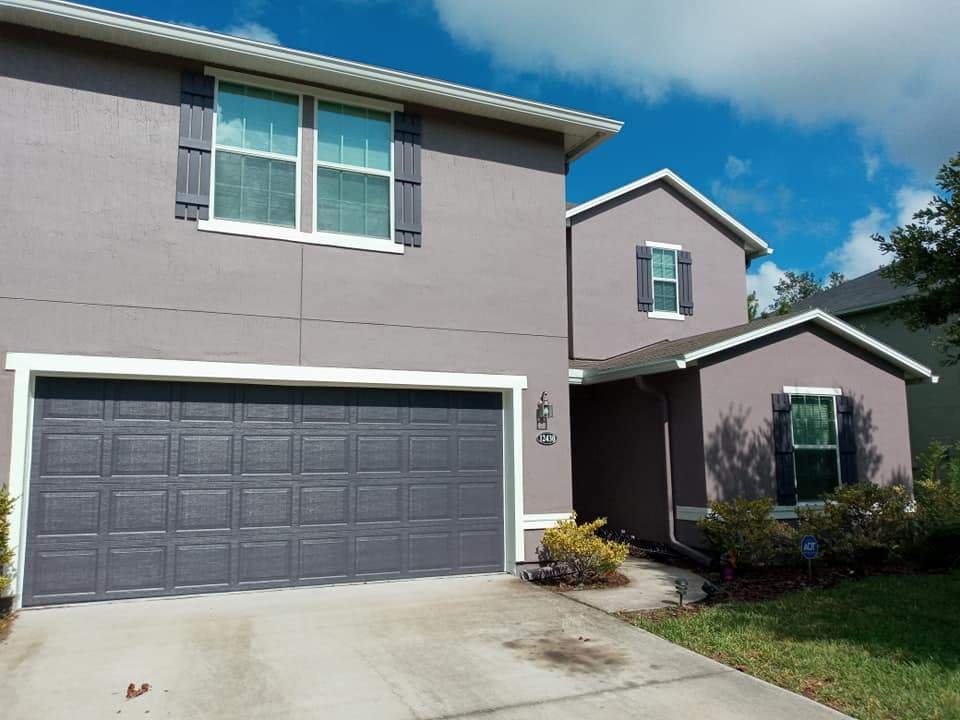
Substantial fading and normal weather-related wear had left this stucco home with visible cracking and separated caulking around openings and trim transitions.
Prep & repairs: The exterior was washed, appropriate nonstructural stucco cracks were repaired and texture-matched, and failed caulking was removed and replaced at vulnerable seams and transitions.
Coating system: Following repairs, caulking, and surface preparation, the home received Sherwin-Williams Loxon® XP, a high-build masonry coating for concrete and stucco surfaces.
Result: A cleaner, brighter, more consistent exterior with reduced crack visibility, newly sealed transitions, and renewed weather protection.
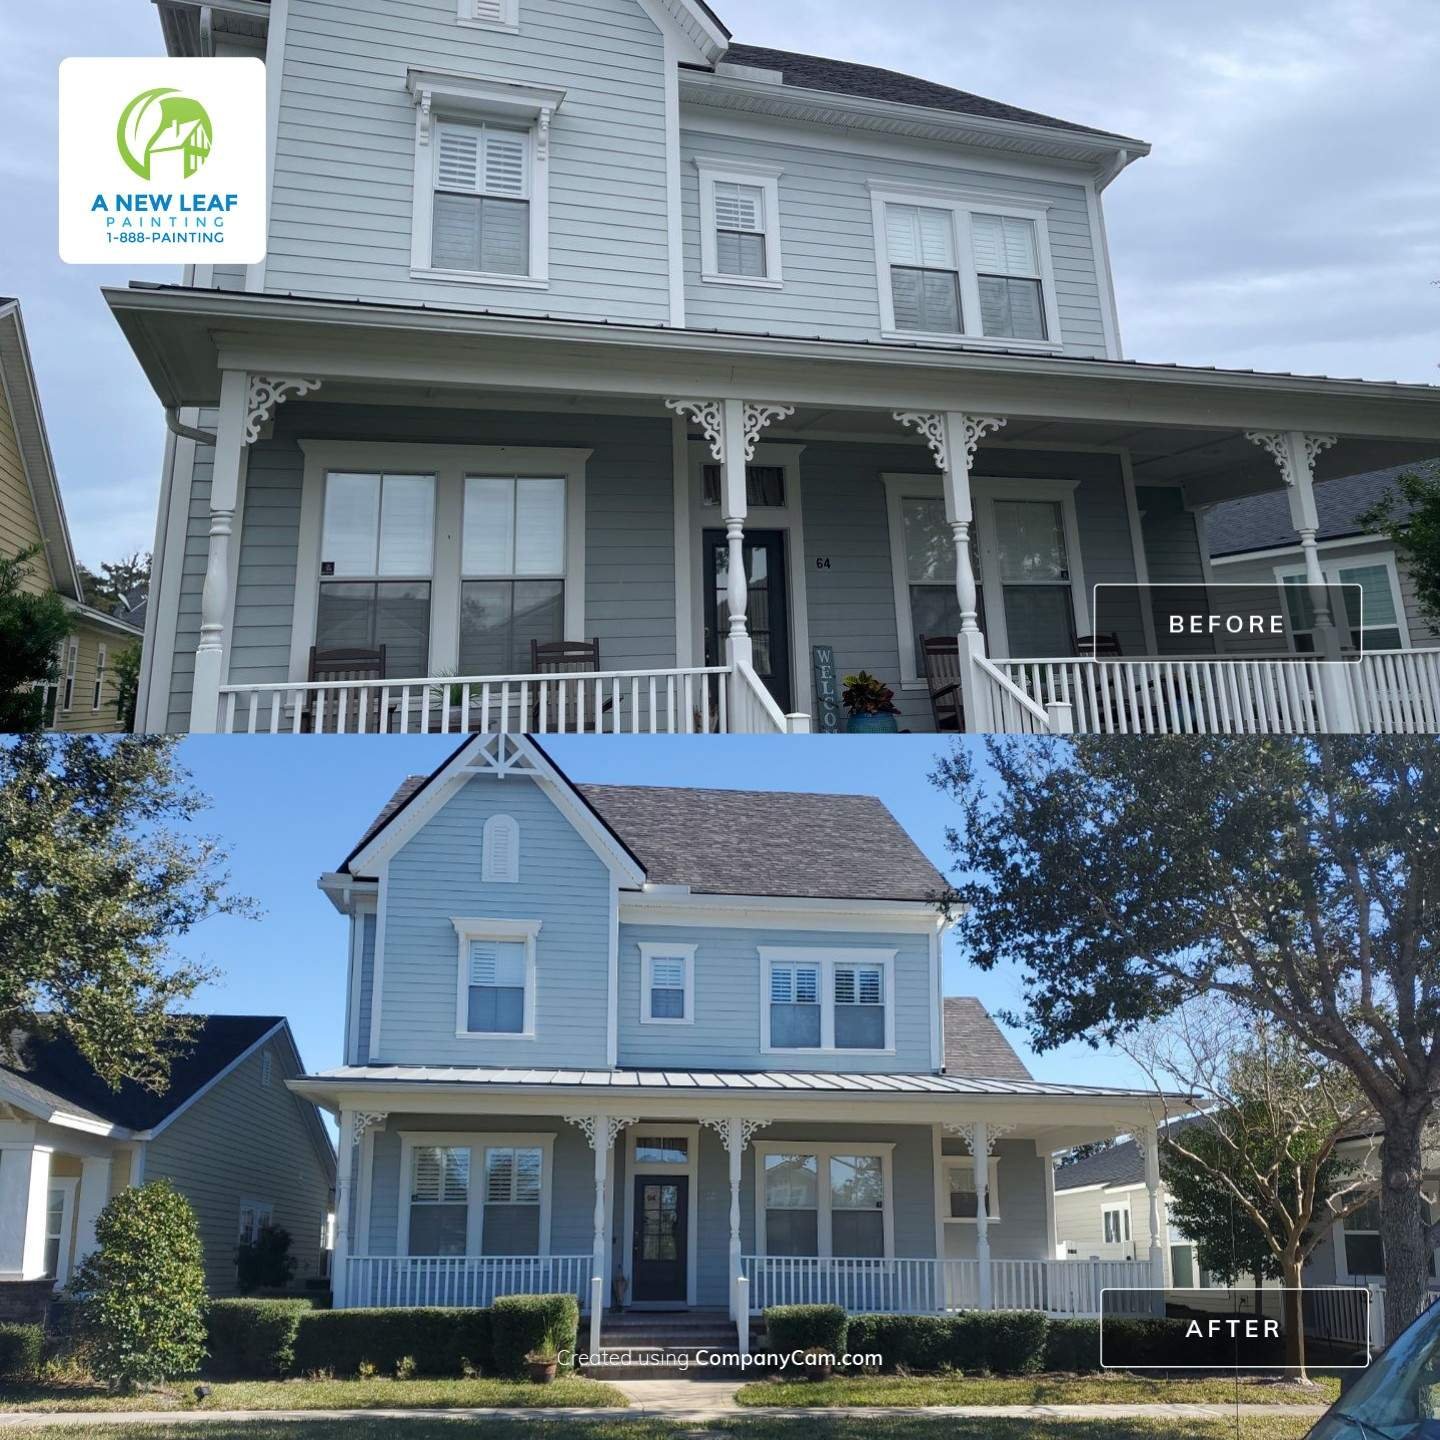
This fiber-cement exterior showed extensive fading and weathering, with joints, nail heads, and trim transitions needing preparation before the home could be repainted.
Prep & repairs: The siding was cleaned, lap joints and trim transitions were inspected, failed caulking was addressed, and repaired or exposed surfaces were primed before finishing.
Coating system: After preparation and priming, the home received a premium Sherwin-Williams exterior finish using Latitude® or Emerald® Rain Refresh™, based on the project specifications.
Result: Renewed color, sharper architectural definition, and a consistent finish across the siding and trim.
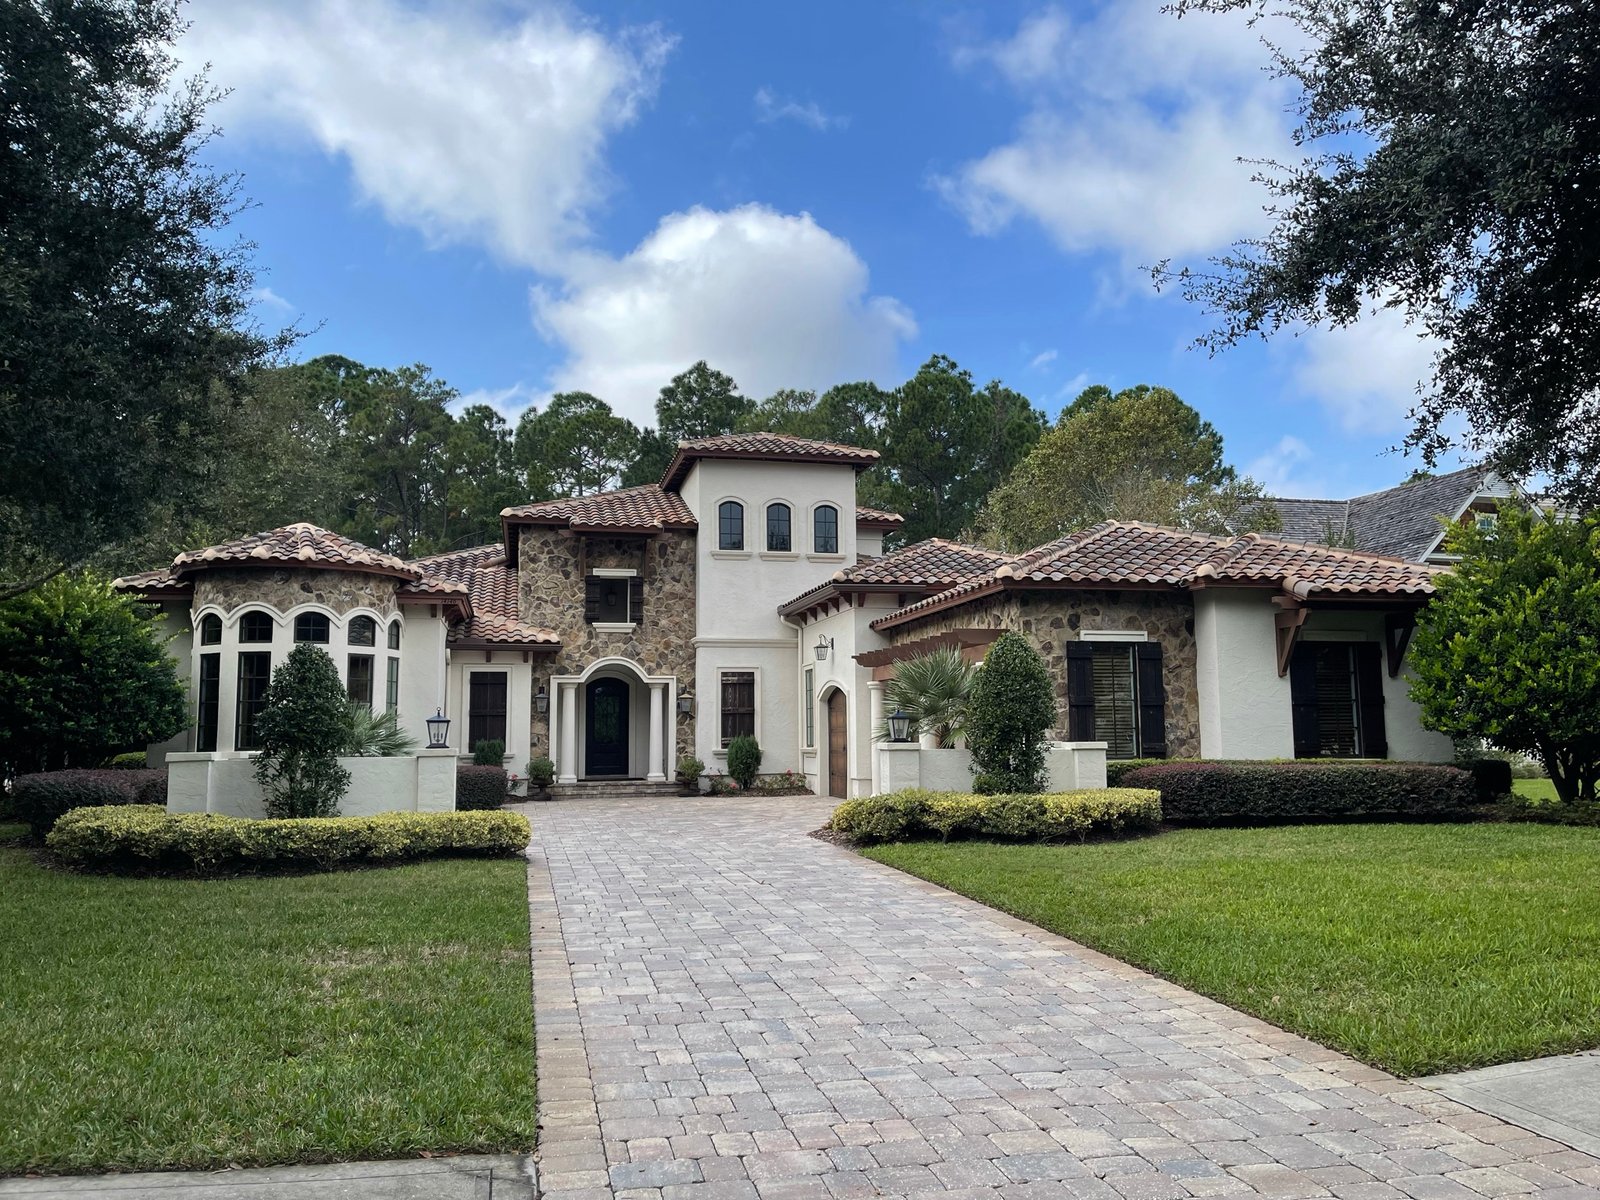
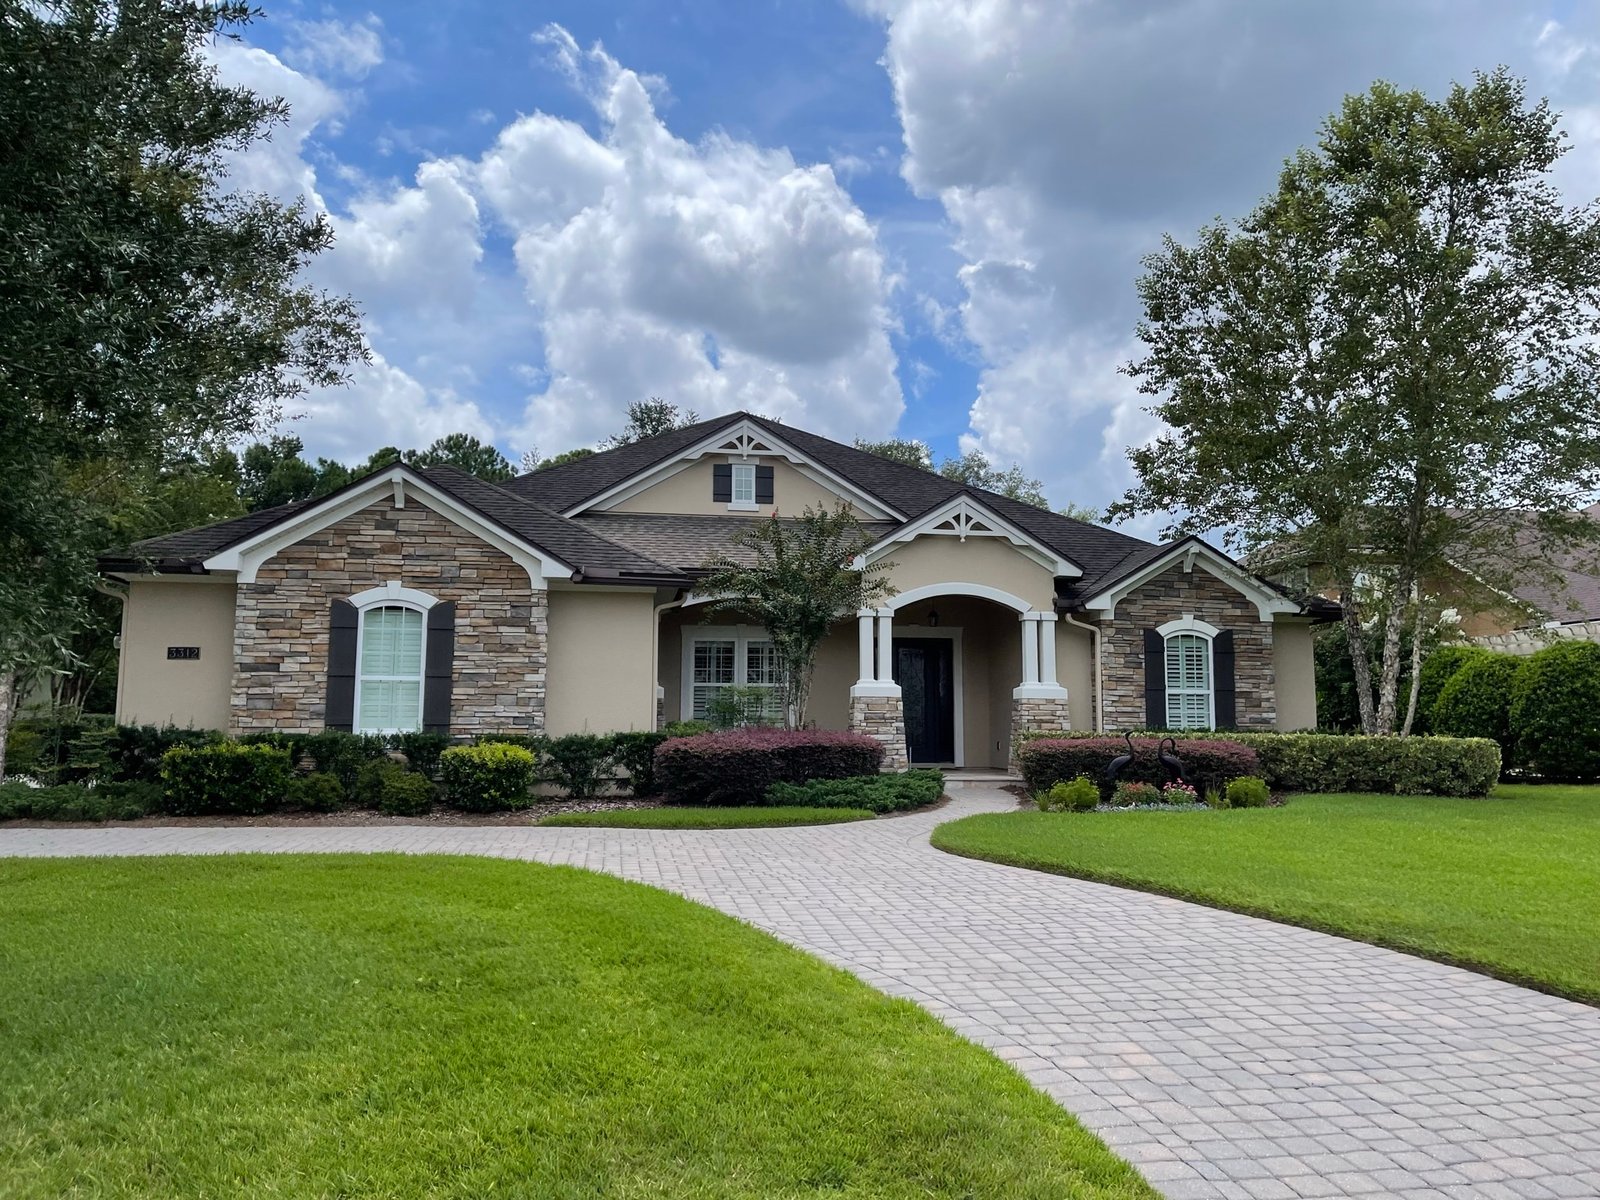
This completed exterior painting project showcases the level of preparation, detail, and finish achieved on a large luxury stucco home in the King & Bear community. While only the completed images are available, the project demonstrates our approach to restoring faded stucco exteriors through extensive preparation, repairs, and premium coating systems.
Prep & repairs: The full exterior was washed, stucco cracks and surface defects were repaired, failed caulking was replaced, and repaired or porous areas were primed — using access equipment and controlled application methods across the home's tall elevations.
Coating system: A premium exterior masonry coating system suitable for painted stucco and Northeast Florida exposure was applied across the home's expansive walls and architectural details.
Result: A renewed, cohesive exterior with restored color depth, cleaner details, and consistent coverage across the home's large stucco elevations.
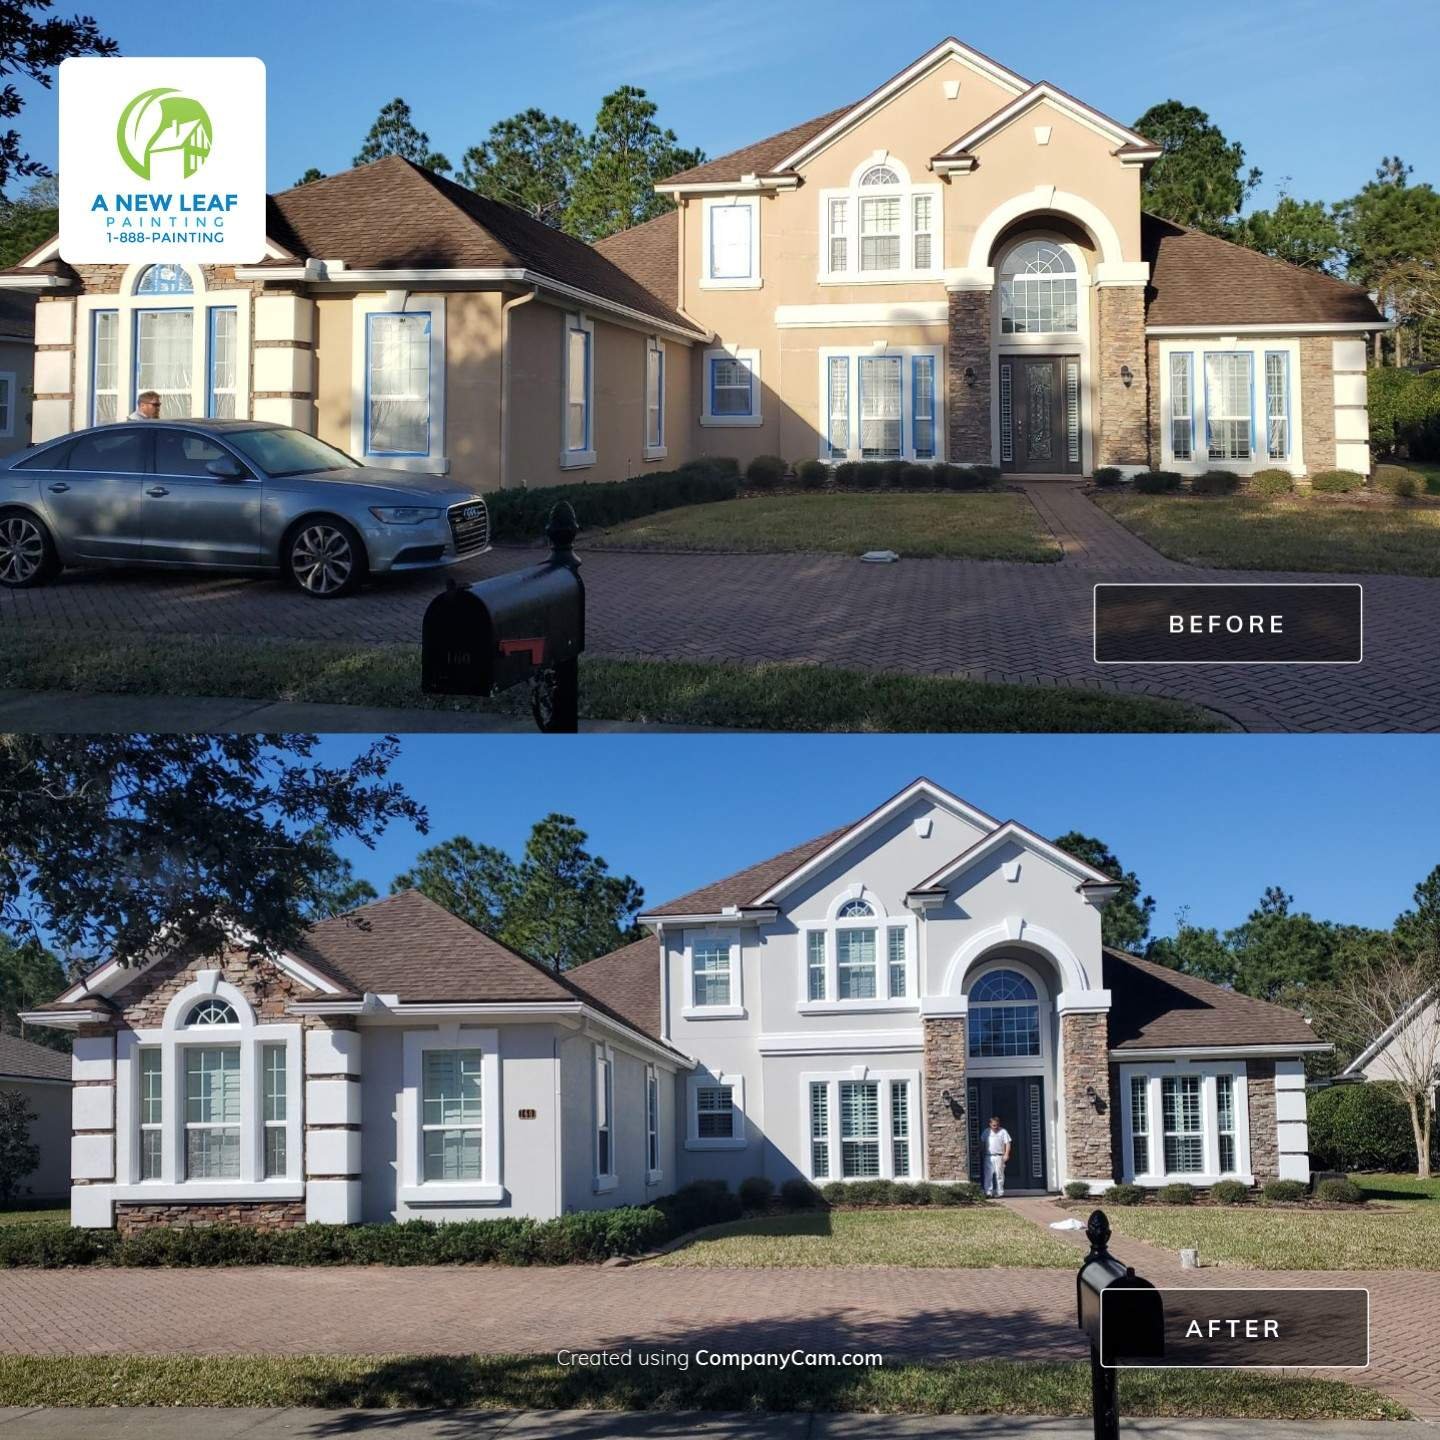
A weathered stucco exterior with fading, hairline cracking, and aging sealant was thoroughly prepared, with appropriate cracks repaired and vulnerable transitions recaulked before painting.
Coating system: Following detailed preparation, the home received Sherwin-Williams Loxon® XP as the exterior coating.
Result: A refreshed, cohesive appearance with renewed color depth and a more uniform finish across the home's large stucco elevations.
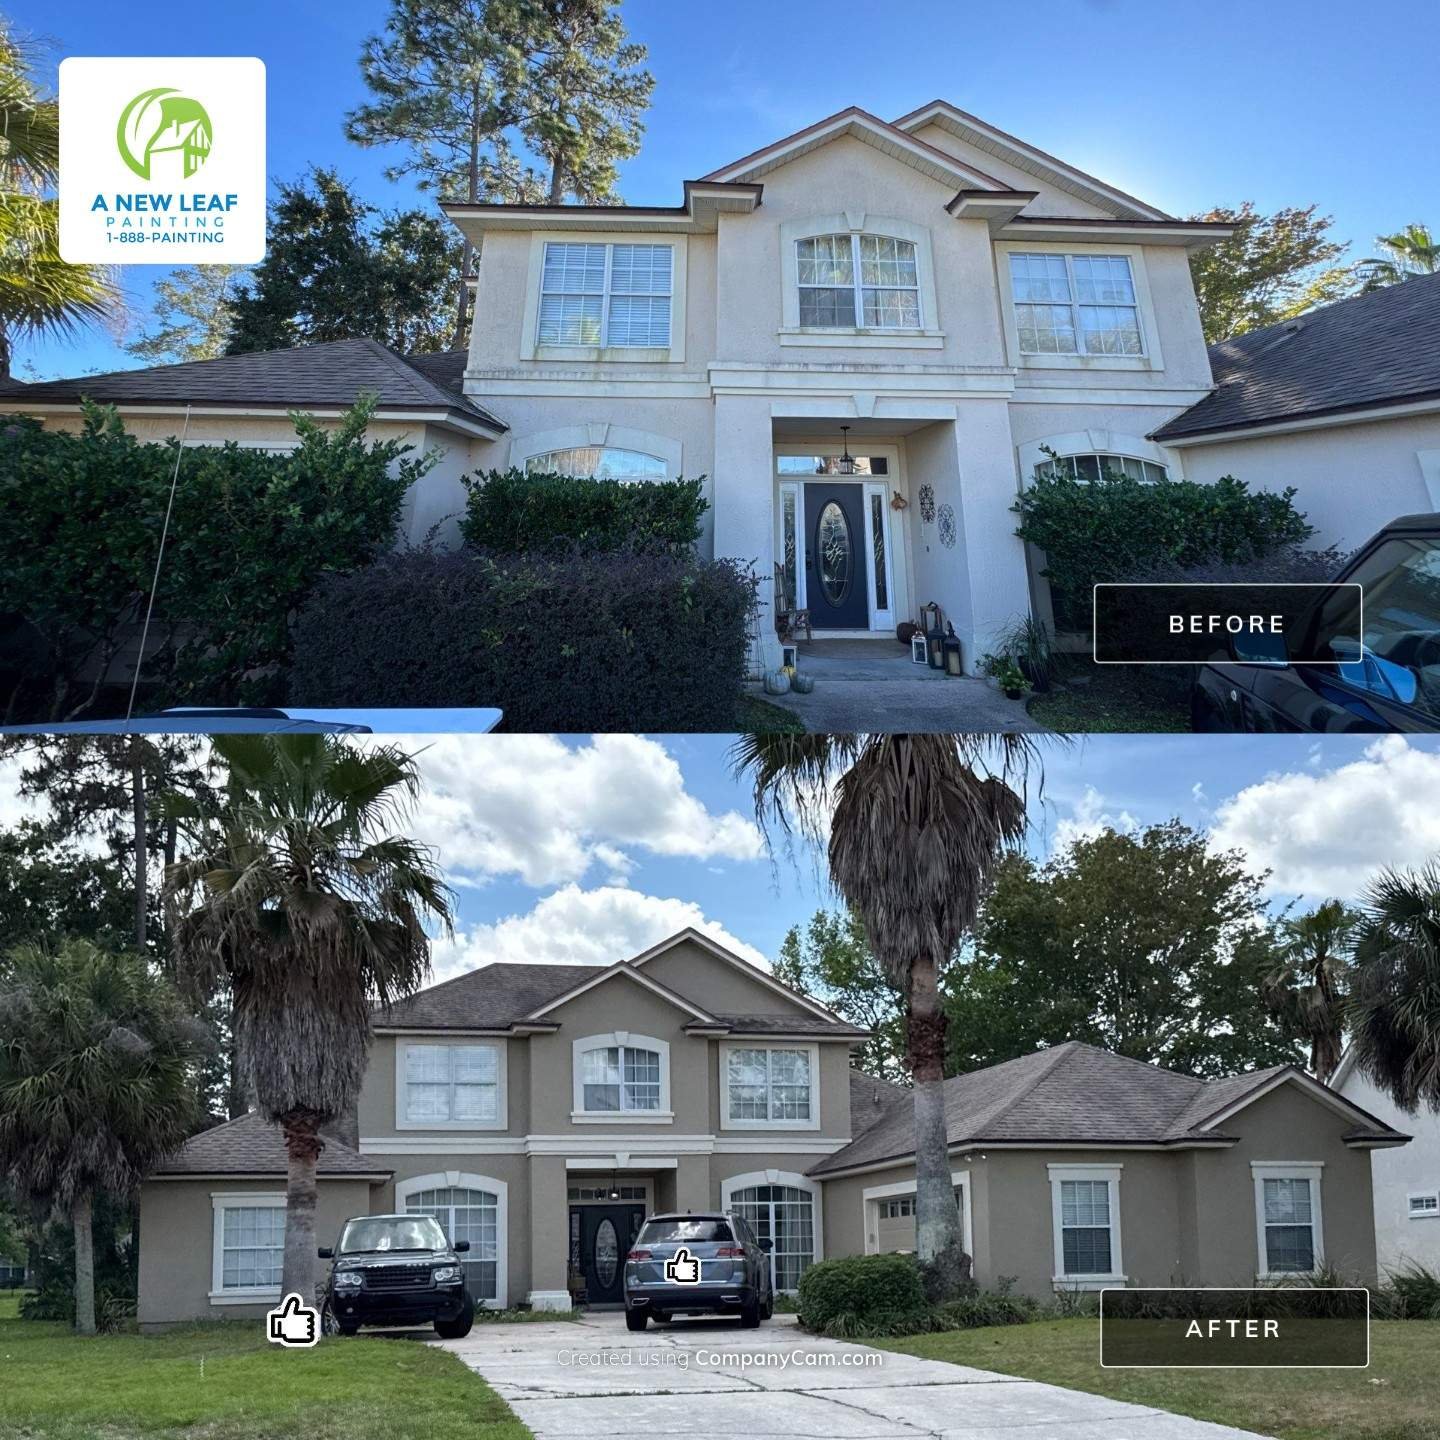
Substantial fading, stucco cracking, failed caulking, and surface blemishes required extensive preparation before this home's finish coat could be applied.
Coating system: The prepared stucco exterior received Sherwin-Williams Loxon® XP for uniform coverage across the repaired masonry surface.
Result: A refreshed exterior with more consistent color, cleaner architectural lines, and sealed transitions.
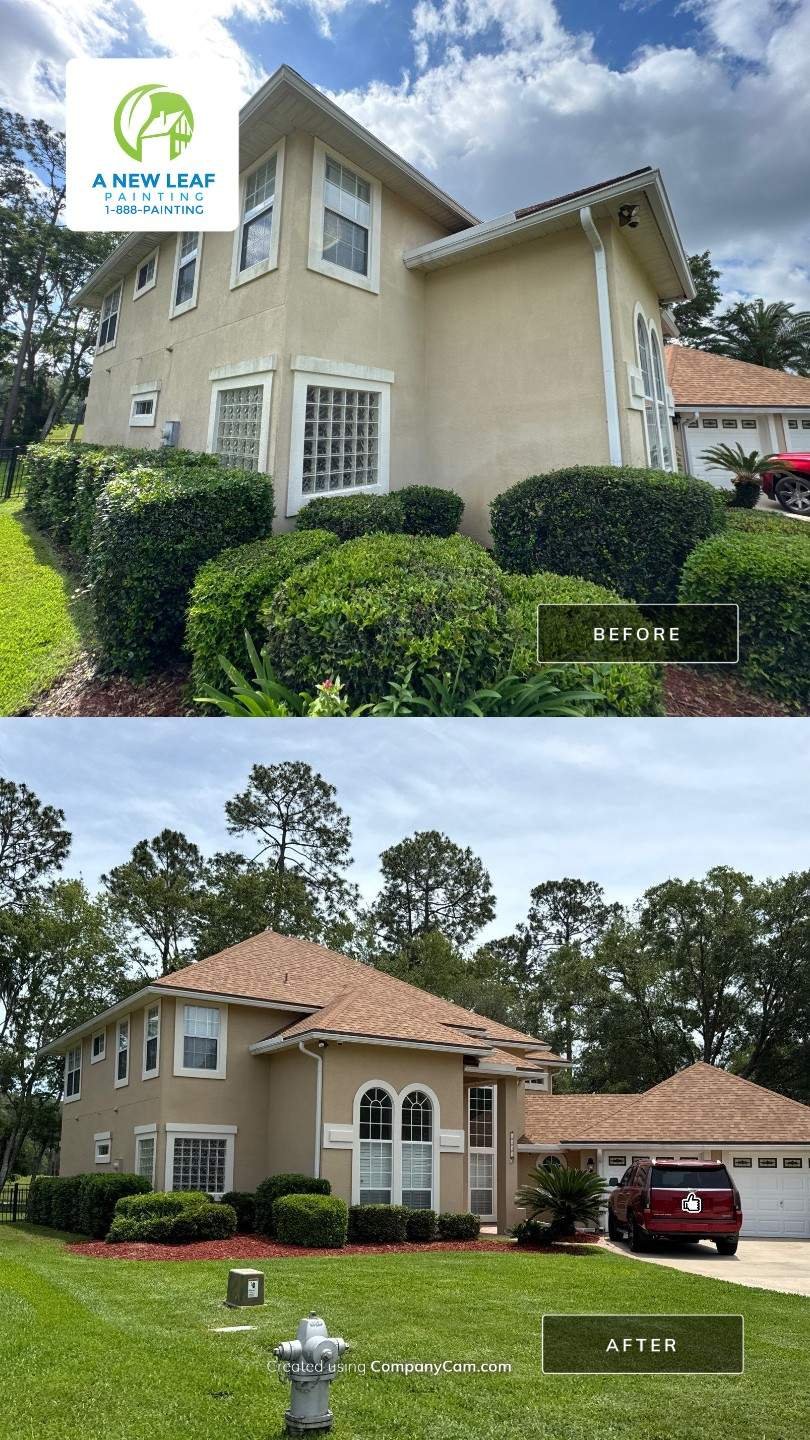
Considerable fading under Florida sun exposure, stucco cracks, aging caulk, and inconsistent surface areas required substantial preparation and repair before repainting.
Coating system: Once cracks, sealant joints, and damaged areas were repaired, the stucco received Sherwin-Williams Loxon® XP.
Result: A brighter, cleaner appearance with a more uniform color scheme and renewed protection across the stucco and trim.
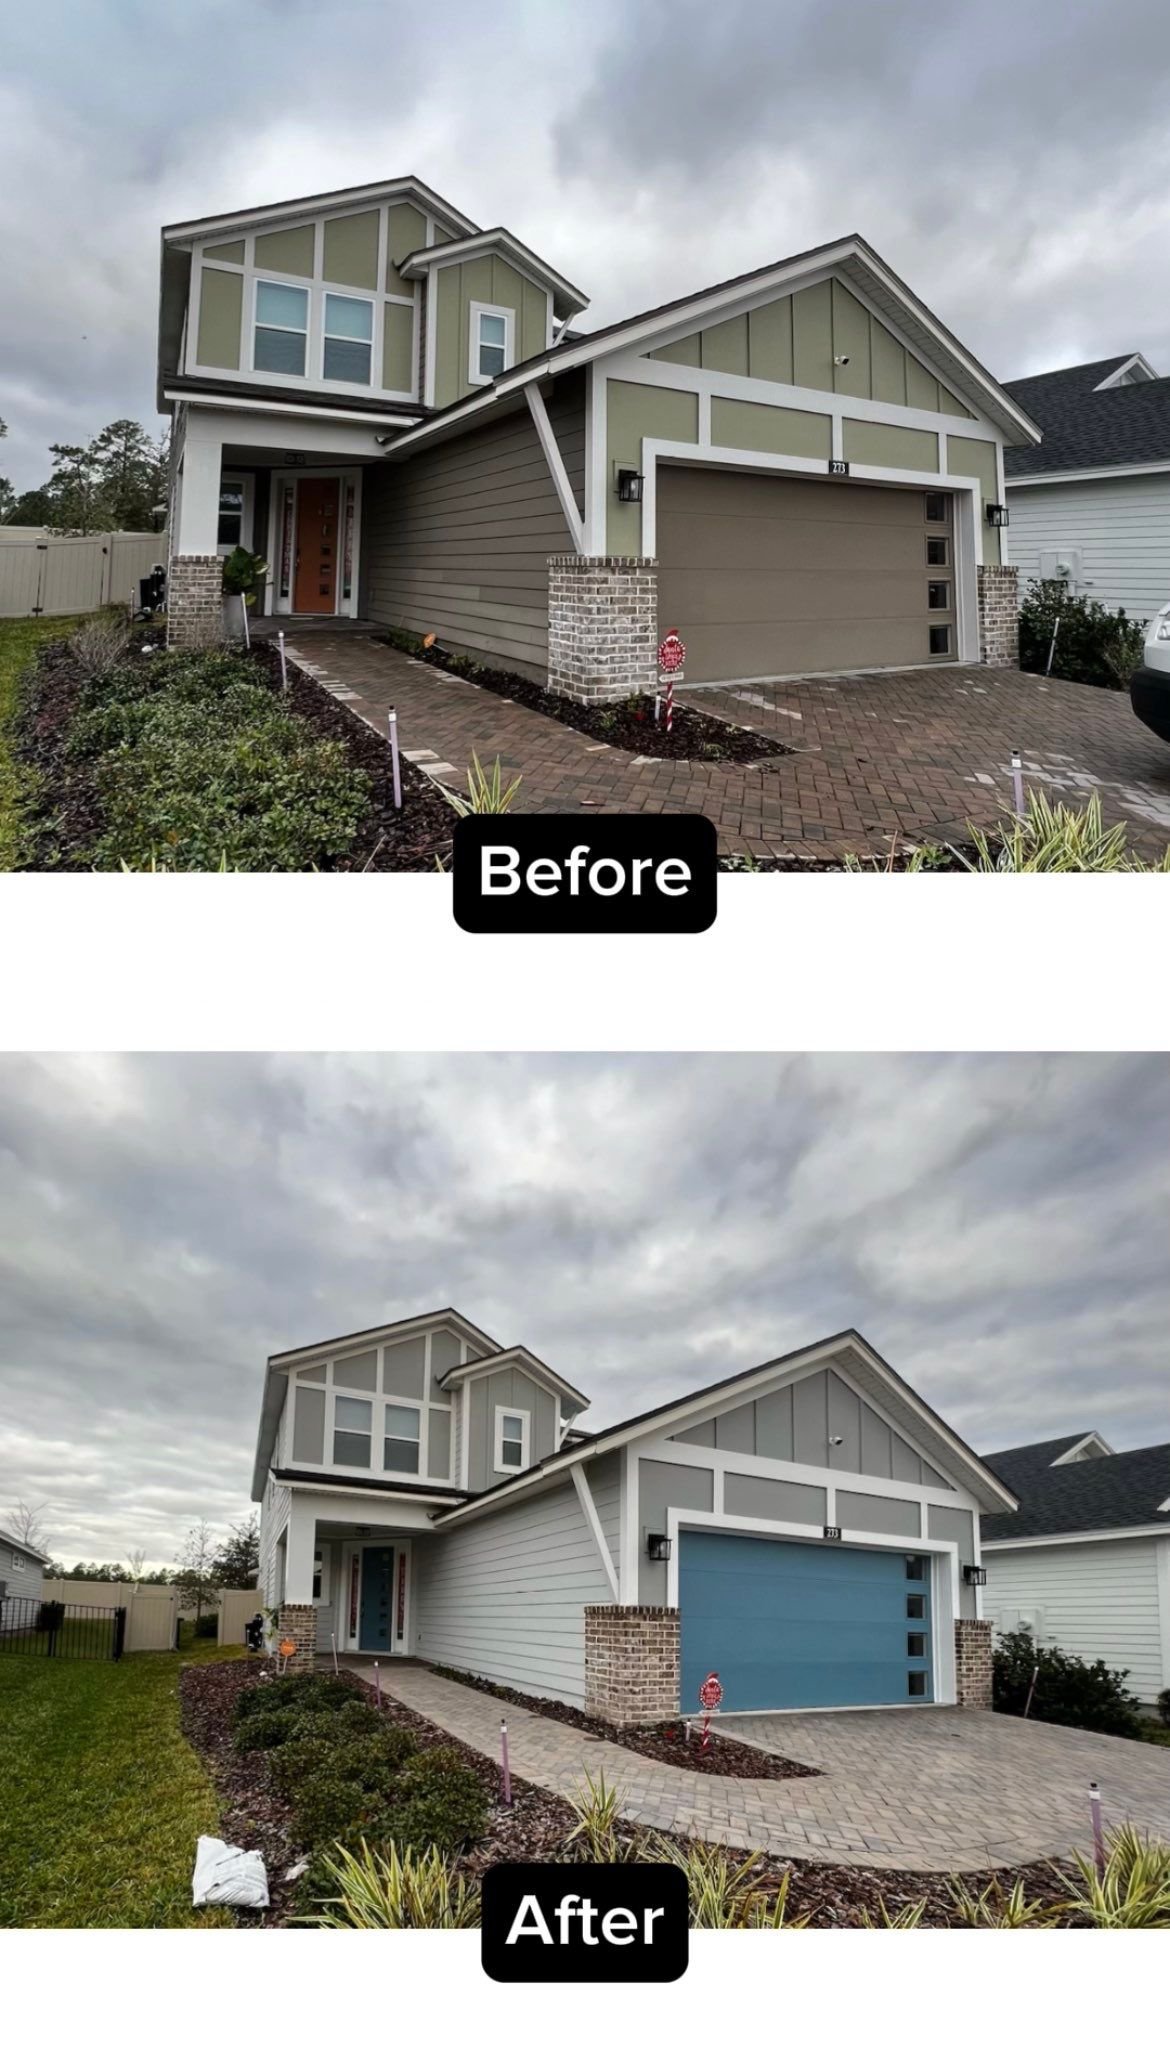
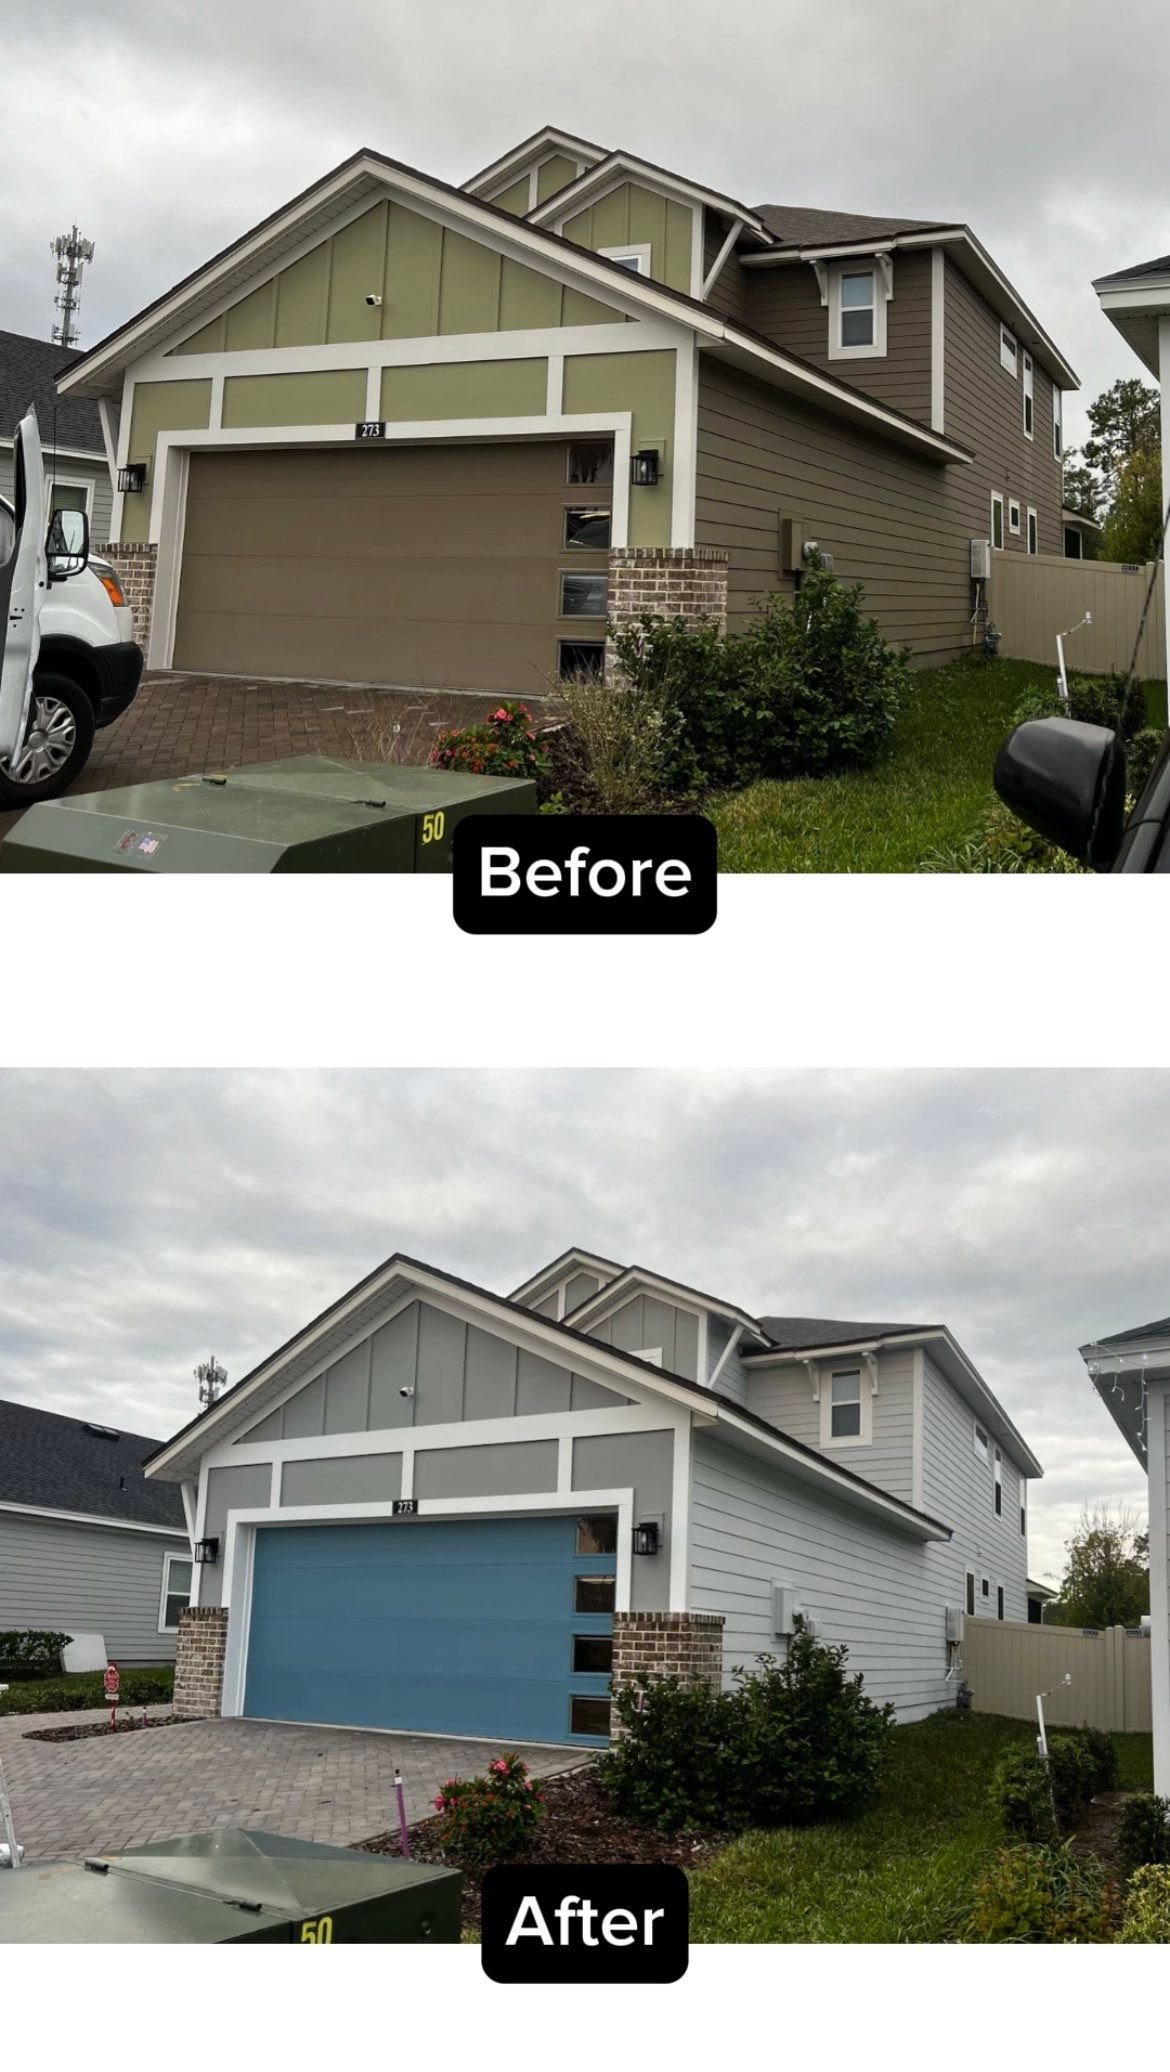
Coastal sun, humidity, rain, and salt-laden air had left this home with extensive fading, cracks, failed caulking, and worn trim requiring attention before painting.
Coating system: After repairs and priming, a premium Sherwin-Williams exterior coating system was applied — Loxon® XP on stucco areas, with Latitude® or Emerald® Rain Refresh™ on siding and trim, according to the substrate.
Result: Stronger color definition, cleaner trim lines, and a substantially refreshed appearance.
Quick answers to the questions that come up constantly on estimates and phone calls. For anything that needs more depth, the linked cluster above covers it in full.
A suggested reading order, from the fundamentals every homeowner should know to the substrate-specific detail that matters most for larger or specialty projects.
Use this hub to understand your options, then request an on-site estimate when you're ready. Every estimate includes a written project scope, surface and repair evaluation, paint-system recommendations matched to your substrate and exposure, HOA color support where applicable, and clear communication from the first call to the final walkthrough.