
Why Exterior Paint Peels in Jacksonville, FL — and What to Fix Before You Repaint
By Thomas Drake, Founder & Owner — A New Leaf Painting Contractors | Updated September 5, 2026
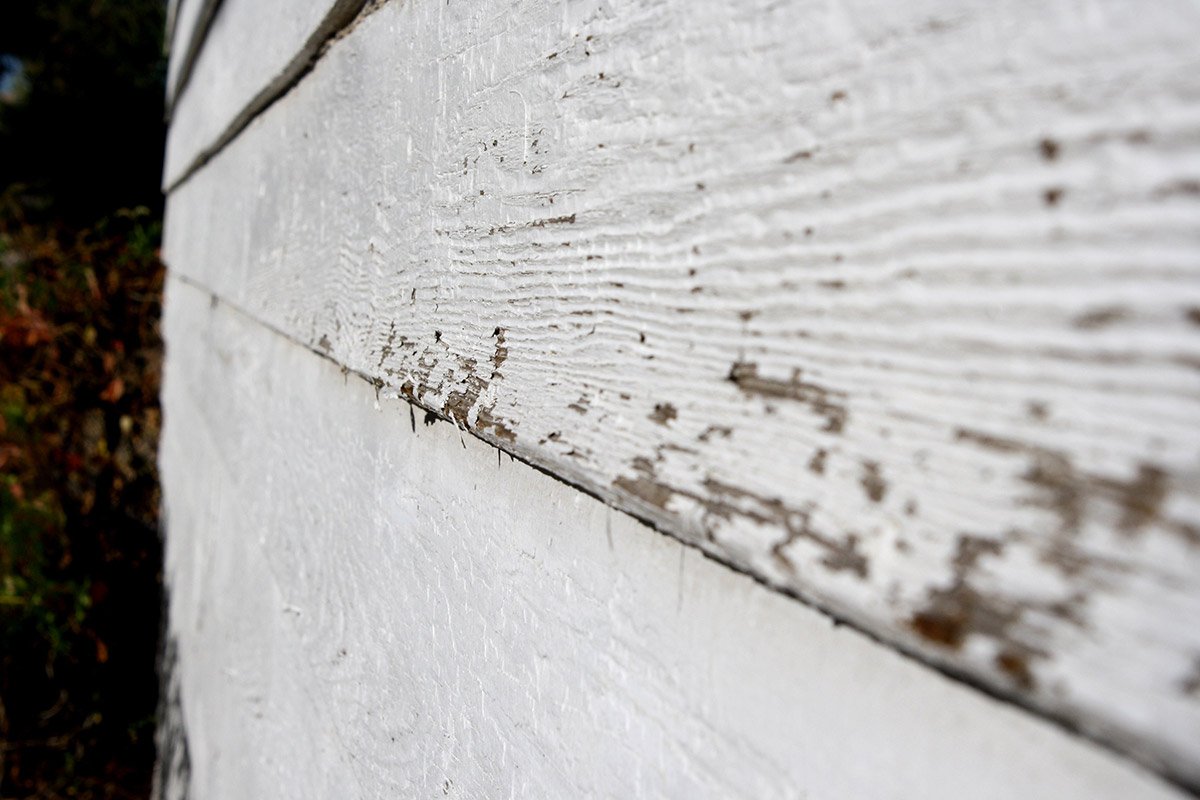
You’re trimming the hedges along the front of the house and you notice paint chips in the mulch. Or you’re backing out of the driveway and catch a patch above the garage that’s lifting. Or there’s a spot below a window that’s bubbled and split — the same spot that was repaired the last time the house was painted, doing the same thing again.
Here’s the thing worth understanding before you call anyone: paint rarely fails for no reason. In our experience, by the time peeling is visible from the driveway, something has usually been going on behind it for a while. The peeling is the symptom. The job worth paying for is finding the cause.
That distinction is the whole article. A coating applied over an uncorrected condition is a cosmetic fix on a problem that’s still running, and it tends to come back — often in the same place.
The Most Common Causes of Exterior Paint Failure
Some of the most common causes we find on Jacksonville-area homes:
Water and moisture. Either water reaching the surface repeatedly from outside, or moisture that was already in or behind the substrate when the coating went on. This is the one we find most often, and it gets its own section below.
Surface preparation that didn’t address what was there. Coating applied over loose material, chalk, dirt, mildew, or bare substrate that needed priming. The new film bonds to whatever was on the surface rather than to the surface itself.
Substrate damage that was coated instead of repaired. Soft wood, cracked or delaminated stucco, deteriorated trim. Paint is a finish, not a repair material — it can protect sound material but it can’t restore compromised material.
Deferred maintenance. Small conditions that were fixable for very little money, left alone long enough to become large ones.
UV exposure and normal aging. Sunlight degrades the binder in a paint film over time, which releases pigment at the surface — that’s chalking, and on a south or west elevation in Florida it shows up sooner than most homeowners expect. We cover this specifically in our guide to exterior paint chalking in Jacksonville.
Thermal movement. Surfaces expand and contract daily with heat and humidity. That movement concentrates stress at joints, lap edges, end grain, and around openings — which is why failures so often start at those locations rather than in the middle of a wall.
Coating and substrate mismatch. A product that isn’t suited to the surface or the exposure, or a new system applied over an existing one it doesn’t work well with.
That list isn’t exhaustive, and it’s rarely just one item. A typical failure we’re called to look at involves two or three of these working together. What it almost never is, despite being the first thing people assume, is simply “bad paint.”
One field note that’s genuinely useful for homeowners: where the failure is tells you something about why. Peeling concentrated in one area — below a particular window, at one corner, along one run of fascia — usually points to a water source at that location. Peeling spread evenly across a whole elevation more often points to preparation, coating age, or exposure. That’s not a diagnosis, but it’s the first question worth asking when you’re standing there looking at it.
Water and Moisture Are Usually the Real Problem
If I had to name one thing behind most of the exterior failures we’re asked to repair, it’s water — and usually water that had an obvious path to the surface that nobody was watching.
The sources we find repeatedly:
- Failed caulk at windows, doors, trim joints, and penetrations. This is the most common entry point we find, and the cheapest to have fixed before it matters.
- Leaking or overflowing gutters, which discharge water down a wall or against fascia every time it rains hard.
- Missing gutters in locations where roof runoff hits the same area of siding or stucco repeatedly.
- Damaged stucco — cracks, failed previous repairs, or delaminated areas that let water behind the wall surface.
- Deteriorated wood, particularly unsealed end grain and open joints in trim and fascia, which absorb water and hold it.
- Vegetation against the house. A shrub touching siding keeps that area shaded, damp, and poorly ventilated. It’s a small thing that does real damage over a few years.
- Drainage and grading that sends water toward the foundation rather than away, or irrigation that wets the same wall several times a week.
Two things worth being direct about.
First: paint cannot solve a moisture problem. If water is still reaching or moving through a surface, a new coating goes on top of an active condition. Depending on where the water is coming from and where it’s going, the result may be blistering, peeling, staining, or simply an early return of whatever failed the first time. A coating is the last layer of a system that depends on water being managed before it gets there.
Second: this is not an argument that every peeling area means a serious moisture problem. Sometimes the cause is a single failed caulk joint at one window, and correcting that plus properly repairing that area is the whole job. Finding out which situation you’re in is what a real inspection is for.
Why Surface Preparation Matters Before Repainting
The second thing we find regularly is a previous coating that went on over conditions that needed to be corrected first.
What we commonly see underneath a failing coating:
- Loose or failing coating that was painted over rather than removed back to sound material. The new film is only as attached as what’s under it.
- Chalky surfaces that weren’t washed and neutralized. Chalk is degraded binder and loose pigment — a powder layer between the substrate and the new coat.
- Dirty siding, mildew, or algae. Coating over live mildew traps a growing organism under the film.
- Damaged stucco coated rather than repaired, so the crack or defect continues doing what it was doing.
- Bare wood that wasn’t primed, particularly exposed end grain and areas revealed by scraping.
- Failed caulk caulked over instead of cut out and replaced.
Any of these can interfere with adhesion or shorten the service life of the coating system. Not always, and not always quickly — some of these coast along for years before anything shows. But when we open up a failure and find one of them, it’s usually part of the explanation.
Preparation isn’t a step you can evaluate by looking at the finished house, which is exactly why it’s the easiest thing to reduce on a bid. We wrote a longer piece on what surface preparation actually involves and why it drives the outcome.
Why Small Problems Become Expensive Ones
Most of the large exterior repairs we scope started as something small and visible. A hairline crack that began taking water. An open caulk joint. A downspout putting water on the same corner for three years. None of these announce themselves — they just sit there and work.
This isn’t a homeowner failing. Nobody is walking their house looking for caulk joints, and there’s no reason they’d know to. It’s simply that exterior conditions progress quietly, and the window where they’re cheap to fix passes without anyone noticing it opened.
So here’s my practical recommendation, offered as exactly that — my recommendation from experience, not a code requirement, a manufacturer mandate, or an industry standard: walk the outside of your house every three to six months and look at it. Ten minutes, twice a year, no ladder required.
What to look for:
- Caulk that’s split, pulled away, cracked, or missing — especially at windows, doors, and trim joints
- New stucco cracks, or existing cracks that look wider than you remember
- Any peeling, blistering, or flaking, and where specifically it is
- Water staining or discoloration, particularly below windows and along rooflines
- Wood that’s soft, spongy, or discolored — press on fascia and trim with a thumb
- Vegetation touching siding, stucco, or trim
- Gutters that overflow, leak at seams, or discharge against the house
- Areas that stay wet well after everything around them has dried
You don’t need to diagnose anything. You just need to notice it while it’s still small.
What to Do When Paint Is Already Peeling
Don’t just paint over it.
That’s the short version, and it’s the single most useful thing in this article. Covering peeling paint with new paint addresses how the wall looks, not why it failed, and the new coating inherits every problem the old one had.
Our actual process when we find a failure:
1. Determine why it failed. Before anything else. Where is it, what’s near it, what’s above it, what’s the substrate, and what’s the likely water path if there is one.
2. Remove the loose and failing material. Scraping back to sound, well-adhered coating, and feathering the edges so the transition doesn’t telegraph through the new finish.
3. Inspect what’s underneath. This is often where the real condition shows up. Wood gets probed, stucco gets checked for hollow or soft areas, and the exposed substrate tells you more than the intact surface did.
4. Repair the damage. Rotted wood replaced, stucco defects repaired properly with texture matched, failed caulk cut out and redone.
5. Correct the underlying condition. The gutter, the drainage, the vegetation, the grading — whatever was delivering water to that spot. This step is the one most often skipped, and skipping it is why failures repeat in the same location.
6. Prime where priming is warranted. Bare wood, exposed substrate, fresh stucco repairs, stains that need blocking. Not everywhere by reflex — where it’s doing a specific job.
7. Repaint, once the surface is actually sound.
Here’s a situation we encounter regularly. A homeowner notices peeling on one elevation and assumes it’s a small touch-up. Up close, the previous coating is breaking down across a much wider area than what was visible from the street — some mix of years of sun exposure, moisture reaching the surface, an aging coating near the end of its service life, and maintenance that got deferred while the house still looked acceptable. At that point painting the visible patch isn’t a repair. The failing material needs to come off, what’s underneath needs to be evaluated, and the reason it happened needs to be understood and corrected before anything new goes on.
That’s a bigger conversation than the homeowner expected to have. It’s also the one that determines whether the next coating performs.
When You May Not Need a Full Repaint Yet
This section exists because it’s true, not because it’s good for business.
Peeling in one area does not automatically mean the house needs to be repainted. Sometimes the right answer is targeted and considerably cheaper:
- Repair a localized caulk failure and properly prepare and coat that area
- Correct a drainage issue — extend a downspout, adjust grading, redirect irrigation
- Cut vegetation back from the wall and let the area dry out and stay dry
- Replace one damaged trim board or short section of fascia before it spreads
- Repair a localized stucco defect rather than treating it as a whole-house condition
- Properly prepare and touch up a contained area where the surrounding coating is still sound and the color will reasonably match
A word on that last one: touch-up works when the failure is genuinely localized, the existing coating is in good condition elsewhere, and you’re realistic about color match. Exterior coatings fade, so a touched-up area on a wall that’s been in the sun for eight years may be visible even with the original paint. Sometimes the honest answer is that touch-up is structurally correct but cosmetically imperfect, and the homeowner gets to decide which matters more on that elevation.
If what your house needs is a gutter fix and one board replaced, we’d rather tell you that. A repaint over an uncorrected condition isn’t a service we’re proud to sell.
When a Full Exterior Repaint Does Make Sense
There’s a point where addressing areas individually stops being the efficient choice. Generally that’s when:
- Failure is widespread rather than concentrated — multiple elevations, multiple substrate types
- Chalking is extensive, meaning the existing film has degraded broadly rather than locally
- Fading and color degradation are significant enough that spot work will never blend
- Repairs are widespread, and the prep required for them approaches a full-house scope anyway
- The existing coating is near the end of its service life, so fixing one area only moves the next failure elsewhere
- You’re already doing substantial repairs and the incremental cost of coating the whole envelope while the setup is there is modest
How long a coating lasts depends on the product, the substrate, the exposure, and the maintenance it received — we go through realistic intervals by surface type in our guide to how often to repaint a house in Florida. Anyone quoting you a firm number without looking at your house is guessing.
How to Reduce the Risk of Exterior Paint Failure
Most of prevention comes down to managing water and not letting small things run:
- Inspect periodically — the walk-around above
- Manage water first. Gutters that work, downspouts that discharge away from the house, grading that drains, irrigation that isn’t hitting walls
- Keep caulk current. It’s a maintenance item, not a permanent installation. Florida sun degrades it and daily movement works joints open
- Repair stucco defects when they’re small — see why stucco repair comes before painting
- Address wood deterioration early, while it’s one board rather than a fascia run — our guide to rotten wood repair and exterior painting covers what to look for
- Keep vegetation off the house — cheap, fast, and genuinely effective
- Wash as appropriate to keep mildew and surface contamination from accumulating, matching the method to the surface rather than defaulting to high pressure
- Prepare thoroughly and use compatible, substrate-appropriate coatings when you do repaint
None of this makes a coating permanent. It improves the odds, and it keeps small problems from turning into the kind that require repairs before anyone can even talk about paint.
What to Ask Before Hiring an Exterior Painter
If your house is peeling and you’re getting estimates, these are the questions that separate a real evaluation from a bid written off a photo:
- What do you think caused this failure? If there’s no answer, or the answer is “old paint,” keep asking.
- What preparation is included, specifically?
- How will the loose and failing coating be removed, and how far back?
- Did you check for wood rot, and how — visually, or by probing?
- Are stucco repairs included, excluded, or priced separately?
- Which areas will be primed, and why those?
- What did you notice about drainage, gutters, or vegetation that might be contributing?
- What coating system are you specifying, by name, for each surface?
- How many coats are included?
- What is explicitly excluded from this estimate?
The first question is the important one. A contractor who has thought about why your paint failed is going to prepare your house differently than one who hasn’t.
Get an Honest Read on What Failed
If your exterior is peeling, the useful thing we can do before any money changes hands is walk the house, look at what’s actually happening, and tell you what we find — including telling you if the answer is a gutter repair and one section of trim rather than a repaint.
More on our process and system on the exterior painting page, with related work on our stucco repair and carpentry and wood rot repair pages. If you want the deeper technical treatment of failure modes, our complete exterior paint failure guide goes further than this article does. For budgeting, see the exterior painting cost guide.
A New Leaf Painting Contractors has served Jacksonville and Northeast Florida since 2001. We’re licensed and insured, hold a Duval County Certificate of Competency, and have 750+ verified five-star reviews.
Find out what actually failed.
We’ll walk your exterior, show you what we find, and tell you what needs fixing — including when that’s less than a full repaint.
Or call or text 904-615-6599