Why the Same Paint Color Can Still Look Different After a Touch-Up
The color label matches. The leftover paint came straight from the builder. The touched-up spot even looked fine while it was still wet. Then it dried — and the patch showed up darker, lighter, shinier, flatter, or just noticeably different from the wall around it.
Paint touch-ups often fail to match because the new paint differs from the surrounding wall in age, sheen, application method, film thickness, porosity, batch, or the lighting you’re viewing it under. Our interior painters in Jacksonville, FL see this frequently on walls where the original finish was sprayed but a later touch-up was brushed or rolled. Even when the color formula is genuinely identical, differences in application and film build can change how light reflects from the repaired area.
After more than 25 years of interior painting in Northeast Florida, we’ve found a successful touch-up depends on much more than matching the color formula: the exact paint product, batch, age of the existing coating, sheen, application method, roller nap, film thickness, wall porosity, nearby drywall repairs, lighting, surface cleanliness, and how much the original finish has changed over time can all affect the final appearance.
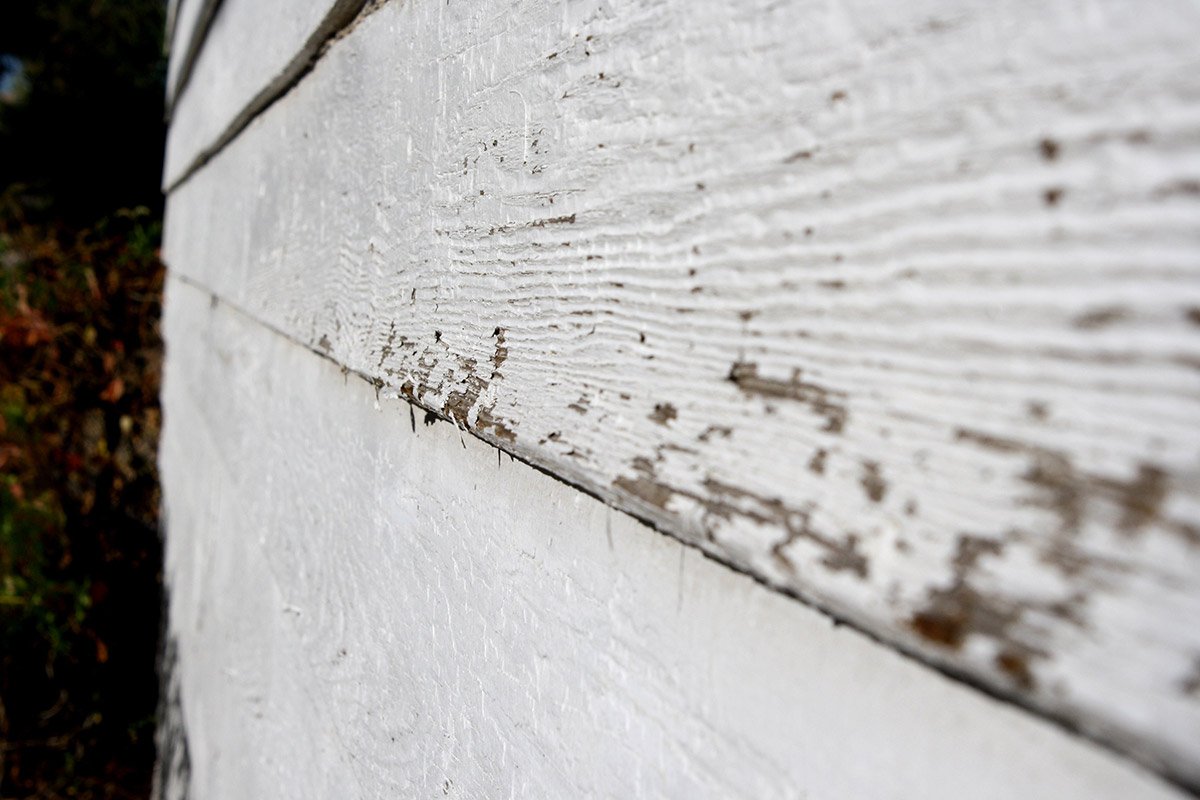
The same principle applies outdoors, where our exterior painters in Jacksonville, FL also have to account for UV fading, weather exposure, chalking, substrate differences, previous repairs, and the condition of the existing coating when trying to blend a repair. Matching the formula on a paint can doesn’t guarantee matching the actual appearance of the painted surface — that’s the core of what this guide walks through.
For more Jacksonville homeowner guides covering paint touch-ups, builder-grade paint, drywall repairs, wall preparation, paint sheen, washability, color selection, and professional interior painting, visit our Interior Painting Resource Center.
Why Don’t Paint Touch-Ups Match?
Quick Answer: A wall’s finished appearance is created by more than just color — sheen, texture, film thickness, application pattern, drying conditions, how the surface absorbs paint, lighting, and the age of the existing coating all factor in. Two applications of the “same” paint, at different times, with different tools, rarely produce an identical result.
Why Does Touch-Up Paint Look Darker?
A few different things can cause this: the fresh paint hasn’t fully dried and cured yet (many paints shift in appearance as they finish curing), the existing surrounding paint has faded over time, the touch-up was applied more heavily than the original coat, the wall absorbed the new paint differently than it absorbed the original, a brush created a denser film than the original roller or spray application did, the touch-up paint came from a different batch, the surrounding wall has accumulated dirt that’s subtly shifted its appearance, lighting is creating a shadow or sheen difference rather than a true color difference, or the wrong specific product or base was used.
Paint frequently dries a different shade than it appears while wet, and that shift varies by product and color — which is why it’s worth letting a touch-up fully dry and cure before judging the result. That said, we won’t promise the color will even out once it’s dry. Sometimes what you’re seeing wet is close to the final result.
Why Does Touch-Up Paint Look Lighter?
This can happen when the existing wall has darkened somewhat from accumulated dirt or oils over time, the original paint has aged or yellowed slightly, the new paint was mixed to a subtly different formula, too little paint was applied in the touch-up, drywall compound underneath absorbed some of the coating unevenly, primer was skipped where it was needed, the new patch has different surface texture than the surrounding wall, strong light is reflecting differently off the repair than off the aged surrounding paint, or the stored paint itself had separated or deteriorated before use.
What looks like a lighter color might actually be a surface, sheen, or texture difference rather than a genuine color mismatch — and those can be hard to tell apart without a closer look.
Why Does Touch-Up Paint Look Shinier?
This is a specific, well-known phenomenon called flashing — a visible difference in sheen, color, or texture between a repaired area and the surrounding painted wall.
Touched-up areas can look shinier for several reasons: higher film thickness than the surrounding wall, a smoother application than the original, surrounding paint that’s become burnished from cleaning or contact over time, different roller nap than what was originally used, brush application versus the original spray or roller finish, paint that wasn’t thoroughly mixed before application, an actual sheen difference between products, uneven porosity across the wall, joint compound sitting underneath the repair without adequate priming, or strong side lighting making any of the above more obvious than it would be under flat, even light.
Eggshell and satin finishes tend to reveal flashing far more readily than flat finishes do, simply because they reflect more light in the first place.
Is the Paint Color Wrong, or Is It a Sheen Problem?
A practical way to tell these apart: inspect the wall straight on, from an angle at the side, in daylight, at night, under overhead lighting, and once the paint is fully dry. A patch that’s only visible from certain angles, or under specific lighting, is usually a sheen or texture difference rather than an actual color mismatch. A patch that remains clearly visible under every lighting condition you check is more likely to involve a genuine color mismatch.
Why Does the Same Paint Formula Not Match?
The formula printed on a can’s label can be technically correct while the final result on your wall still looks different. This can come down to a different product line than what was originally used (even within the same brand), a different sheen, a different paint base, a different batch, a reformulated version of the same product name, paint that’s aged in the can, improper storage, pigment that’s settled out over time, incomplete stirring before use, a different application method than the original, or the existing wall having faded or picked up contamination since it was first painted.
When a homeowner tells me “but it’s the exact same color,” one of the first things I check is whether they actually have the same sheen. Someone can have the exact color name in hand and still be holding a completely different finish. The same color is often sold in flat, matte, eggshell, satin, and sometimes more, depending on the product line. That’s not a different color formula — it’s the same color reflecting light differently, and on a wall that difference can be obvious.
The other thing worth knowing is that the wall you’re matching may not look the way it did when it was painted. Natural light coming through windows can fade or shift interior paint over time, in the same way sunlight affects an exterior — not as fast, and not on every wall, but enough that a perfect can-match can still read differently next to a wall that’s had four years of afternoon sun on it.
Using the same brand and color name isn’t enough on its own. The exact product, sheen, base, and formula all need to line up for a real chance at a close match.
Does Paint Change Color as It Ages?
Yes, gradually, due to a combination of factors: sunlight exposure, artificial lighting over time, accumulated dirt, smoke residue, cooking residue in kitchens, repeated cleaning, moisture exposure, general touching and contact, oxidation, and the colorants themselves shifting subtly with age. This means the original wall you’re trying to match may no longer look like fresh paint from that exact same formula would look today — you’re not just matching a color, you’re matching a color that’s already changed somewhat from its original state. South- and west-facing rooms, which get more direct sun, often show a more noticeable difference than rooms with less direct light.
Does Stored Builder Paint Still Match?
Leftover paint from your builder is common, and homeowners tend to assume leftover paint equals a perfect match. In practice it often isn’t, and the reasons usually have nothing to do with the paint’s age.
Here’s what I run into regularly. The container wasn’t labeled correctly by the builder’s painter in the first place — so what’s written on the lid isn’t what’s in the can. Or it’s the right brand and color but the wrong product line. Or it’s the right color in the wrong sheen, which is the most common version of this. Or the can has been sitting in a hot Florida garage for a year or two, where heat cycling drives the pigments, resins, and binders to settle hard, leaving material on the bottom that’s compacted or hardened. And then it gets stirred for thirty seconds and used, which isn’t enough to bring a heavily settled paint back to a uniform consistency.
Other problems that develop in stored paint: poorly sealed containers letting air in, freezing or excessive heat, separation of the paint’s components, a skin forming on the surface, rust or contamination getting into the can, paint from multiple builder batches getting mixed up, or the product having been reformulated since your can was filled.
Worth being clear about one thing: paint sitting for a year or two isn’t automatically bad. Age alone doesn’t ruin it. What matters is how it was sealed and stored, whether it froze or cooked, whether it’s contaminated, and whether it will mix back to a uniform, usable consistency. Thorough stirring — real stirring, or a shake at the paint store — restores plenty of paint that’s simply settled.
But paint with a foul odor, heavy lumps that won’t stir out, visible mold, hardened material at the bottom, or separation that stirring doesn’t resolve shouldn’t be used. At that point it’s not a usable product anymore, regardless of how convenient having it on hand seemed.
Why Does Sprayed Paint Touch Up Differently?
Many new-construction walls are originally sprayed, for good reason — it’s efficient at the scale builders work at. Spraying creates a genuinely different surface texture, film thickness, sheen appearance, application pattern, drying behavior, and light reflection than brushing or rolling does, even using the identical paint product.
A later touch-up applied with a brush or roller can create a visibly different texture from that original sprayed finish, even when the color is a perfect match. This doesn’t mean sprayed paint is inferior — it’s a different application method with its own characteristic finish, and the real challenge is matching that original application, not just the paint color.
Brush vs. Roller vs. Spray Touch-Ups
Brush: useful for small edges and corners, but can leave visible brush texture and create a heavier film build than the surrounding wall — which can also make it look shinier by comparison.
Roller: often works better for larger wall areas than a brush does, though the roller nap needs to reasonably match the wall’s original texture, and the edges of the touched-up section can still remain visible against the older paint around it.
Spray: can better reproduce an originally sprayed texture than either brush or roller, but it requires extensive masking and protection, careful overspray control, and generally isn’t practical for a small spot-repair in an occupied, furnished room.
Worth being clear: using the same tool as the original application doesn’t guarantee an invisible touch-up on its own, since the surrounding paint has also aged and changed in ways a fresh coat hasn’t yet.
Does Roller Nap Affect Paint Touch-Ups?
Yes — roller nap length affects surface texture, how much paint gets deposited, resulting sheen, coverage, and how visible the edges of the touched-up area end up looking. A thicker nap tends to leave more texture and more paint on the wall, while a shorter nap produces a smoother finish. Even a fairly small texture difference from mismatched nap can become obvious under side lighting, which is part of why this detail matters more than homeowners expect. There’s no single universal “correct” nap — it depends on matching whatever texture is already there.
Why Do Touch-Ups Show More in Natural Light?
Side lighting from large windows is unforgiving — it reveals surface texture, roller marks, any drywall repairs, sheen variation, differences in film thickness, slightly raised patch edges, and even sanding marks that flat, even lighting would hide completely. Open floor plans and the large windows common in a lot of new construction make touch-ups more noticeable than they might be in an older home with smaller windows and more compartmentalized rooms. A repair that looked completely fine under soft evening lighting can look surprisingly obvious the next morning in direct daylight — a common experience, not a sign something was necessarily done wrong.
Why Do Builder Paint Touch-Ups Look Different?
New construction brings together several of the factors covered above at once: the original walls were sprayed, but repairs during construction and after your move-in are often rolled or brushed instead. Different batches get used across the construction timeline. Drywall repairs get spot-painted rather than full walls. Settlement cracks and nail pops get patched at various points as they appear. Paint gets applied at meaningfully different times throughout the process. Lighting in the space may have changed since move-in as you’ve added window treatments or fixtures. Walls accumulate dirt once the home is occupied. And the specific original product may have had limited touch-up consistency to begin with.
Touch-up convenience is one reason flat paint gets used so often in construction — but flat paint doesn’t guarantee an invisible repair on its own; it just makes success more likely than a higher-sheen product would. For more background on why builder-grade paint behaves the way it does, see why builder-grade paint scuffs so easily and our comparison of builder-grade paint vs. premium paint.
Why Do Drywall Repairs Show Through Touch-Up Paint?
Drywall compound and existing paint absorb new coatings differently from each other. Without proper preparation, a repair can show up as a dull spot, a shiny spot, an area that reads darker or lighter than the surrounding wall, visible edges around the patch, a texture difference, or a slightly raised area you can feel more than see.
Getting this right depends on properly feathering repairs into the surrounding wall, sanding smooth, thoroughly removing dust, matching the original texture where the wall has any, priming the joint compound specifically, and applying finish coats uniformly across the repaired area and beyond it. Our drywall repair team handles this preparation as standard practice, since skipping any of these steps is how a repair ends up visible. For the full breakdown, see why drywall repairs show through paint.
Does Joint Compound Need Primer Before Touch-Up Paint?
Usually, yes — bare joint compound should generally be primed before finish paint goes over it. Primer helps control how the compound absorbs paint, reduces the chance of flashing, improves adhesion, creates a more uniform sheen across the repair and surrounding area, and seals what’s otherwise a fairly porous repair material.
Worth being clear: spot-priming alone can still remain visible if the finish coat that follows is only touched up over a small area rather than across the whole wall. Priming solves the absorption problem, but it doesn’t necessarily solve the broader blending problem on its own.
Can You Touch Up Flat Paint?
Flat paint is generally the most forgiving finish for touch-ups, simply because it reflects the least light of any common sheen category.
Touch-up tends to work when: the existing paint is relatively new, you have the exact same product and ideally the same batch, the wall is clean, the patch itself is small, you’re using the same application method as the original, the room has fairly limited side lighting, and the surrounding wall hasn’t significantly faded yet.
Touch-up is more likely to still show when: the builder paint is weak or chalky, the original wall was sprayed, the paint has genuinely aged, the area needing touch-up is large, drywall repairs are involved, or the new coat’s film thickness ends up meaningfully different from the original.
Can You Touch Up Matte Paint?
Matte paint can touch up reasonably well, though results depend heavily on the specific product’s quality, its exact sheen level, how much the surrounding paint has aged, room lighting, the color itself, application method, and the size of the repair. Premium matte coatings may offer better washability than economy versions, but that doesn’t automatically mean better touch-up blending — these are separate performance characteristics.
Can You Touch Up Eggshell Paint?
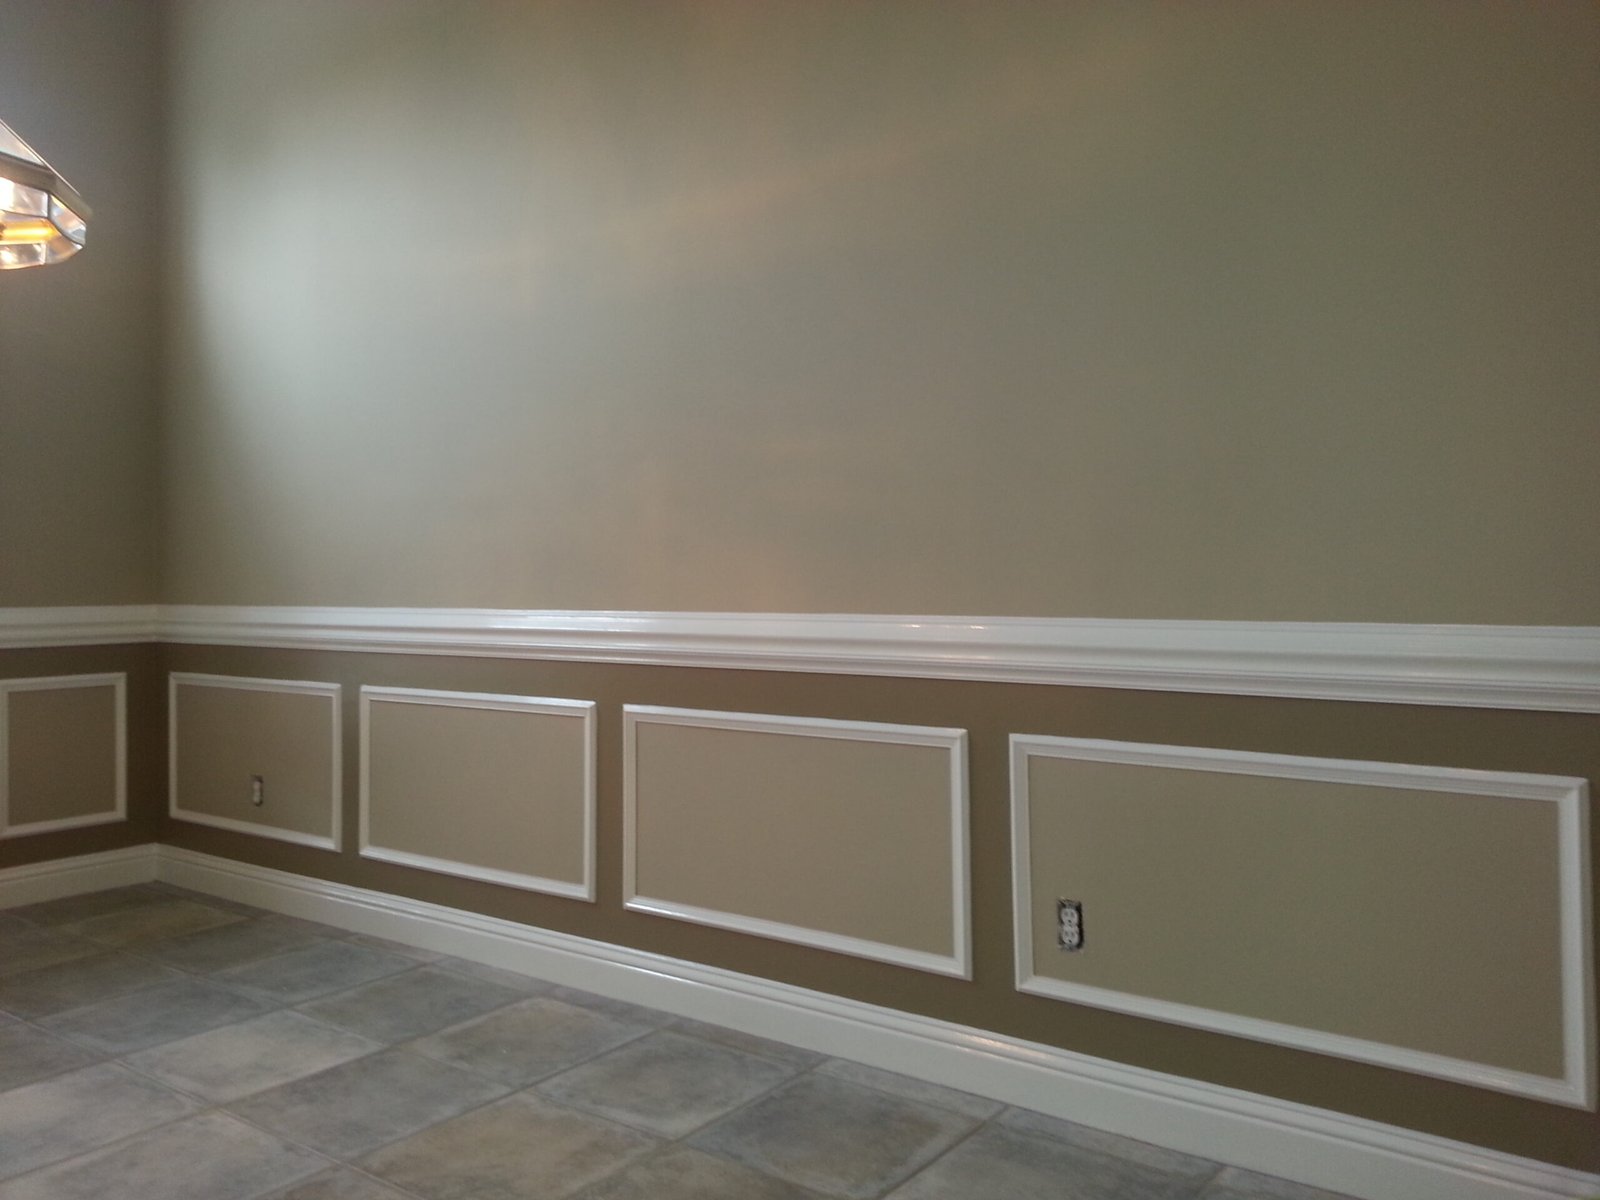
Eggshell touch-ups are more likely to show, simply because the finish reflects more light than flat or matte. Potential visible differences include sheen halos around the repaired area, roller texture that doesn’t quite match, brush marks, patches that read darker or lighter, visible edge lines, and general flashing. When eggshell walls need a noticeable repair — not just a tiny nick — repainting the entire wall is often the better approach rather than fighting to blend a spot repair. For the full comparison of finishes and how each behaves, see flat vs. matte vs. eggshell paint.
Can You Touch Up Satin Paint?
Satin is even less forgiving of localized touch-ups than eggshell, given its greater reflectivity. This is why satin walls are so commonly repainted corner to corner after any real repair, rather than spot-touched. That said, a very small, discreet touch-up can still be acceptable depending on the lighting conditions and how much visibility you’re personally comfortable with — a realistic expectation to go in with, not an absolute rule.
How Large Can a Paint Touch-Up Be?
There’s no single universal maximum size — success depends on sheen, color, lighting, the wall’s texture, how much the paint has aged, application method, the exact product involved, and where on the wall the repair sits. A small nick or scuff often blends reasonably well. A larger patch, or multiple separate repairs on the same wall, more often calls for repainting the full wall. Worth knowing: simply expanding the touch-up area to try to blend it better doesn’t reliably improve the result — sometimes it just makes the transition zone larger without making it less visible.
Should You Feather the Touch-Up Paint?
Feathering means gradually thinning the paint out toward the edges of a repair rather than stopping abruptly. It can genuinely help with small flat-paint repairs, minor scuffs, rooms with relatively low side lighting, and paint that’s still fairly new. It has real limitations too: feathering can sometimes create a larger, more diffuse halo rather than a cleaner edge, higher-sheen paint may still flash even with careful feathering, uneven application during feathering can make a repair look worse than a clean, defined patch would have, and feathering does nothing to fix unprimed drywall underneath — it’s a blending technique, not a substitute for proper prep.
Should You Paint the Entire Wall?
I’ll give you my honest position on this, and it isn’t the one that sells the most paint.
For interior walls and for the body of an exterior, we generally don’t recommend touching up broad areas. In our experience localized touch-ups on those surfaces often remain visible even when experienced painters do them carefully — the surrounding coating has aged, the film build differs, the application differs, and all of that shows up together. What we prefer instead is repainting from one natural break to another, typically corner to corner. Not because it’s more work to bill, but because painting the full surface is what gives you a real chance at uniform color, sheen, film build, texture, and light reflection all at once.
If you’re trying to save money, I’d rather see you paint one complete wall than keep chasing several touch-up spots that still show. One clean wall usually looks better than a wall with four blended patches on it, and it often costs less than the third attempt at spot-repairing.
Trim and doors are a different conversation. Those can often be touched up more successfully — the surfaces are smaller, the profiles interrupt light differently, and natural breaks in the millwork help hide a transition. Depending on the product, the age of the finish, and the condition of the surface, a trim or door touch-up can blend reasonably well. I won’t promise it’ll be invisible, but the odds are meaningfully better than they are on a wall.
Corner-to-corner repainting is the more reliable solution when a touch-up is already visibly showing, the wall has multiple separate repairs, you’re dealing with eggshell or satin rather than flat, the original paint was sprayed, the existing coating has noticeably faded, the exact original product isn’t available anymore, drywall repairs are part of the picture, the room gets strong side lighting, or you want a genuinely uniform finish rather than accepting visible patchwork.
Natural wall breaks — corners, where a wall meets a different material, or where trim interrupts a surface — help conceal the transition between old and new paint. Adjoining walls often don’t need repainting too, as long as the color remains reasonably close between them.
Do You Need to Repaint the Entire Room?
Not necessarily. Your options range from touching up a very small, isolated area, to repainting just one complete wall, to repainting several connected walls, up to the entire room — with ceilings and trim either included or left as-is depending on their own condition. How much color variation would show between adjoining walls if you only repaint one is worth factoring in before you commit to a scope.
How to Improve the Chances of a Successful Touch-Up
- Confirm the exact product, color, sheen, and base — not just the color name
- Make sure any stored paint is genuinely still usable
- Stir the paint thoroughly before use, or have it shaken
- Clean the wall gently before touching it up
- Let the wall fully dry before painting over it
- Complete any drywall repairs properly first
- Prime bare joint compound before the finish coat
- Match the original application method as closely as possible
- Use a similar roller nap to what was originally used
- Apply the paint lightly rather than heavily
- Avoid excessive buildup in one spot
- Feather cautiously, and only where it’s likely to actually help
- Let the paint dry fully before judging the result
- Inspect under multiple lighting conditions, not just one
- Be ready to repaint the full wall if the result still isn’t acceptable
We won’t promise this process guarantees success — it improves your odds meaningfully, but some combination of aged paint, sprayed original walls, and higher-sheen finishes will still show a touch-up no matter how carefully it’s done.
Common Paint Touch-Up Mistakes
- Matching only the color name — the exact product line, sheen, and base all matter too.
- Using the wrong product line — even within the same brand and color name.
- Using the wrong sheen — the single most common mismatch we see.
- Trusting the label on a builder’s leftover can — it isn’t always what’s actually inside.
- Failing to stir settled paint thoroughly — leaves inconsistent color and texture.
- Applying paint too heavily — creates a visibly different film thickness than the surrounding wall.
- Using a brush on a wall that was originally sprayed — a common, very visible texture mismatch.
- Using the wrong roller nap — creates a subtle but real texture difference.
- Painting over drywall compound without primer — leads to uneven absorption and flashing.
- Judging the result while the paint is still wet — many paints shift in appearance as they dry and cure.
- Touching up a dirty wall — the surrounding contamination affects how the comparison looks.
- Ignoring how much the surrounding paint has faded — fresh paint next to faded paint rarely matches.
- Feathering over too large an area — can create a bigger, more diffuse halo instead of a clean blend.
- Expecting eggshell or satin to touch up like flat paint — sets up disappointment given their higher reflectivity.
- Touching up multiple separate spots instead of repainting the wall — often ends up looking worse overall than one clean, full repaint.
Paint Touch-Ups in New Construction Homes
New homes bring together a specific combination of factors: builder warranty repairs happening at various points, nail pops as the frame settles, settlement cracks, drywall patches from move-in dings, an originally sprayed application, leftover paint of uncertain age and storage condition, different batches used across the construction timeline, strong natural lighting in a lot of newer floor plans, open layouts that make wall transitions more visible, generic builder colors some homeowners want to move away from anyway, and flat paint chosen partly for construction-phase touch-up convenience.
Homeowners often don’t notice touch-up differences right away — they tend to become obvious only after furniture, window treatments, and permanent lighting fixtures are in place, which changes both how a room is lit and how closely people are looking at the walls day to day. For more on whether to repaint after moving in, see should you repaint a new construction home, and if you’re noticing paint transferring during cleaning, see why paint comes off when wiping walls.
Paint Touch-Ups in Jacksonville’s Newer Homes
A few local factors are worth knowing: large windows and strong Florida sunlight for much of the year reveal touch-up flashing more readily than dimmer climates would, open floor plans common in newer Northeast Florida construction mean more continuous wall space under consistent light, rapid residential development across the region means a lot of homes going through this same first-year experience at once, settlement and nail pops play out here the same as anywhere, builder warranty repairs are a normal part of the process, our humidity affects drying conditions during touch-up work, and many families here want more washable paint once they’ve lived with the original builder finish for a while.
The hot garage is worth its own mention. A can of leftover paint stored through a Jacksonville summer goes through heat cycling that a can in a conditioned space doesn’t, and that’s hard on a coating sitting in storage.
None of this points to any specific builder, and it doesn’t mean every new home in the region has poor-quality touch-ups — it’s the shared experience of a fast-growing area with a lot of new construction happening at once.
Professional Process for Repairing Visible Touch-Ups
- Identify the exact paint product and sheen where possible
- Inspect the existing wall under multiple lighting conditions
- Evaluate any drywall repairs and existing texture
- Protect floors, furniture, and adjacent surfaces
- Repair nail pops, cracks, and patch edges properly
- Sand and remove all dust
- Prime bare or porous repair areas
- Test a small touch-up where it makes sense to try
- Repaint the full wall when that test remains visibly noticeable
- Apply uniform finish coats across the repainted area
- Inspect the result under both natural and artificial lighting
- Complete final touch-ups and cleanup
The goal throughout isn’t simply covering the repair — it’s achieving uniform color, sheen, and texture together, which sometimes means a small touch-up and sometimes means a full wall.
Frequently Asked Questions
What is paint flashing?
A visible difference in sheen, color, or texture between a repaired area and the surrounding painted wall. It’s a cosmetic mismatch, not a sign the coating is failing.
Can leftover builder paint still be used?
Sometimes, if it’s been properly stored and thoroughly stirred — age alone doesn’t ruin paint. But paint with a foul odor, heavy lumps, mold, hardened material at the bottom, or separation that stirring won’t resolve should not be used. It’s also worth confirming the can actually contains what the label says, and that the sheen matches.
Can sprayed walls be touched up with a roller?
Yes, but the texture often won’t match the original sprayed finish, even with an identical paint color.
Do drywall repairs need primer?
Usually, yes — bare joint compound generally needs primer before finish paint to control absorption and reduce flashing.
How long should touch-up paint dry before judging it?
Let it fully dry and cure rather than judging it while wet, since many products shift in appearance during drying and curing.
Should you repaint the entire wall after a repair?
For interior walls we generally recommend it once a touch-up is already showing — corner to corner, rather than blending a spot. Trim and doors are more forgiving and can often be touched up successfully.
Can a painter make touch-ups completely invisible?
Not always — even skilled painters can’t guarantee an invisible result when the paint has aged, the original wall was sprayed, or the finish has higher sheen. Those are real physical differences a touch-up alone can’t fully erase.
Conclusion
Paint touch-ups fail to match for reasons that mostly come down to one thing: you’re not matching a color, you’re matching a surface that has aged, been applied a particular way, and reflects light in a particular pattern. A small, careful flat-paint touch-up can blend well under the right conditions, and trim and doors are more forgiving than walls. But for interior walls and exterior body surfaces, repainting corner to corner is usually the more reliable way to get a uniform result — especially with higher-sheen finishes or walls that were originally sprayed.
If you’re dealing with a visible touch-up that’s bothering you, or deciding between a spot repair and a full repaint, we’re glad to take a look and give you an honest read on which approach will actually get you the result you want — including telling you when a touch-up is worth trying first.
Ready to talk through your walls? Schedule a free, no-pressure consultation for interior painting. Call 904-615-6599.
Helpful Resources
- Why Does Builder-Grade Paint Scuff So Easily?
- Builder-Grade Paint vs. Premium Paint
- Why Does Paint Come Off When I Wipe the Walls?
- Flat vs. Matte vs. Eggshell Paint
- Should You Repaint a New Construction Home?
- Why Are Drywall Repairs Showing Through the Paint?
- Drywall Repair
- Interior Painting Services
A New Leaf Painting Contractors is one of Jacksonville’s most-reviewed residential painting companies, serving homeowners and businesses throughout Northeast Florida since 2001 with 750+ verified five-star reviews and 5,000+ completed projects. Our licensed and insured team provides interior painting, exterior house painting, commercial painting, cabinet painting and refinishing, drywall repair, popcorn ceiling removal, stucco repair, and wood rot repair. We serve Riverside, Avondale, Mandarin, Julington Creek, Nocatee, Ponte Vedra Beach, Jacksonville Beach, Fleming Island, Orange Park, St. Johns, St. Augustine, and communities throughout Northeast Florida. Every project is supported by our No-Chaos Process, with Google Guaranteed status, EPA Lead-Safe Certification, and a Duval County Certificate of Competency. Call 904-615-6599 to schedule a free, no-pressure painting estimate.