Why Are Drywall Repairs Showing Through the Paint?
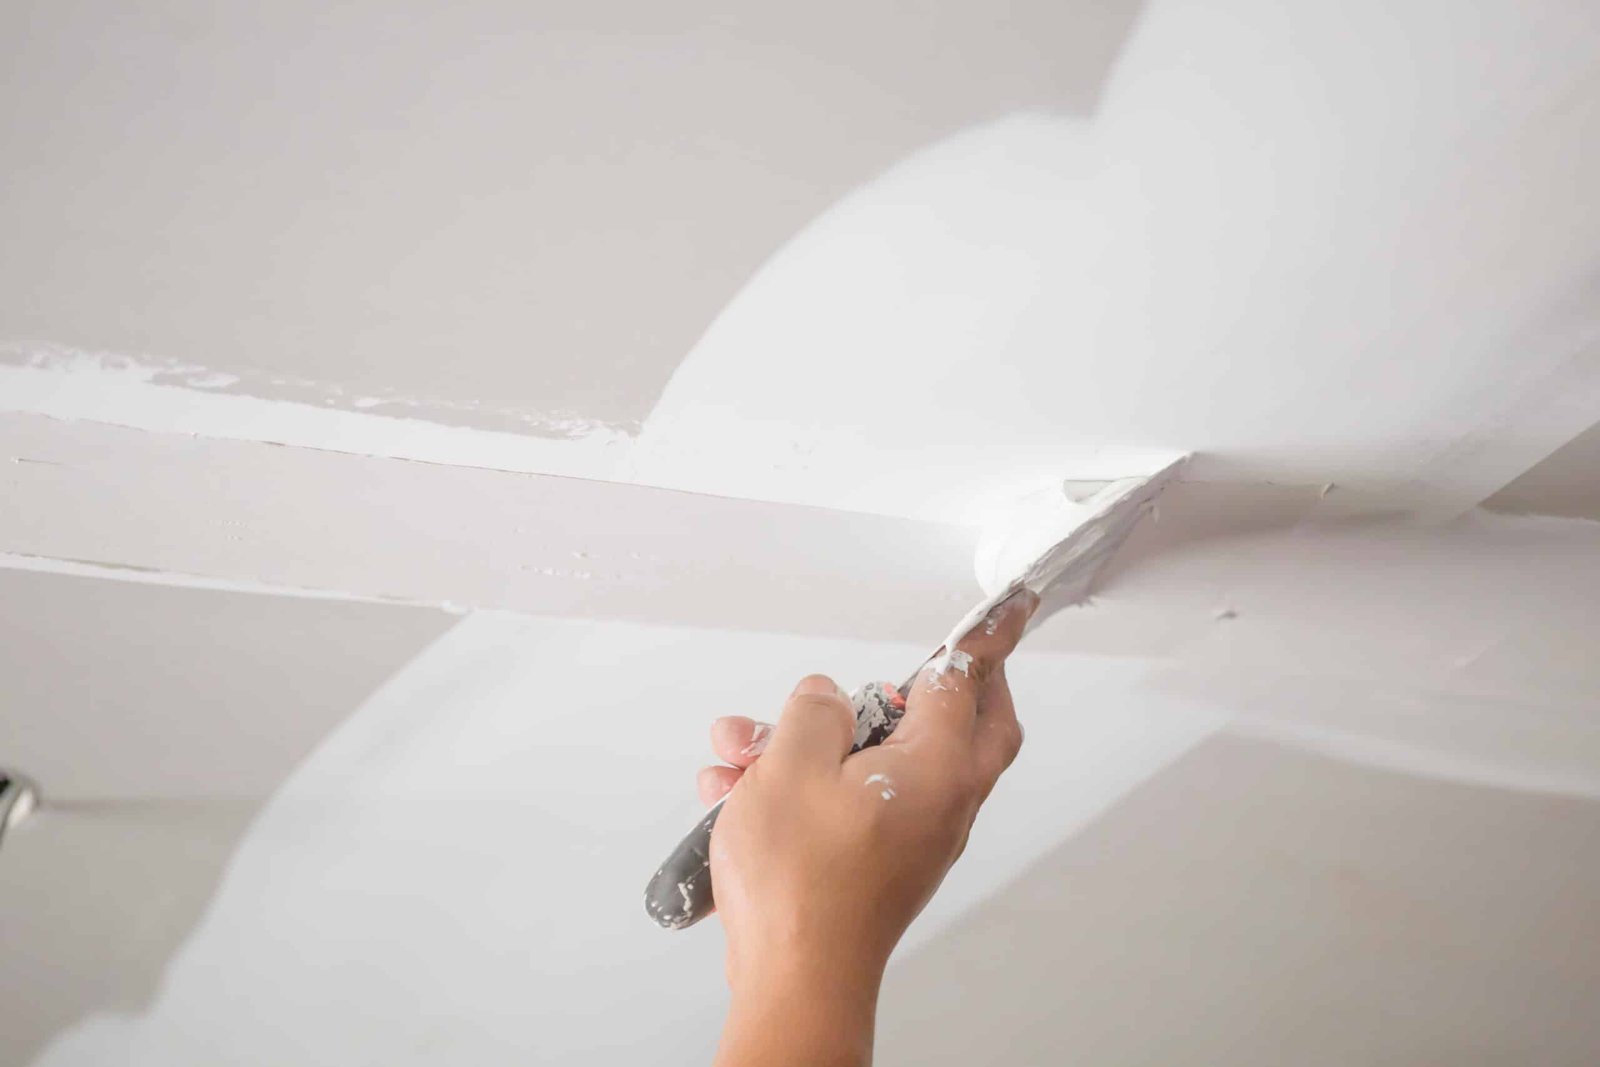
The hole, crack, or nail pop got repaired and painted over — but the patch is still visible. It might look darker, lighter, shinier, flatter, smoother, rougher, slightly raised, or outlined the moment sunlight hits the wall at the wrong angle.
Drywall repairs often show through paint because joint compound is more porous than the surrounding painted wall. Our interior painters in Jacksonville, FL see this most often when a repair hasn’t been properly feathered, sanded, textured, primed, and coated, leaving visible differences in sheen, color, texture, or even surface height. Repainting the entire wall is sometimes genuinely necessary to achieve a truly uniform finish — more paint alone doesn’t always fix what’s actually going on underneath.
After more than 25 years of interior painting in Jacksonville, FL, we’ve learned that a visible drywall repair usually traces back to one or more of these conditions: uneven porosity between the repair and the surrounding wall, missing primer, poor feathering at the edges, insufficient sanding, oversanding, a texture mismatch, edges that sit slightly raised or recessed, a different paint sheen than the original coat, how the touch-up was actually applied, strong side lighting exposing what flatter light would hide, or simply not enough finish coats over the repair. It’s worth saying plainly upfront: just adding more paint doesn’t reliably solve the underlying problem if one of these is actually what’s going on.
For more Jacksonville homeowner guides covering interior paint, drywall repairs, wall preparation, builder-grade coatings, paint sheen, touch-ups, color selection, and long-term maintenance, visit our Interior Painting Resource Center.
Why Are Drywall Repairs Showing Through the Paint?
Quick Answer: Joint compound is porous and absorbs paint differently than an already-painted wall does. When a repair area differs from the surrounding wall in porosity, smoothness, height, texture, primer coverage, film thickness, or application method, the finish paint reflects light differently over that spot — and it stays visible no matter how good the color match is.
What Does Drywall Flashing Mean?
Flashing is a visible difference in sheen, color, texture, or light reflection between a repaired area and the surrounding wall. It shows up in a few recognizable ways: a shiny patch standing out against a flatter wall, a dull patch standing out against a glossier one, a dark outline tracing the repair’s edges, a lighter halo around it, a spot that’s noticeably smoother than the texture around it, an edge that sits slightly raised, or roller texture that just doesn’t quite match the surrounding pattern.
Worth being clear about: flashing doesn’t necessarily mean the paint is failing or peeling. It’s usually a cosmetic mismatch between the repair and the original surface — a real, visible problem, but not the same thing as a coating that’s actually coming apart.
Why Does Joint Compound Absorb Paint Differently?
Bare joint compound is significantly more porous than an already-cured, painted wall surface. Left unprimed, it can absorb the liquid and binder from finish paint rapidly and unevenly, which leads to dull spots, uneven color development, reduced overall film build right over the repair, visible texture differences once the paint dries, poor touch-up appearance, and uneven sheen compared to the surrounding wall.
Primer exists specifically to reduce this porosity mismatch and create a more consistent surface for the topcoat to land on evenly. It’s worth being clear that primer isn’t simply “white paint” — it’s formulated differently, specifically to seal a porous surface and even out how the finish coat gets absorbed, which is a genuinely different job than color and final appearance.
Do Drywall Repairs Need Primer?
Generally, yes — bare joint compound and any exposed drywall should typically be primed before finish paint goes on. Primer helps seal the porous compound, improves adhesion of the topcoat, reduces the odds of visible flashing, creates more uniform paint absorption across the repair, improves overall color consistency, and supports an even sheen once the finish coat is applied.
Spot priming just the repaired area can be sufficient for a small, well-executed patch. Broader priming — sometimes across the whole wall — becomes more worthwhile when there are multiple repairs, uneven overall porosity, or you’re already planning to repaint the full wall anyway. One important limit worth knowing: primer cannot correct a poorly shaped or badly textured repair underneath it. Primer solves an absorption problem, not a surface-shape problem.
Why Does the Drywall Patch Look Shiny?
A few things commonly cause this: finish paint building up more heavily directly over the repair than elsewhere on the wall, a spot primer that dried to a slightly different sheen than the surrounding paint, a surrounding wall that’s become burnished and duller from cleaning or contact over time, a touch-up done with a different paint than what’s on the rest of the wall, a patch that was sanded smoother than the texture around it (smoother surfaces tend to read as shinier), the wrong sheen used for the touch-up altogether, or simply strong light reflecting more directly off that one spot than off the surrounding texture. For a deeper look at this specific phenomenon and how it relates to touch-ups generally, see why don’t paint touch-ups match in new homes.
Why Does the Drywall Patch Look Dull?
The opposite problem happens too, and for related reasons: unprimed joint compound soaking up more of the paint’s binder and leaving less sheen on the surface, a patch that’s rougher in texture than the surrounding wall (rougher surfaces scatter light and read as flatter), insufficient finish coats over the repair specifically, or paint that was thinned or stretched too far right at the patch. Both the “too shiny” and “too dull” versions of this problem usually come back to the same root cause — a porosity or texture mismatch that wasn’t fully addressed before the topcoat went on.
Poor Sanding: Undersanding and Oversanding
Undersanding leaves ridges, tool marks, or slightly raised compound that catches light differently than the smooth surrounding wall — you can often feel this with your hand even when it’s hard to see head-on.
Oversanding can actually damage the paper facing on the surrounding drywall, creating a fuzzy or slightly rough texture right at the edges of the repair that then absorbs paint differently than the untouched wall around it. Both problems stem from the same underlying goal not quite being met — a truly smooth, flush transition between the repair and the original wall — just approached from opposite directions.
Texture Mismatch
Most walls aren’t perfectly smooth, even when they look that way at a glance — orange peel, knockdown, and other subtle texture patterns are common, especially on ceilings and in older homes. A patch that’s finished perfectly smooth on a textured wall (or vice versa) will show, regardless of how good the paint color match is. Matching texture is a real skill that takes practice, and it’s one of the more common places a repair falls short even when everything else about it was done correctly.
Raised or Recessed Patch Edges
A repair that sits even slightly proud of (raised above) or recessed below the surrounding wall surface will catch light differently along its edges, creating a visible outline regardless of color or sheen matching. This typically comes down to how the joint compound was feathered out — tapering it gradually into the surrounding wall rather than stopping abruptly — and how thoroughly it was sanded flush afterward.
Nail Pop Repairs Showing Through Paint
Nail pops — where a drywall fastener pushes slightly through the surface as framing settles — get repaired by re-securing the fastener, filling the resulting small crater with compound, and finishing it flush. When a nail pop repair shows through paint afterward, it’s usually one of the same issues covered above: insufficient feathering leaving a slight ridge, inadequate priming over the fresh compound, or a texture difference at that specific small spot. Because these repairs are often quite small, it can be tempting to rush the finishing steps — which is exactly how a technically successful repair (the nail pop itself is fixed) ends up remaining cosmetically visible.
Settlement Crack Repairs Showing Through Paint
Settlement cracks need to be properly filled — ideally with a flexible compound suited to a crack that may see some minor ongoing movement — then taped in problem areas, feathered, sanded, primed, and painted. A repaired crack that still shows often points to inadequate feathering along the crack’s length, missing primer, or the crack having continued to move slightly after the repair, which can reopen a hairline gap even through paint. If a “repaired” crack keeps reappearing in the same spot repeatedly, that’s worth having evaluated for ongoing structural movement rather than just re-patching it the same way again.
Water-Damage Repair Visibility
Repairs following water damage carry an extra risk: staining. Water stains can bleed through standard paint even after the drywall itself has been properly repaired, showing up as a yellowish or brownish shadow — sometimes not immediately, but weeks or months later as conditions change. This calls for a dedicated stain-blocking primer specifically, not just a standard drywall primer, over any area that had actual water exposure.
Why Do Wall Repairs Show More in Natural Light?
Side lighting from windows is unforgiving in exactly the way flat, even artificial lighting isn’t — it reveals texture differences, raised or recessed edges, sheen variation, and subtle surface irregularities that are essentially invisible under softer, more diffuse light. This is part of why a repair can look completely acceptable during an evening walkthrough and then look surprisingly obvious the next morning in direct daylight. It’s a real, common experience — not necessarily a sign that anything was done wrong, just a function of how raking light interacts with any surface irregularity, however small.
Will Another Coat of Paint Fix a Visible Repair?
Sometimes, but not reliably. An additional coat can help even out color and add some film thickness, which occasionally resolves a mild dullness or slight color difference. But it generally won’t fix a genuine texture mismatch, a raised or recessed edge, or a porosity difference that wasn’t addressed with primer first — in those cases, another coat of paint just sits on top of the same underlying problem rather than solving it. Before adding more paint, it’s worth diagnosing which specific issue you’re actually dealing with, since the fix is different depending on the cause.
Do You Need to Repaint the Entire Wall?
Not always — but often, for a truly uniform result. A small, well-executed repair with proper primer and a close paint match can sometimes stay genuinely invisible with just a careful touch-up. But when the repair is larger, involves noticeable texture differences, sits on a wall with strong side lighting, or is one of several patches on the same wall, repainting the full wall from corner to corner is usually the more reliable path to a result you’ll actually be happy with — rather than repeatedly trying to blend an isolated spot that keeps drawing your eye.
Professional Process for Fixing a Visible Drywall Repair
- Inspect the repair under multiple lighting conditions, including strong side light
- Determine whether the issue is porosity, texture, height, sheen, or a combination
- Sand down any raised areas, or re-fill any recessed ones
- Re-feather the compound further out into the surrounding wall if needed
- Match texture to the surrounding surface where the wall has any
- Remove all sanding dust thoroughly
- Apply an appropriate primer over the repair — stain-blocking specifically if water damage was involved
- Apply finish coats evenly, extending beyond just the immediate repair area
- Inspect again under natural and artificial lighting
- Repaint the full wall if the result still isn’t acceptably uniform
Our professional drywall repair team follows this full sequence as standard practice — the goal is a repair that disappears, not just one that’s technically structurally sound.
Common Mistakes That Leave Repairs Visible
- Skipping primer over bare joint compound — leads directly to flashing from uneven absorption.
- Insufficient feathering — leaves a visible edge or ridge around the repair.
- Undersanding — leaves texture and tool marks that catch light.
- Oversanding — damages surrounding drywall paper, creating its own texture mismatch.
- Ignoring existing wall texture — a smooth patch on a textured wall (or the reverse) always shows.
- Judging the repair under one lighting condition only — misses problems that side lighting would reveal.
- Applying finish paint too thin over the repair — reduces film build exactly where more is often needed.
- Skipping stain-blocking primer after water damage — risks staining bleeding through later.
- Assuming another coat of paint will fix a structural or texture issue — often just delays the real fix.
- Touching up with a different paint than the rest of the wall — introduces a new mismatch on top of the original repair.
Drywall Repairs in New Construction Homes
New homes bring a specific set of repair situations together: nail pops as framing settles during the first year, hairline settlement cracks, builder warranty patch work, spots where the original wall was sprayed but repairs get rolled or brushed, and strong natural light in a lot of newer floor plans that makes any of this more visible than it would be in a dimmer, older home. Homeowners often don’t notice these repairs clearly until furniture and lighting fixtures are actually in place and they’re spending real time looking at the walls day to day. For the bigger picture on repainting timing after a new-home move-in, see should you repaint a new construction home, and for context on why builder touch-ups specifically can look different, see why don’t paint touch-ups match in new homes.
Drywall Repairs in Jacksonville’s Newer Homes
A few factors specific to our market are worth knowing: strong Florida sunlight through much of the year reveals texture and flashing issues more readily than dimmer climates, open floor plans common in newer Northeast Florida construction mean more continuous wall space under consistent light, humidity affects how joint compound and primer cure and how quickly you can move through repair steps, and settlement-related repairs are a completely normal part of a new home’s first year here just as anywhere else. None of this points to any specific builder or contractor — it’s simply the shared experience of a region with a lot of new construction happening at once.
Frequently Asked Questions
Why are drywall repairs showing through paint?
Usually because joint compound absorbs paint differently than the surrounding painted wall, and the repair wasn’t fully feathered, sanded, textured, and primed to match before the finish coat went on.
Does joint compound need primer before painting?
Generally, yes — bare joint compound is porous and needs primer to seal it and create even paint absorption across the repair.
Why does a drywall patch look shiny?
Often from extra paint buildup, a smoother sanded surface than the surrounding wall, or a sheen mismatch with the rest of the room.
Why does a drywall patch look dull?
Usually from unprimed compound absorbing too much of the paint’s binder, or a rougher texture than the surrounding wall.
Will another coat of paint hide a visible repair?
Sometimes for minor color or dullness issues, but it typically won’t fix a real texture mismatch, raised edge, or porosity problem underneath.
Do nail pop repairs need to be primed?
Yes — even small nail pop repairs involve fresh joint compound that needs priming to avoid flashing, just like any larger patch.
Why does my wall repair look worse in sunlight?
Strong side lighting reveals texture, sheen, and surface-height differences that flatter, more even lighting hides completely.
Can a settlement crack repair reopen?
Yes, particularly if the underlying movement continues — a crack that keeps reappearing in the same spot is worth having evaluated rather than repeatedly re-patched.
Do water-damage repairs need special primer?
Yes — a stain-blocking primer specifically, since standard primer may not prevent water staining from bleeding through the topcoat later.
Should the whole wall be repainted after a drywall repair?
Often the more reliable choice for a truly uniform look, especially for larger repairs, multiple patches, or walls with strong side lighting — though a small, well-primed repair can sometimes blend well on its own.
Conclusion
A drywall repair showing through paint almost always comes down to a mismatch — in porosity, texture, height, sheen, or primer coverage — between the repaired area and the surrounding wall. The fix depends on which of those is actually going on, and it’s rarely as simple as adding another coat of paint. Proper feathering, sanding, texture matching, and primer solve most of these issues before they ever become visible; once a repair is already showing, sometimes a touch-up can still resolve it, and sometimes repainting the full wall is genuinely the better path to a result you’ll actually be happy with.
If you’ve got a repair that’s still bothering you, or you’d rather have it done right the first time, we’re glad to take a look and give you a straight assessment.
Ready to talk through your walls? Schedule a free, no-pressure consultation for professional drywall repair or interior painting. Call 904-615-6599.
Helpful Resources
- Drywall Repair
- Interior Painting Services
- Why Don’t Paint Touch-Ups Match in New Homes?
- Why Does Builder-Grade Paint Scuff So Easily?
- Builder-Grade Paint vs. Premium Paint
- Why Does Paint Come Off When I Wipe the Walls?
- Flat vs. Matte vs. Eggshell Paint
- Should You Repaint a New Construction Home?
- Why Surface Preparation Matters
A New Leaf Painting Contractors has provided professional residential painting in Jacksonville, FL and throughout Northeast Florida since 2001. With 750+ five-star reviews and more than 5,000 completed projects, our experienced Jacksonville painters and house painting contractors help homeowners protect, update, and transform their homes with professional interior painting, exterior house painting, cabinet painting, drywall repair, stucco repair, popcorn ceiling removal, and wood rot repair. Homeowners searching for trusted residential painters, house painters, interior painters, exterior painters, and painting contractors in Jacksonville can count on our licensed and insured team for detailed preparation, quality coatings, clean job sites, and our No-Chaos Painting Process. We proudly serve Jacksonville, Mandarin, Riverside, Avondale, Julington Creek, Nocatee, Ponte Vedra Beach, Jacksonville Beach, St. Johns, Fleming Island, Orange Park, St. Augustine, and surrounding Northeast Florida communities. Ready to improve your home? Call 904-615-6599 for a free residential painting estimate.