How to Remove Wallpaper From Drywall Without Damaging the Wall
Last updated:
Reviewed by Thomas Drake, Founder & Owner, A New Leaf Painting Contractors — painting Northeast Florida homes since 2001.
Wallpaper removal either goes quickly or turns into a far bigger job than anyone planned for. Two rooms in the same house can behave completely differently: one releases in full sheets over an afternoon, the next fights you for three days and leaves walls needing skim coat before they can be painted.
The difference comes down to five things: the type of wallpaper, the adhesive behind it, whether the drywall was primed or sealed before the paper went up, how long it has been there, and the condition of the drywall itself.
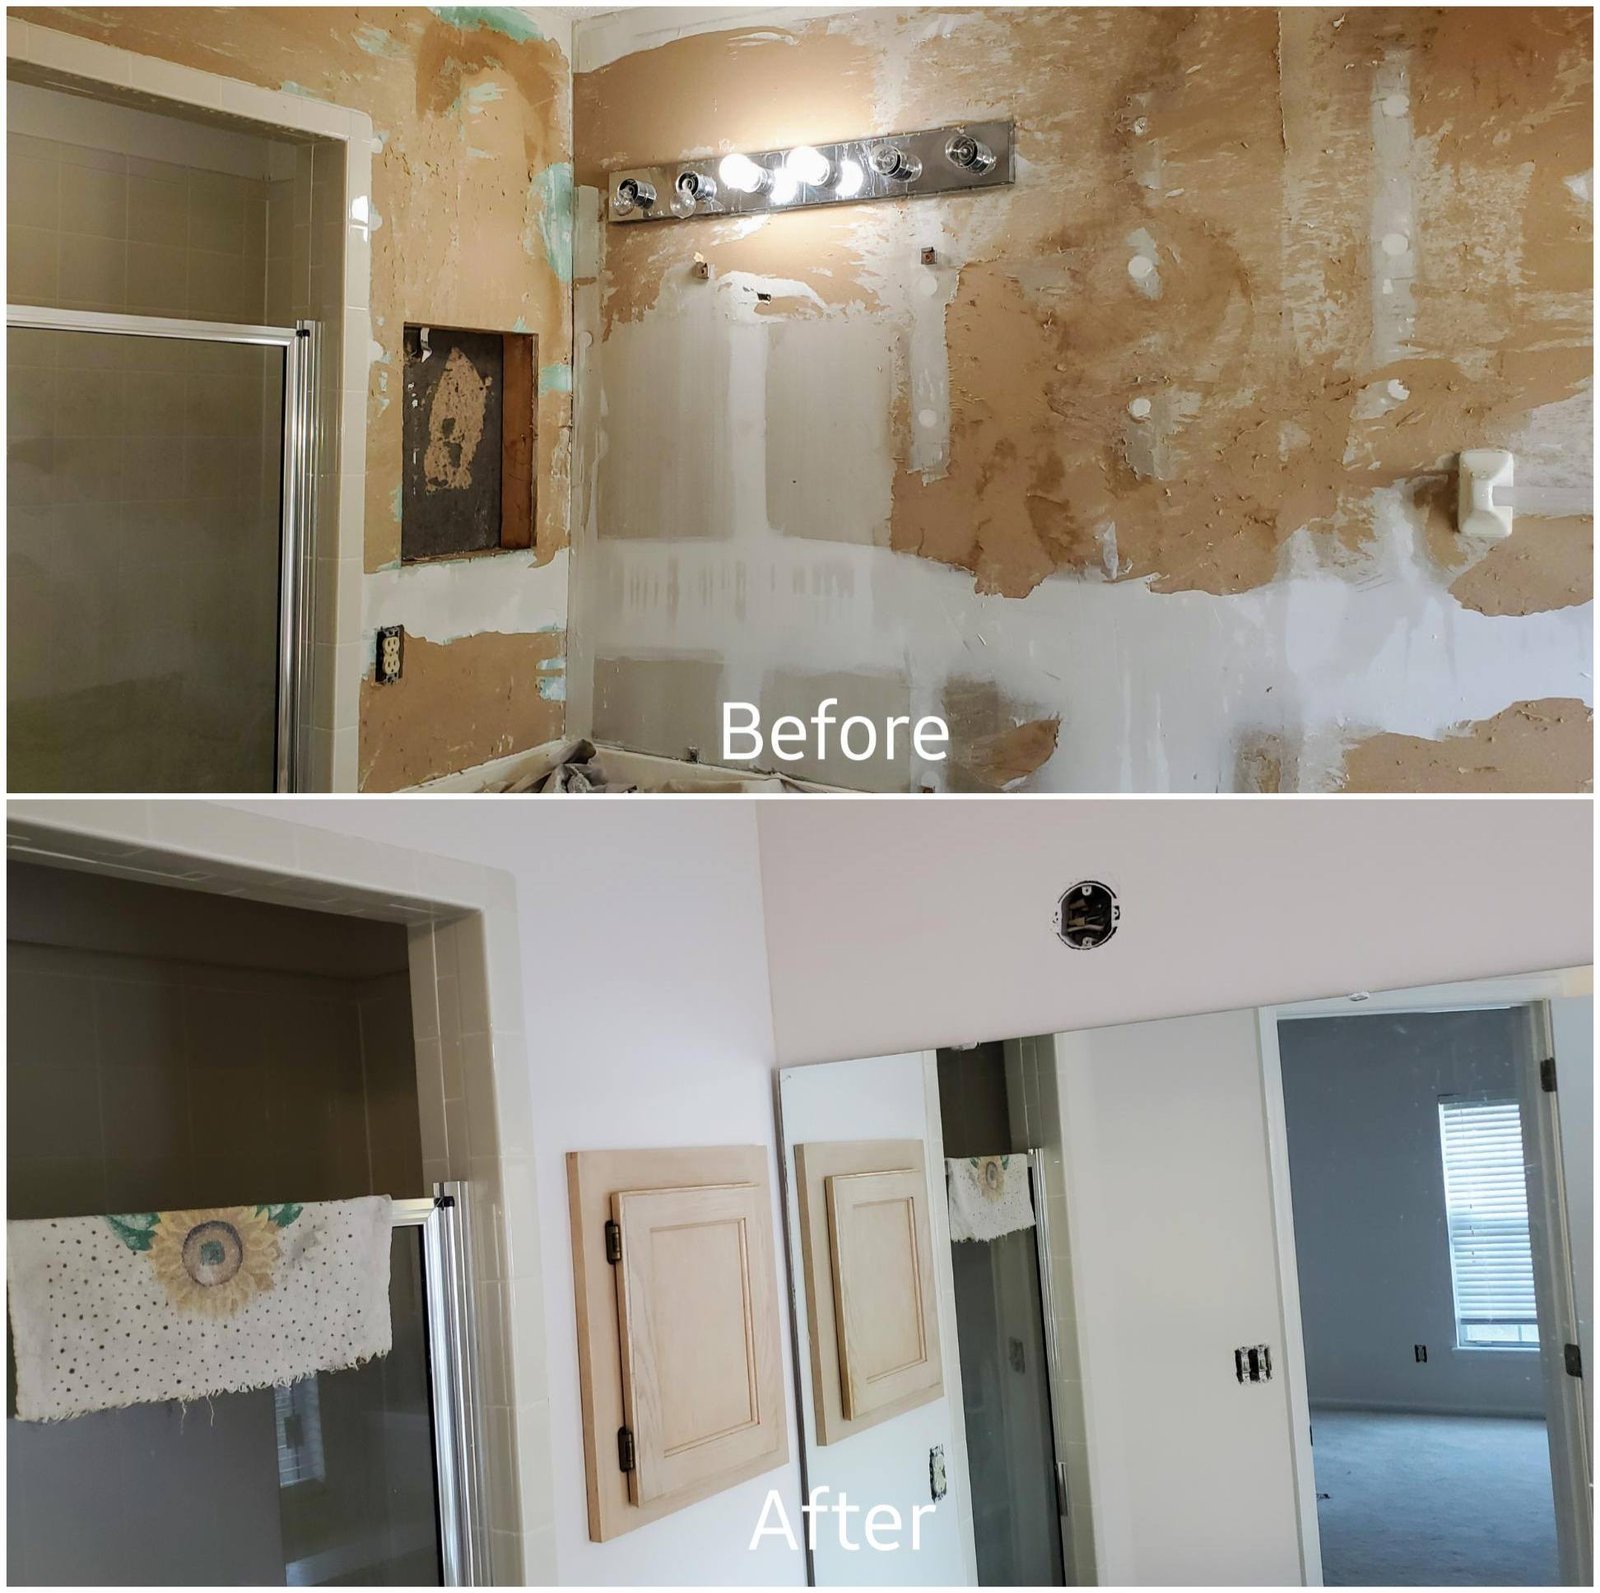
Here is the part most homeowners discover halfway through the job: the real risk is not the wallpaper — it is the drywall face paper underneath it. Drywall is gypsum pressed between two layers of paper, and that outer paper layer is the surface your paint sits on. If it tears, soaks through, or comes away attached to the wallpaper, you are no longer removing wallpaper. You are repairing drywall. Avoiding that is most of the skill in this work.
If the paper is heavily bonded, layered, or already damaging the wall surface, professional wallpaper removal can help prevent a simple update from turning into a larger drywall repair project.
Wallpaper itself is not the problem. Homeowners are removing dated paper from the 1980s and 1990s while others install new paper on accent walls and powder rooms. The goal is simply to get the old material off cleanly and leave a surface worth painting.
Once the walls are clean, repaired, sealed, and properly prepared, our interior painting services can take the project from bare drywall to a finished room with a smooth, durable paint system.
Before You Start: Identify the Wallpaper Type
Everything downstream depends on this. Pick an inconspicuous edge, work a putty knife under it, and see what happens.
- Strippable wallpaper. Lifts away dry in large sheets, leaving only adhesive behind. The best case, and more common in installations from the last twenty years.
- Peelable wallpaper. The decorative top layer peels off dry, but a paper backing stays stuck to the wall. That backing still has to come off with water and a scraper — many people stop at the top layer and paint over the backing, which causes problems later.
- Traditional uncoated paper. Absorbs water readily. Wets, softens and scrapes off with reasonable effort, though it tends to come away in small pieces rather than sheets.
- Vinyl-coated or solid vinyl. The hardest of the group. The coating that made it washable also seals it against your removal solution, so nothing reaches the adhesive until the surface is scored or the top layer peeled away. Around Jacksonville this is what you find in kitchens, bathrooms and laundry rooms from the 1970s through the 1990s.
If rooms test differently, treat each as its own project. It is common to find several types in one house.
Why Wallpaper Is Harder to Remove From Drywall
Older homes in Riverside, Avondale and parts of San Marco often have plaster, which is dense and far more forgiving of moisture and scraping. Most Jacksonville homes built from the 1950s onward have drywall, and drywall is fragile once wet. Four things make it difficult:
- Adhesive bonds directly to the face paper. If the drywall was never primed before papering — common on builder work — the adhesive soaked straight into the paper fibers. There is no separation layer; the glue and the wall surface have effectively become one thing.
- Over-wetting destroys drywall. Water softens adhesive, but the same water softens the face paper and eventually the gypsum core. Soak a wall too long or too often and you get bubbling, delamination and soft spots that will not take paint.
- Aggressive scraping tears paper. Once the surface is damp, a sharp scraper held at a steep angle gouges straight through. Most of the damage we see on jobs a homeowner started happened in the first hour, before they found the right angle and pressure.
- Layers compound everything. Wallpaper applied over wallpaper is common in older homes, and each layer needs its own pass. Some of the worst walls we encounter had three generations of paper on them.
Florida humidity adds a wrinkle: walls that seem dry often are not, and residue that looks gone can reappear as a sticky film once the room warms up.
Tools You May Need
- Drop cloths and plastic sheeting
- Painter’s tape
- Broad knife or wallpaper scraper — a wide blade gives better control than a narrow putty knife
- Scoring tool, for coated papers only
- Pump sprayer
- Wallpaper removal solution
- Sponges and clean water
- Wallpaper steamer, if solution alone is not working
- Utility knife
- Sanding sponge
- Joint compound
- Sealing primer appropriate to whatever the walls turn out to need
Step-by-Step: How to Remove Wallpaper From Drywall
- Protect the room. Remove switch and outlet covers and tape over the openings to keep moisture out of the boxes. Kill power to the room at the breaker if you will be working close to outlets. Lay plastic and drop cloths, and tape along baseboards, chair rail and wainscoting.
- Test a corner first. Lift an edge dry before you wet anything. If it strips cleanly, you may not need water at all, and you will have saved yourself the mess.
- Remove the decorative face layer. On peelable and vinyl papers, pull the top layer away dry wherever it will come. Anything you remove dry is adhesive you do not have to dissolve through.
- Score only if you have to. Coated vinyl needs scoring so solution can reach the glue. Use light pressure and keep the tool moving — pressed hard, it perforates the drywall face and leaves you patching hundreds of small holes.
- Apply removal solution. Work a manageable section at a time, roughly what you can scrape before it dries. Wet it thoroughly but do not flood it.
- Let the adhesive soften. This is where patience pays. The paper is ready when it releases under light pressure instead of tearing. If you are fighting it, it needs more time or another application, not more force.
- Scrape carefully. Hold the blade at a low angle, close to parallel with the wall, and let the tool slide under the paper rather than dig into it. If you feel the blade catch, stop and re-wet.
- Use steam only when needed. A steamer works on stubborn coated papers, but drives far more moisture into the wall than a sprayer. Keep the plate moving, work short passes, stop as soon as the paper releases.
- Remove the remaining adhesive. Nearly every job leaves glue behind. This step gets its own section below because it is the one people most often skip.
- Let the walls dry, then inspect. Dry them completely — in Florida humidity that takes longer than most people expect, and running the air conditioning helps more than opening windows. Then check the wall in raking light from a work lamp held close to the surface, which reveals torn paper, bubbles and residue that ceiling lights hide.
What to Do If the Drywall Paper Tears
Some tearing is normal, around outlets, corners and edges. What matters is how you handle it.
Do not paint directly over exposed, fuzzy drywall paper. Torn face paper is raw and absorbent. Roll wet paint onto it and the fibers swell and lift, leaving a permanently rough, blistered texture no amount of additional coats will smooth out. The fix then is sanding and skim coating — far more work than sealing it properly first.
The sequence that works:
- Trim loose edges. Cut away anything hanging or lifting with a sharp utility knife so you have a stable edge. Do not pull at it — pulling widens the damage.
- Seal the damaged areas. Exposed drywall paper needs a sealing primer that locks the fibers down before anything wet touches them. Which product is appropriate depends on what else is on the wall, so this is worth asking about rather than guessing.
- Skim coat where needed. Once sealed, a thin coat of joint compound brings the damaged area back level with the surrounding wall. Badly torn walls sometimes need a full skim coat rather than spot repairs — a judgment call based on how much of the surface is affected.
- Sand and prime. Sand the repairs flat, then prime the whole wall so the repaired and undamaged areas absorb paint the same way.
If a wall has extensive tearing, soft spots, or damage around corners and openings, professional drywall repair is usually faster and produces a better finish than working through it a patch at a time.
How to Remove Wallpaper Glue Before Painting
Adhesive residue is the most under-appreciated part of this job. Walls can look clean and still be coated in a thin, invisible film of old glue — and painting over it causes real problems:
- Poor adhesion, where paint releases from the wall later
- Bubbling as the water in the paint reactivates the old adhesive
- Flashing and uneven sheen, where some areas look glossier than others
- A subtly rough or tacky texture that shows in side light
- Peeling months or years down the line
Work with warm water or a remover solution and a sponge, rinsing often — a dirty sponge just moves glue around. Expect multiple passes; decades-old adhesive rarely gives up on the first attempt. Keep the wall damp rather than saturated. You are dissolving a film, not washing a floor, and every extra gallon is more moisture going into the drywall.
Before you prime, test. Run a clean, damp sponge over a section and feel it — slickness or drag means glue is still there. You can also press a strip of painter’s tape onto the dry wall and pull it: if it comes away too easily, the surface is still contaminated.
How to Prepare Walls for Paint After Wallpaper Removal
The order matters, and skipping steps here is where most disappointing paint jobs begin.
- Clean. All adhesive residue removed and rinsed.
- Dry. Completely, not mostly. Damp drywall traps moisture behind primer.
- Repair. Fill dents, gouges, seam damage and old fastener holes with joint compound.
- Sand. Grit depends on what you are sanding. Fine grit knocks down light residue and fuzz without cutting the face paper; repairs and skim coats need something coarser to level, then a finer pass. Matching grit to the surface matters more than any single number.
- Seal. Torn paper, stains, and any remaining residue need a sealing primer before standard wall primer.
- Prime. Prime the entire wall, not just the repairs, so the surface absorbs paint uniformly.
- Paint. Two coats over properly prepared walls outperform three over a compromised surface.
Walls coming out of wallpaper rarely look like new drywall, and they do not have to. What they need is a surface that is sound, sealed and uniform. Our Interior Painting Resource Center goes deeper on sheens and sequencing, and our interior painting services page explains how we handle prep in occupied homes.
When DIY Wallpaper Removal Makes Sense
Plenty of homeowners do this successfully. It is reasonable when most of the following are true:
- One room, ideally a small one
- The paper is strippable and comes off in sheets during your corner test
- The walls were primed before papering, so adhesive releases rather than soaking in
- There is a single layer, not several
- Ceilings are standard height and reachable from a step ladder
- You are comfortable patching, sanding and priming if something tears
- You have the time to let walls dry properly rather than rushing to paint
When to Hire a Professional
The calculation changes quickly. Consider bringing someone in when:
- Multiple rooms are papered, or the paper runs through hallways and open spaces
- The wallpaper is vinyl-coated and resisting everything you try
- The drywall was never primed and adhesive has bonded to the face paper
- Walls are already tearing, gouging or going soft
- There are several layers of paper
- Adhesive is heavy and multiple cleaning passes are not touching it
- The work involves two-story stairwells, vaulted ceilings or anything needing staging
- The walls will need skim coating to be paintable
- You have already started and the room is going backwards
That last one is worth saying plainly: a half-stripped room with torn walls is harder to price and slower to fix than one nobody has touched, so stopping early beats pushing through. Professional wallpaper removal generally includes the repair and prep work, which is what determines how the finished walls look.
Wallpaper Removal and Interior Painting in Jacksonville
A New Leaf Painting Contractors has worked on Northeast Florida homes since 2001, and wallpaper removal is rarely a standalone job. It arrives as a sequence: remove the paper, clean the adhesive, repair and skim the drywall, seal and prime, then paint. Pricing a wallpaper project without accounting for the repair stage is the most common way these jobs go wrong.
We handle wallpaper removal services, drywall repair and interior painting as one project throughout Jacksonville and nearby communities including Mandarin, Nocatee, Fleming Island and St. Augustine. If you would like an assessment before deciding whether to take it on yourself, call 904-615-6599 and we will tell you honestly what the walls are likely to need.
Related Painting Resources
- Interior Painting Resource Center — guides on prep, sheens, problem surfaces and what a professional interior job includes
- Wallpaper removal
- Drywall repair
- Residential painting services
- For exterior projects, homeowners can also visit our Exterior Painting Resource Center.