
Field Case Study · Jacksonville, FL 32246
Stucco Repair, Substrate Damage & Exterior Painting — Jacksonville, FL 32246
This Jacksonville exterior needed far more than a new coat of paint. Years of exposure and deferred maintenance had left the home with deteriorated caulking, extensive preparation needs, and several localized areas of loose and delaminated stucco.
As preparation moved forward, approximately three to four affected stucco areas had to be opened and addressed. Once the unsound stucco was removed, deteriorated OSB sheathing became visible behind the finish. That damaged substrate had to be repaired before our stucco repair work could restore and texture the affected exterior sections for preparation and coating.
Before painting, our crews completed the necessary substrate repairs, stucco restoration, texture work, caulking, surface preparation, protection, and priming required by the project. Our exterior painting system included Sherwin-Williams® Loxon® XP on the stucco body, Latitude® on the trim, and a Pro Industrial® coating on the soffits and fascia.
This project is a good example of why the condition underneath the paint matters just as much as the finished color. The photographs below document the progression from localized stucco failure and exposed substrate damage through completed repairs, preparation, and the finished exterior.
Project at a Glance
Project Type
Exterior Stucco Repair & Painting
Location
Jacksonville, FL 32246
Property
Large residential stucco home
Contractor
A New Leaf Painting Contractors
Body / Stucco Coating
Sherwin-Williams® Loxon® XP
Trim Coating
Sherwin-Williams® Latitude®
Soffit & Fascia Coating
Sherwin-Williams® Pro Industrial®
Conditions Addressed
- Neglected exterior requiring extensive preparation
- Failed and deteriorated caulking
- Localized stucco delamination — approximately 3–4 areas
- Damaged OSB sheathing found in the affected areas
- Stucco repair and texture restoration
- Full-scale surface preparation before coating
Step 01 — What We Started With
A Neglected Exterior
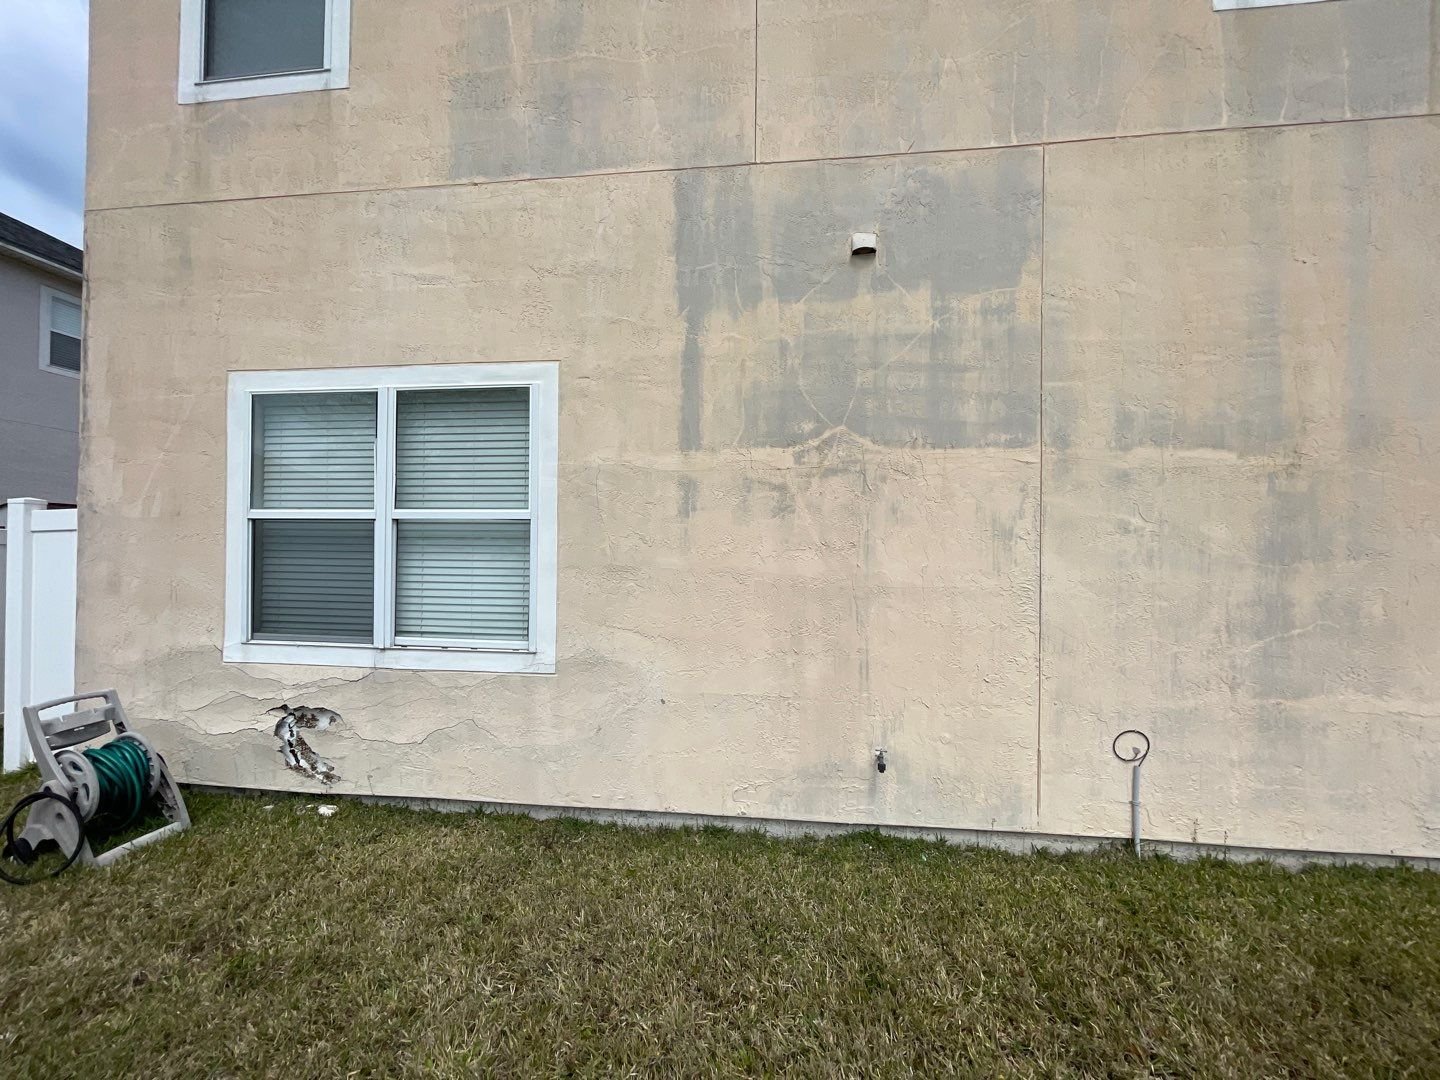
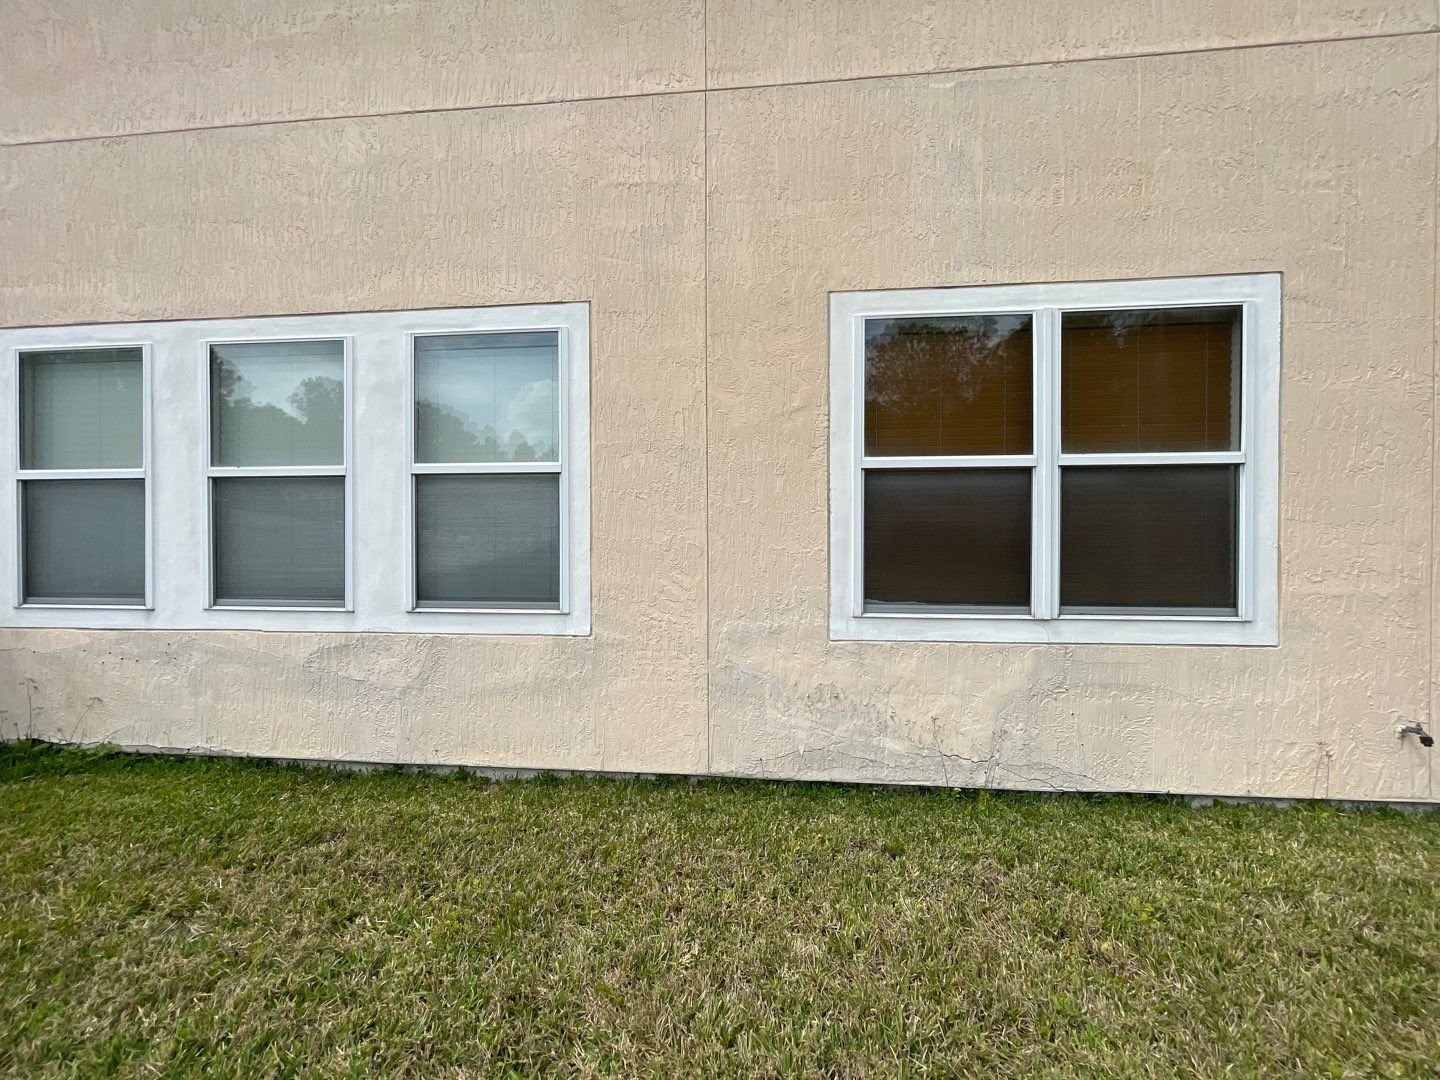
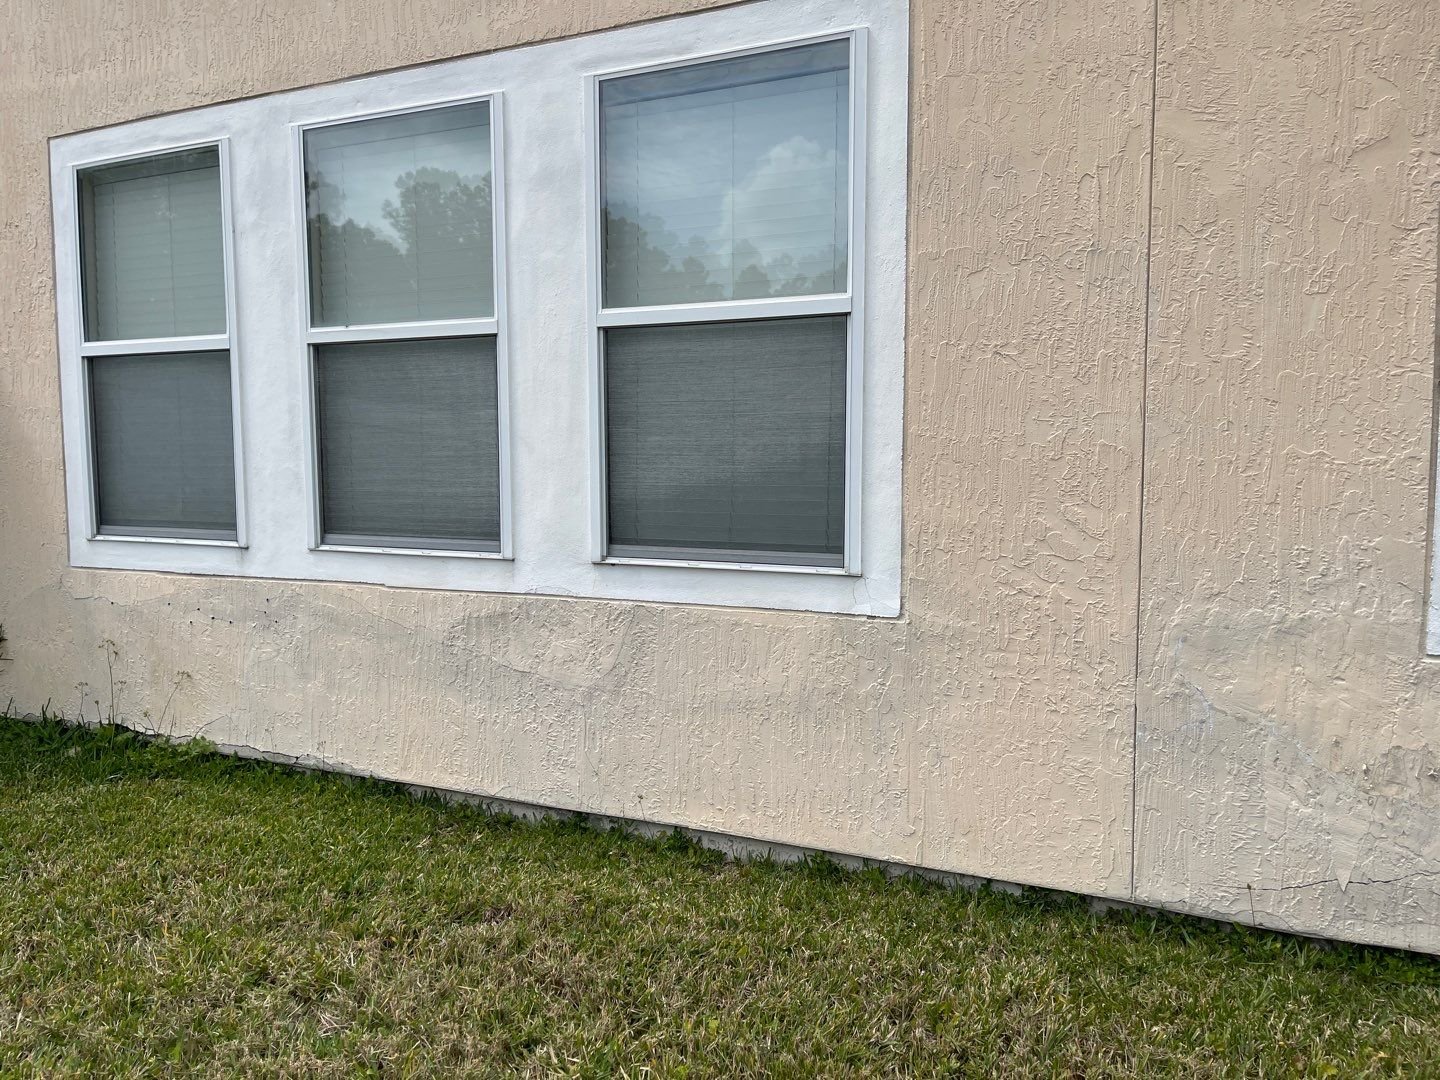
This home came to us as an exterior repaint. From the finished surface, the most obvious need was new paint — but the evaluation showed that several areas required repair before coating.
Sealant had failed and deteriorated in multiple locations. Several areas of the stucco didn’t sound or feel like the wall around them. The exterior needed substantial preparation before a coating would have sound material to bond to.
Step 02 — What the Evaluation Revealed
Localized Stucco Delamination
Across the exterior, our crews identified approximately three to four localized areas where the stucco had delaminated — bulging in places, separating from the wall in others, and loose enough that a coating applied over it would have been bonded to material that was no longer securely attached.
Worth being precise about scale here: this was not a whole-house delamination condition. The affected areas were localized to approximately three to four locations that needed to be opened and repaired. The principle behind stucco delamination applies either way — paint cannot reattach stucco that has lost bond, regardless of how good the product is.
Step 03 — Opening the Failed Areas
Damaged OSB Behind the Stucco
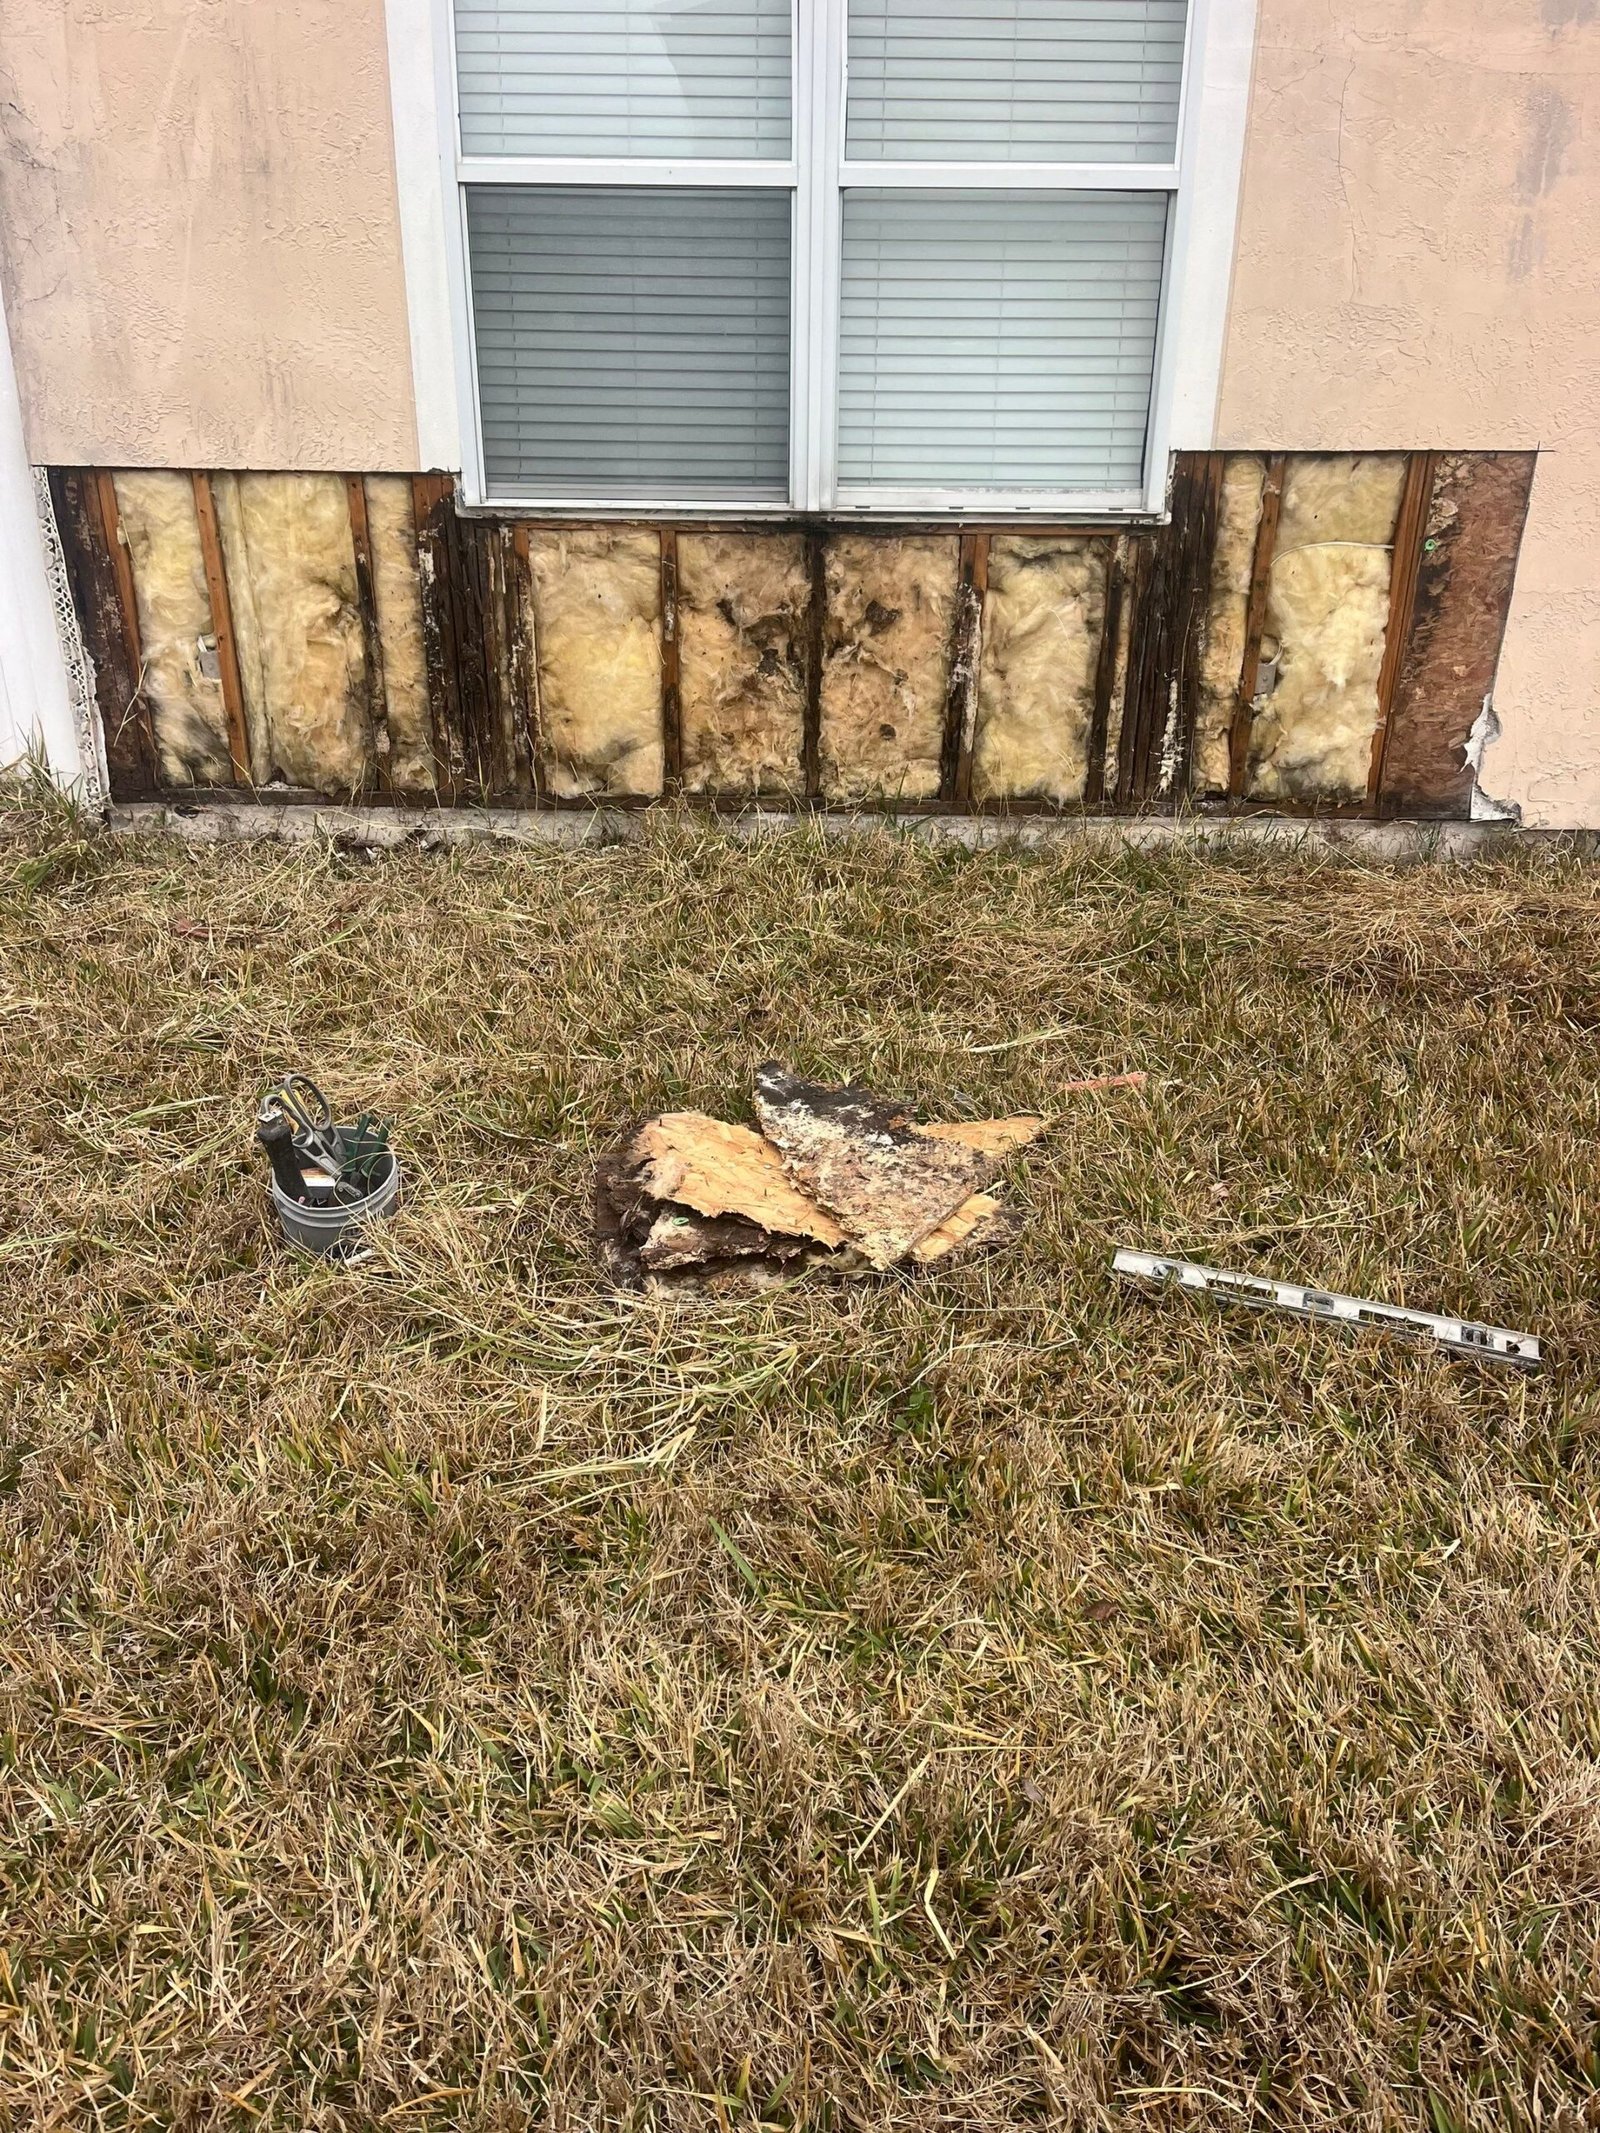
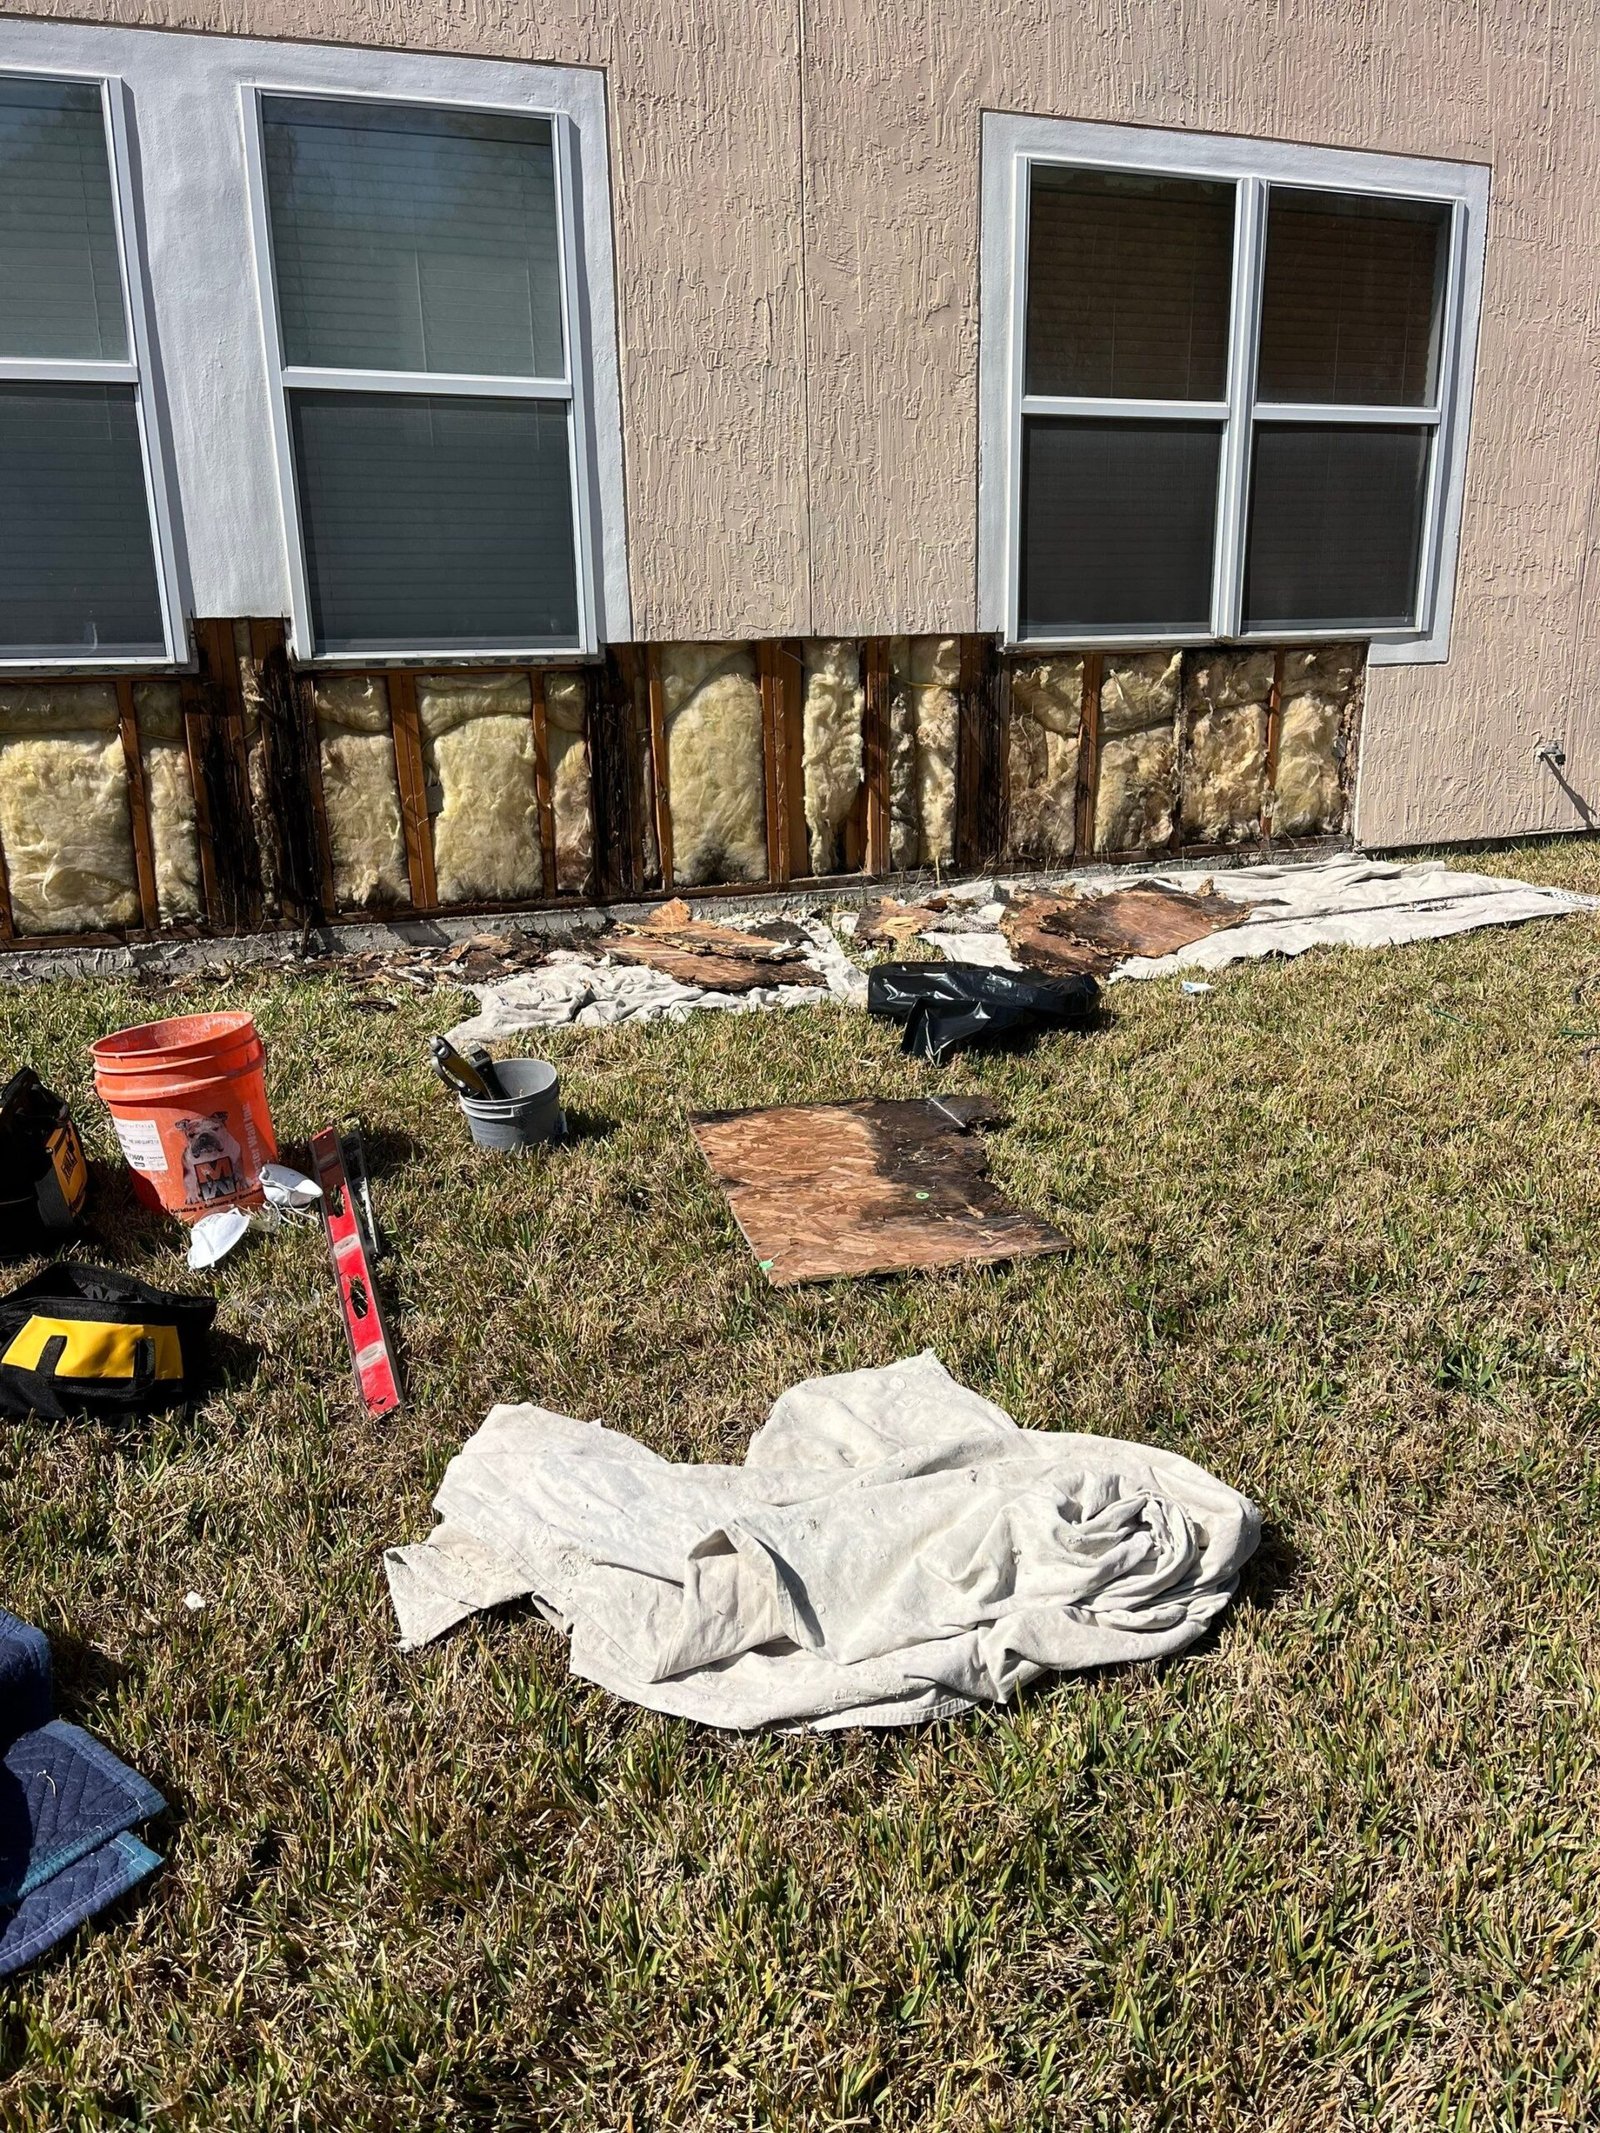
Once the failed stucco was removed and the affected areas were opened sufficiently to address the unsound material, deteriorated OSB sheathing was visible behind them.
We’re describing what became visible, not why it happened. Establishing the original cause of substrate deterioration is outside what a painting and stucco repair contractor can determine from an opened wall, and we’re not going to speculate about it here.
What we can say is that the condition changed the scope. Deteriorated sheathing is not something to be patched over, primed, caulked, or coated. It had to be addressed before the stucco assembly could be rebuilt.
Field Note: What Was Behind the Stucco?
The damaged OSB was not something to conceal with patching compound, primer, caulk, or another coat of paint. Once the unsound stucco came off and the deteriorated sheathing became visible, that substrate needed to be addressed before the exterior finish could be properly restored.
This does not mean every stucco crack, hollow area, or paint blister indicates damaged sheathing. It demonstrates why visibly loose or delaminated stucco should be evaluated rather than simply coated over.
Step 04 — Repairing the Substrate
Substrate First, Then the Finish
Within the repair scope on this project, deteriorated OSB was removed and replaced as required in the affected areas. Only after the substrate was sound did work move to rebuilding the stucco over it.
That order isn’t a preference. The condition of the substrate matters because rebuilding the exterior finish over deteriorated sheathing would leave the underlying damage unresolved.
Step 05 — Restoring & Texturing the Stucco
Rebuilding the Stucco Assembly
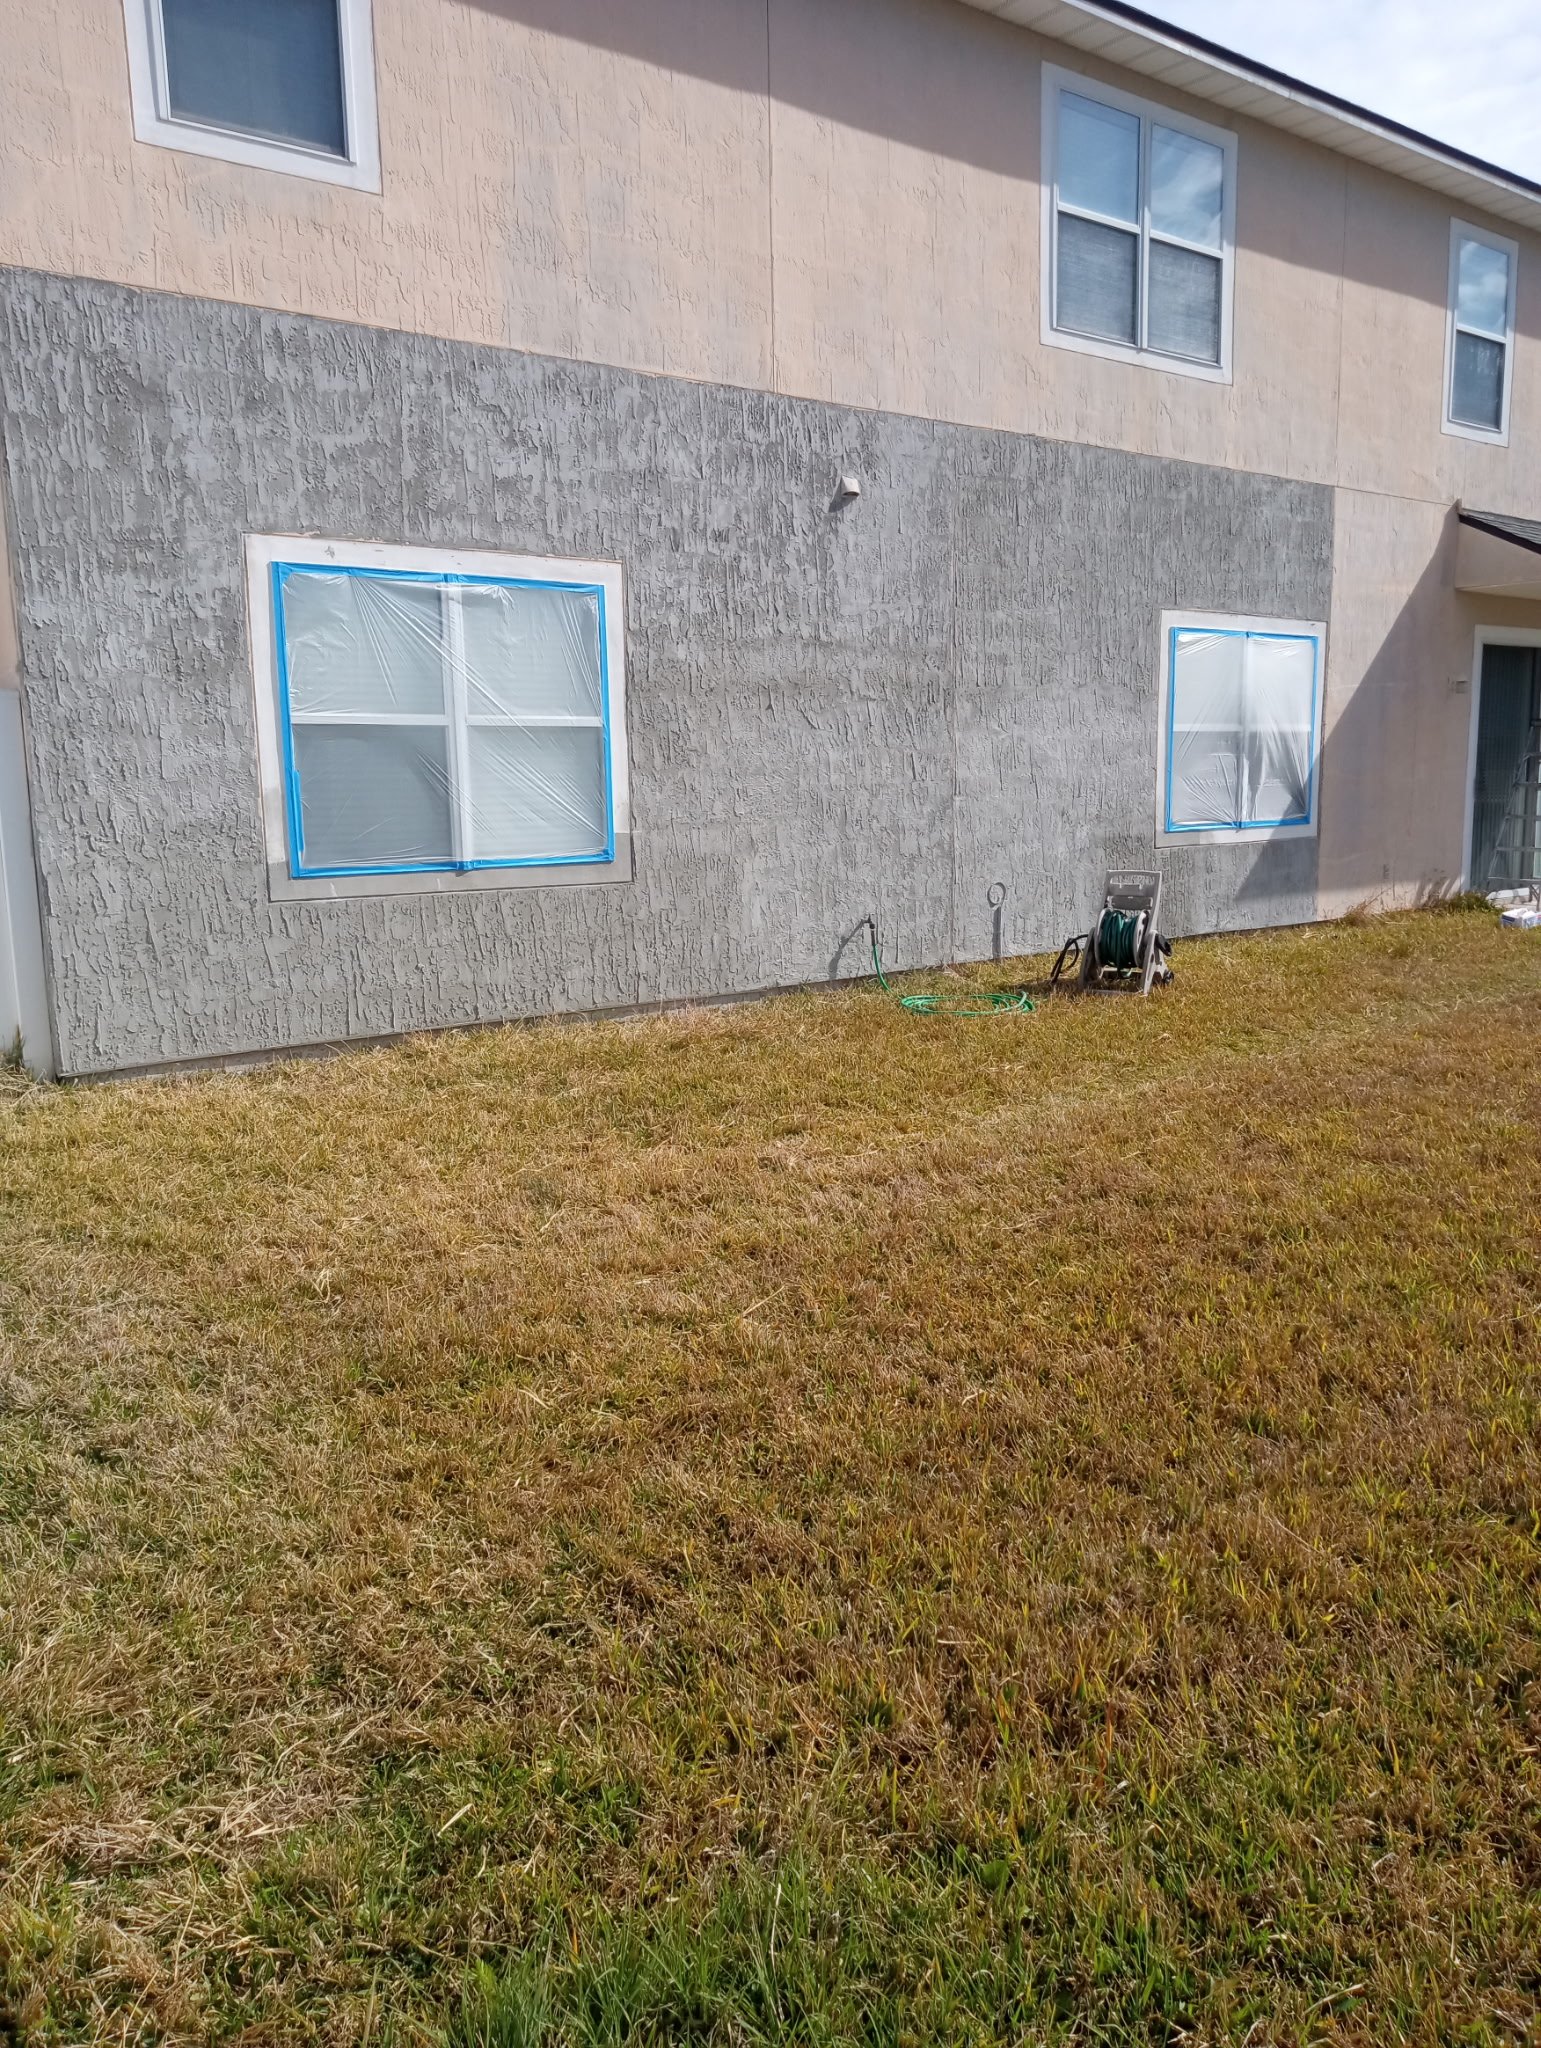
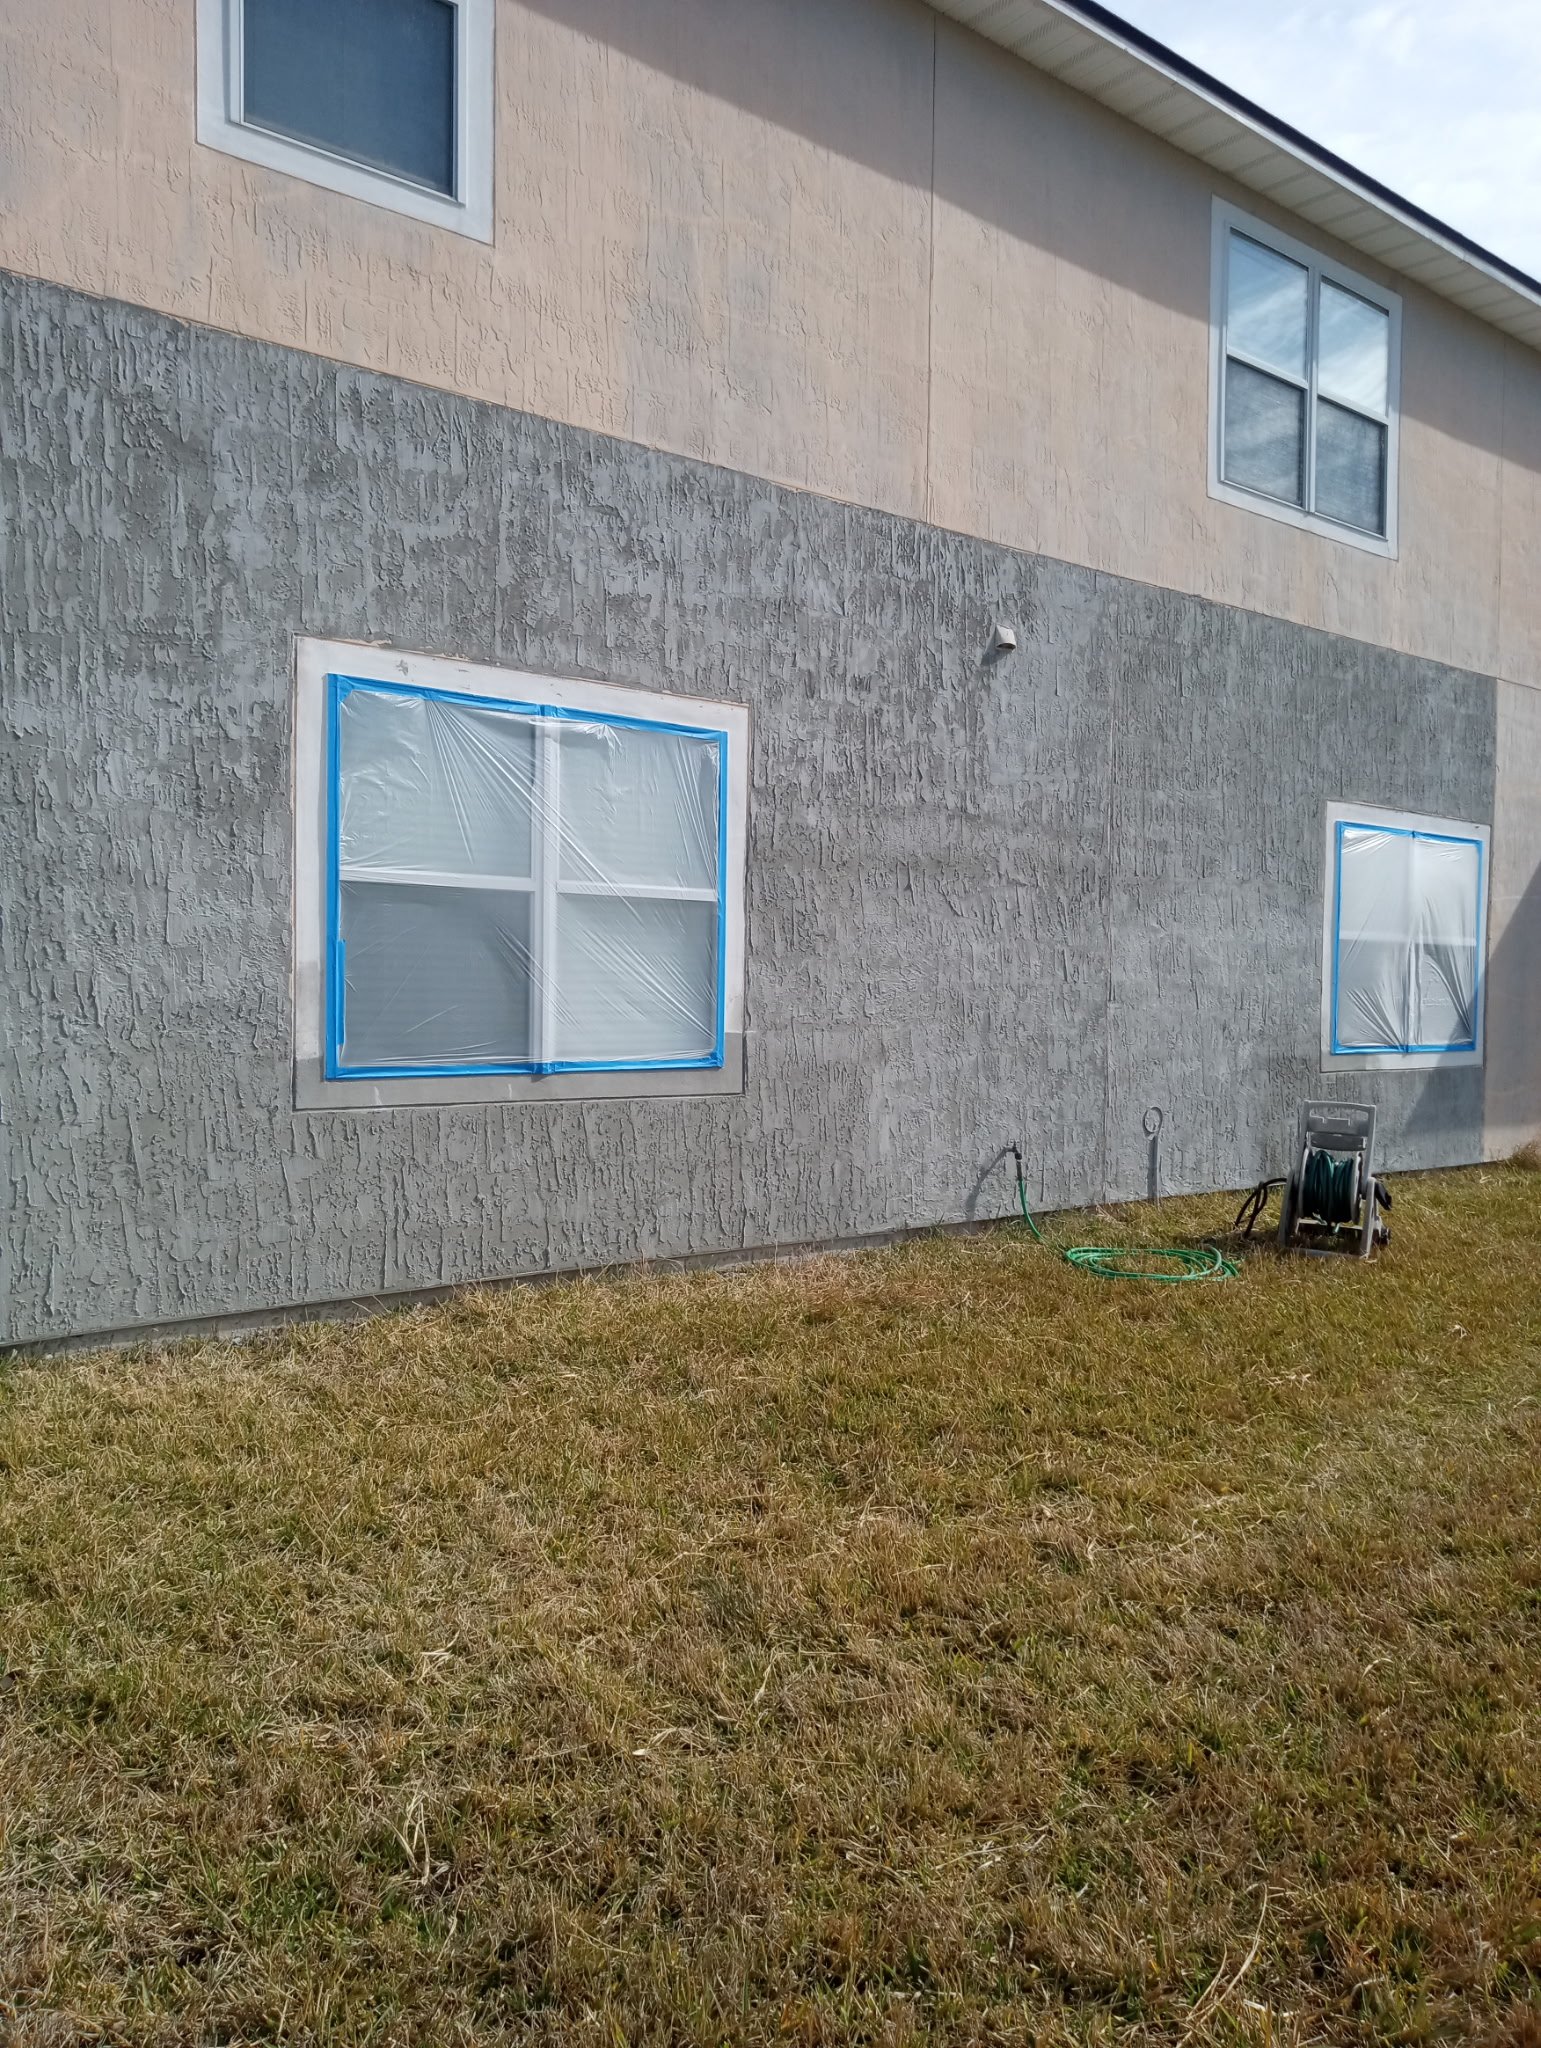
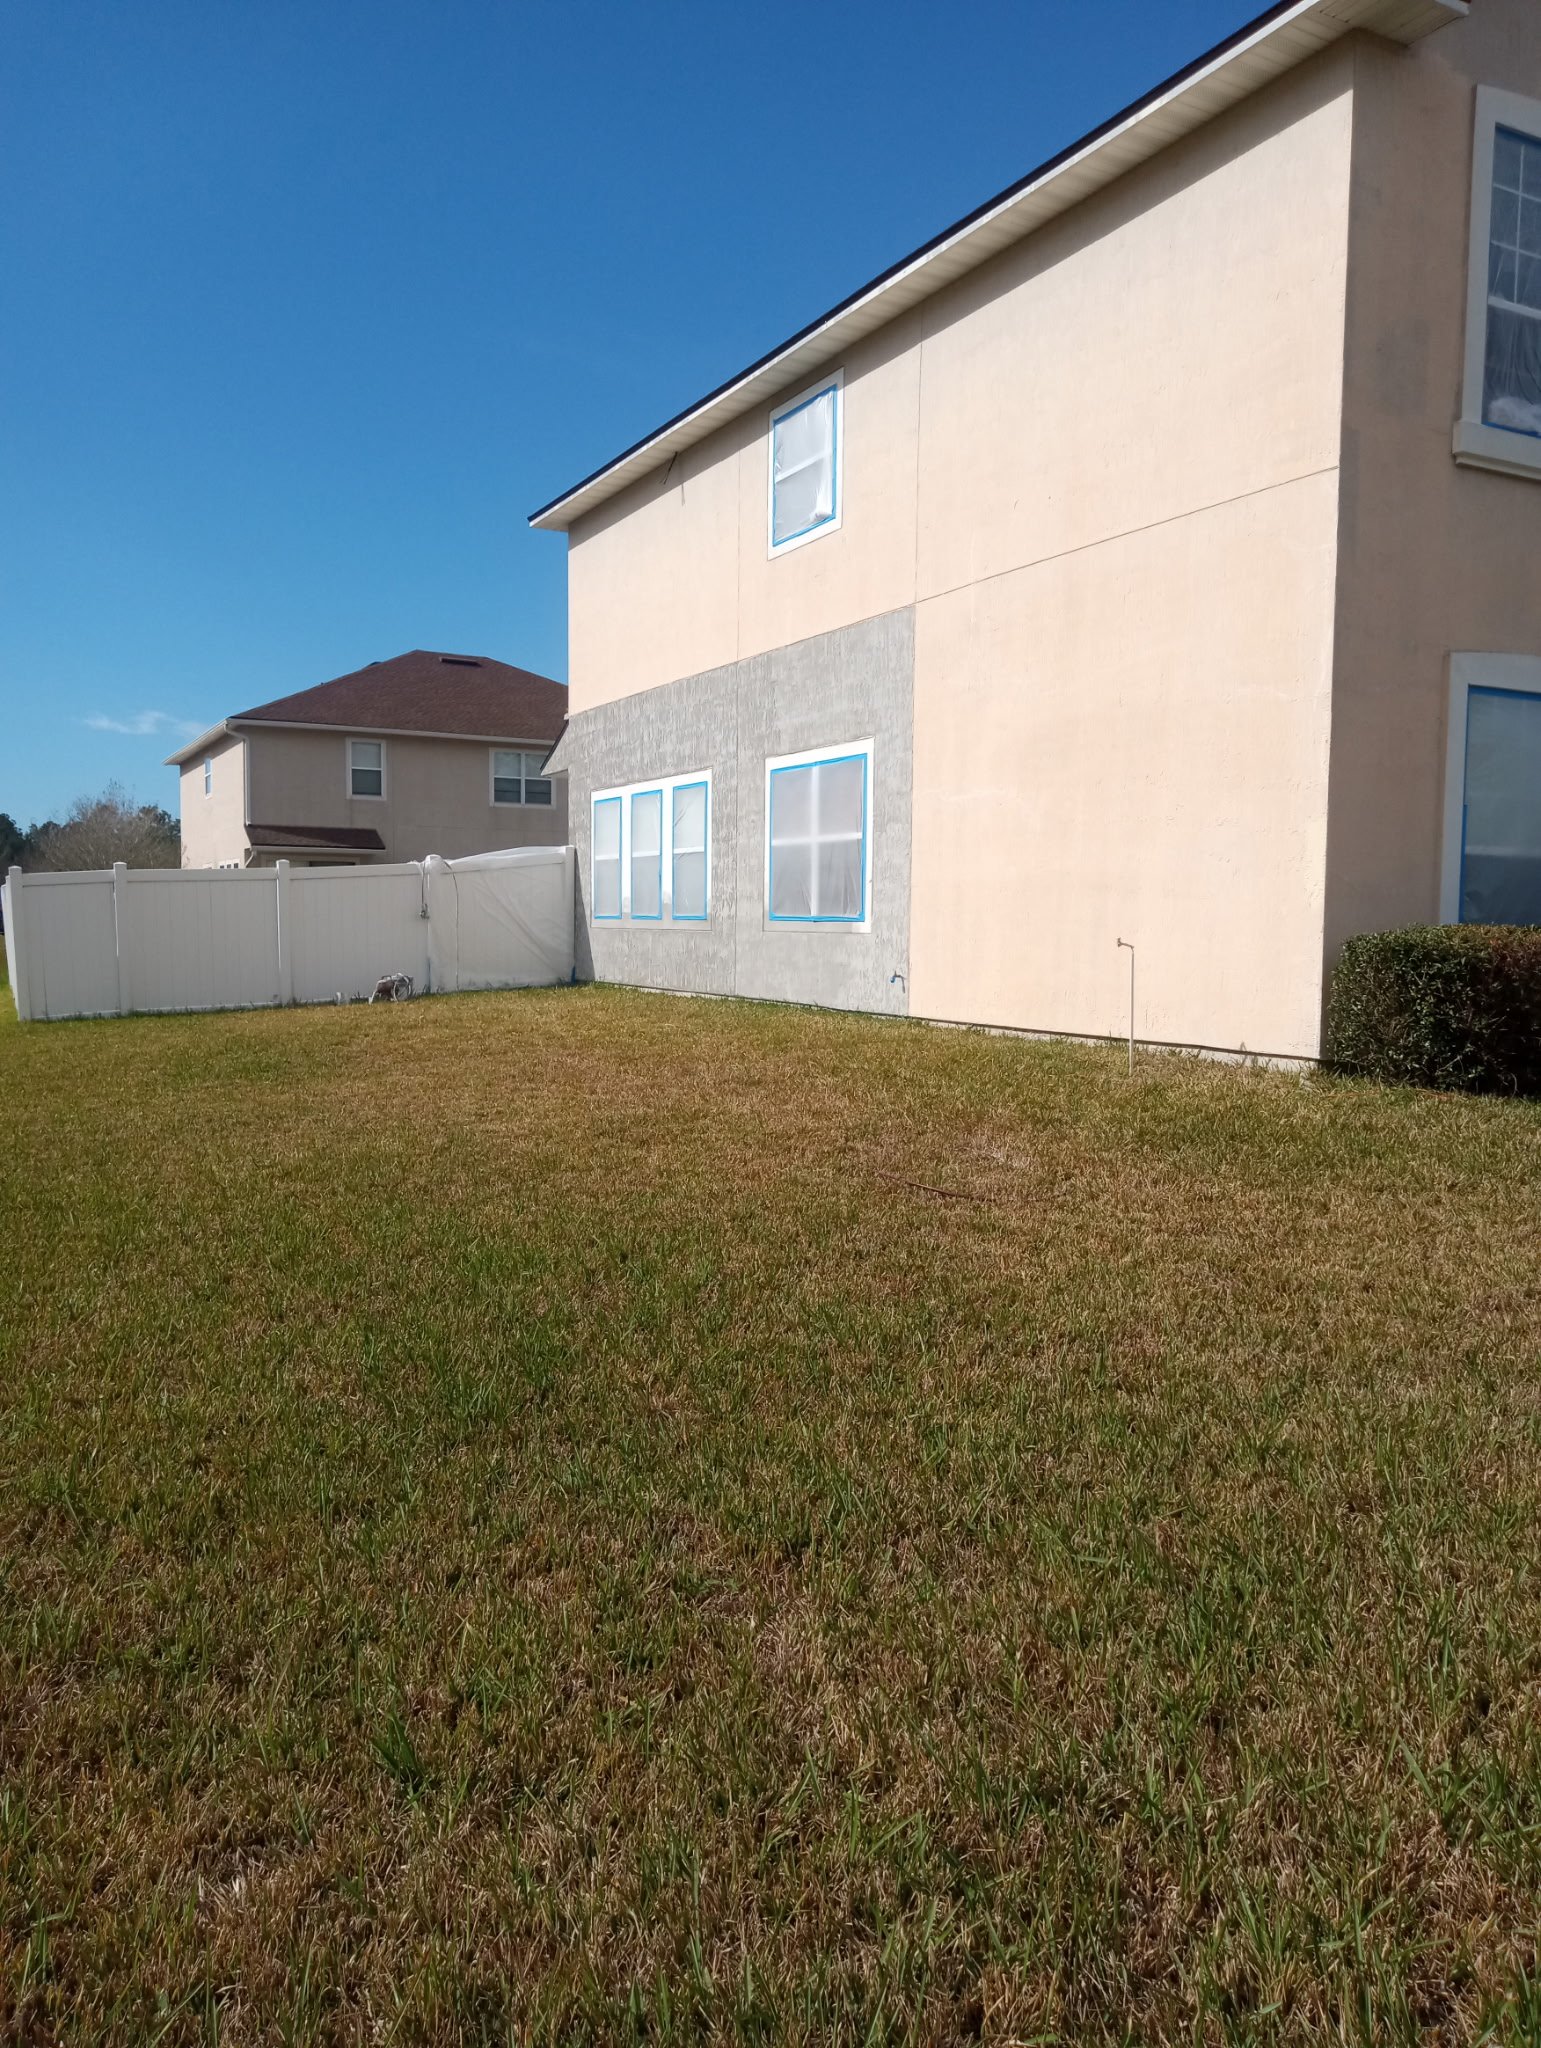
With the substrate repaired, the stucco assembly was restored in each affected area. The repaired sections then received texture work to blend them with the surrounding exterior.
Texture matters more than homeowners expect. A structurally sound repair that reads as a patch in raking light is still a visible repair, and it stays visible through the coating. On a project with three to four separate repair areas across the exterior, blending them into the surrounding finish is a meaningful part of the work rather than a finishing touch.
Step 06 — Full-Scale Preparation
Why Preparation Became the Project
Beyond the repair areas, the whole exterior needed full-scale preparation. Failed and deteriorated caulking was addressed across the home. Trim, fascia, and soffit surfaces were prepared alongside the stucco body. Adjacent surfaces were masked and protected. Repaired areas and bare substrate were primed as the scope required.
Much of that preparation disappears beneath the finished coating, but it plays a major role in what the final paint system is being applied over. Our guide on surface preparation explains how substrate condition and preparation can directly affect coating adhesion, appearance, and long-term performance.
Field Note: Why Preparation Became the Project
On a neglected exterior, the finished paint is only one part of the work. The quality of the finished coating depends heavily on what it’s being applied over.
For this project, that meant addressing failed sealant, localized delamination, damaged substrate, stucco restoration, texture, priming, surface preparation, and protection — before calling the project complete.
Repair → preparation → coating. In that order, every time.
Step 07 — The Coating System
Three Surfaces, Three Coatings
This exterior wasn’t painted with one product. Different substrates and architectural components can receive different coating products as part of a project specification, and the system here was matched to the surfaces included in this project rather than applied as a standard for every home.
Body / Stucco
Sherwin-Williams® Loxon® XP
Sherwin-Williams® Loxon® XP was specified for the stucco body on this project.
Trim
Sherwin-Williams® Latitude®
Sherwin-Williams® Latitude® was specified for the trim surfaces on this project.
Soffits & Fascia
Sherwin-Williams® Pro Industrial®
A Sherwin-Williams® Pro Industrial® product was specified for the soffit and fascia surfaces included in this project.
To be clear about what a coating does and doesn’t do: none of these products waterproofs a wall or prevents moisture intrusion. They’re the final protective and decorative layer over a properly repaired and prepared exterior. The repair work is what addressed the failed material.
Step 08 — Finished Exterior
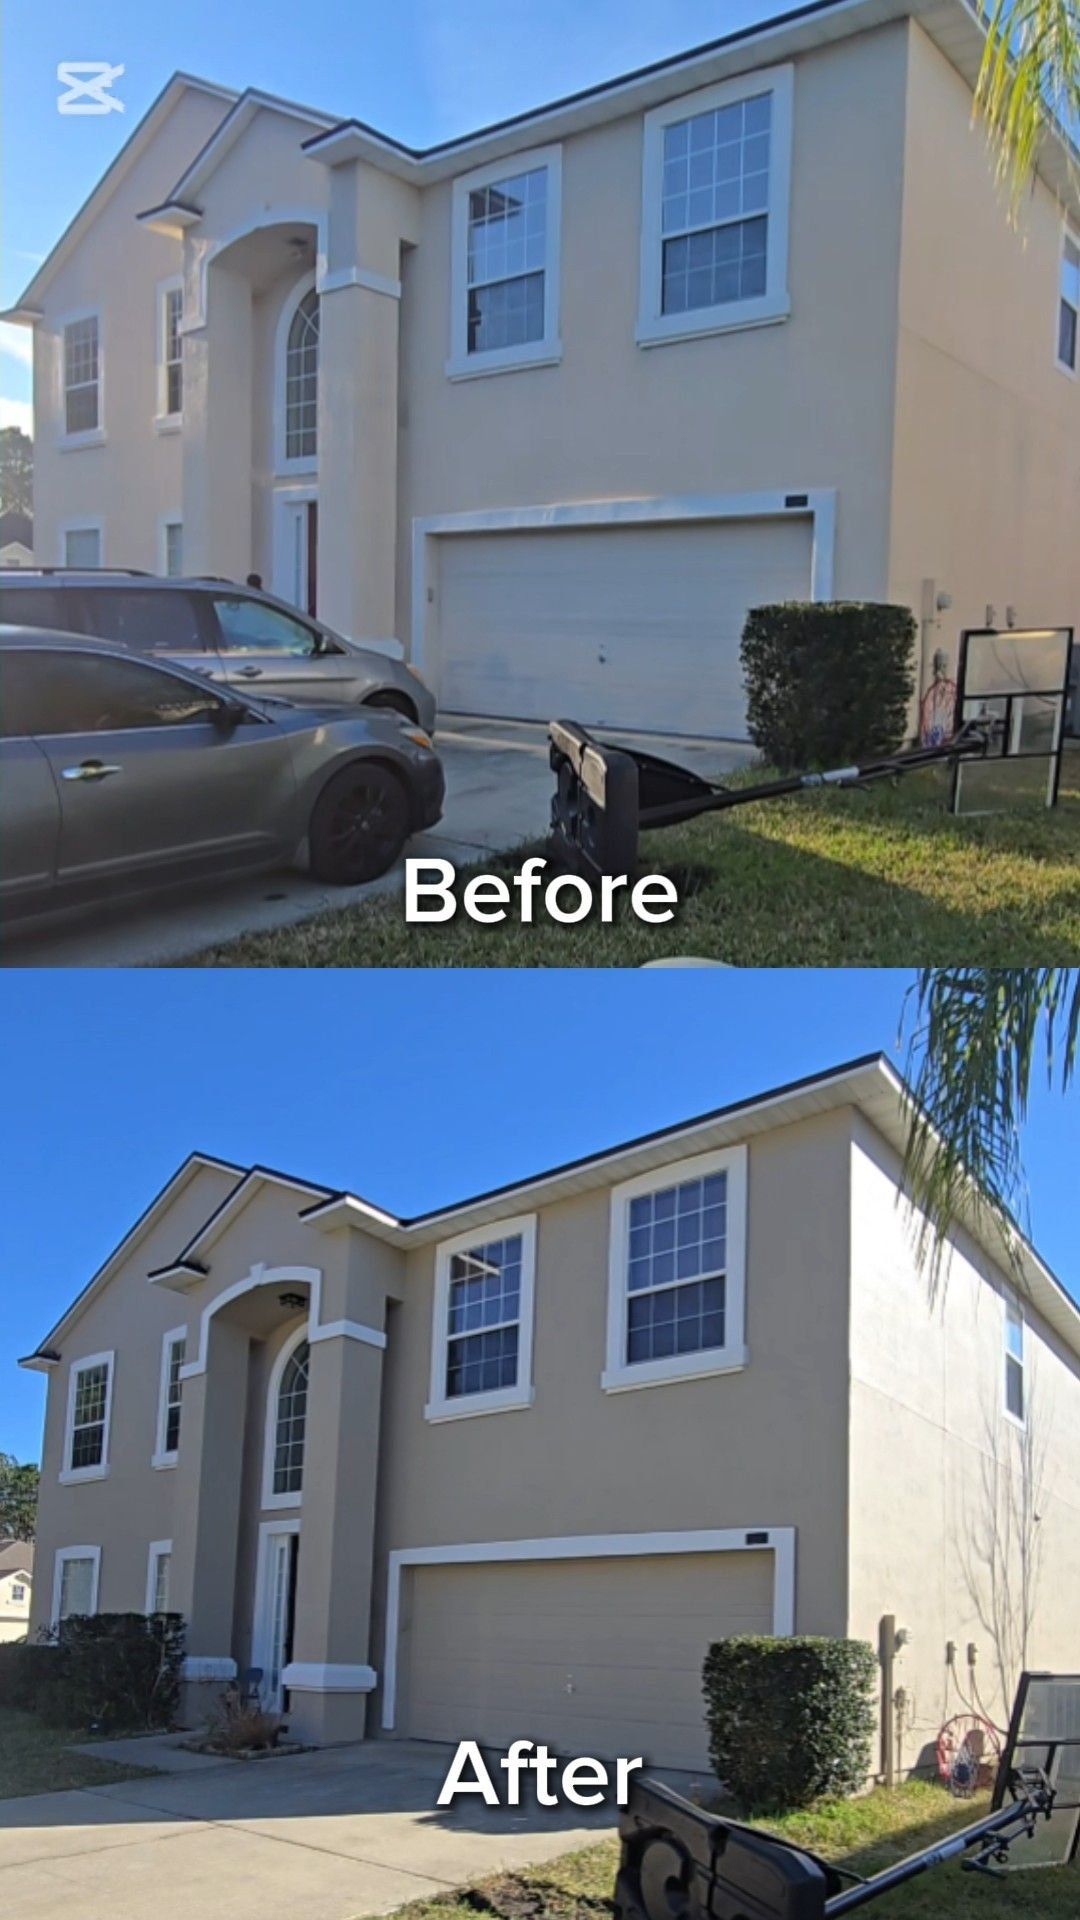
Before and After
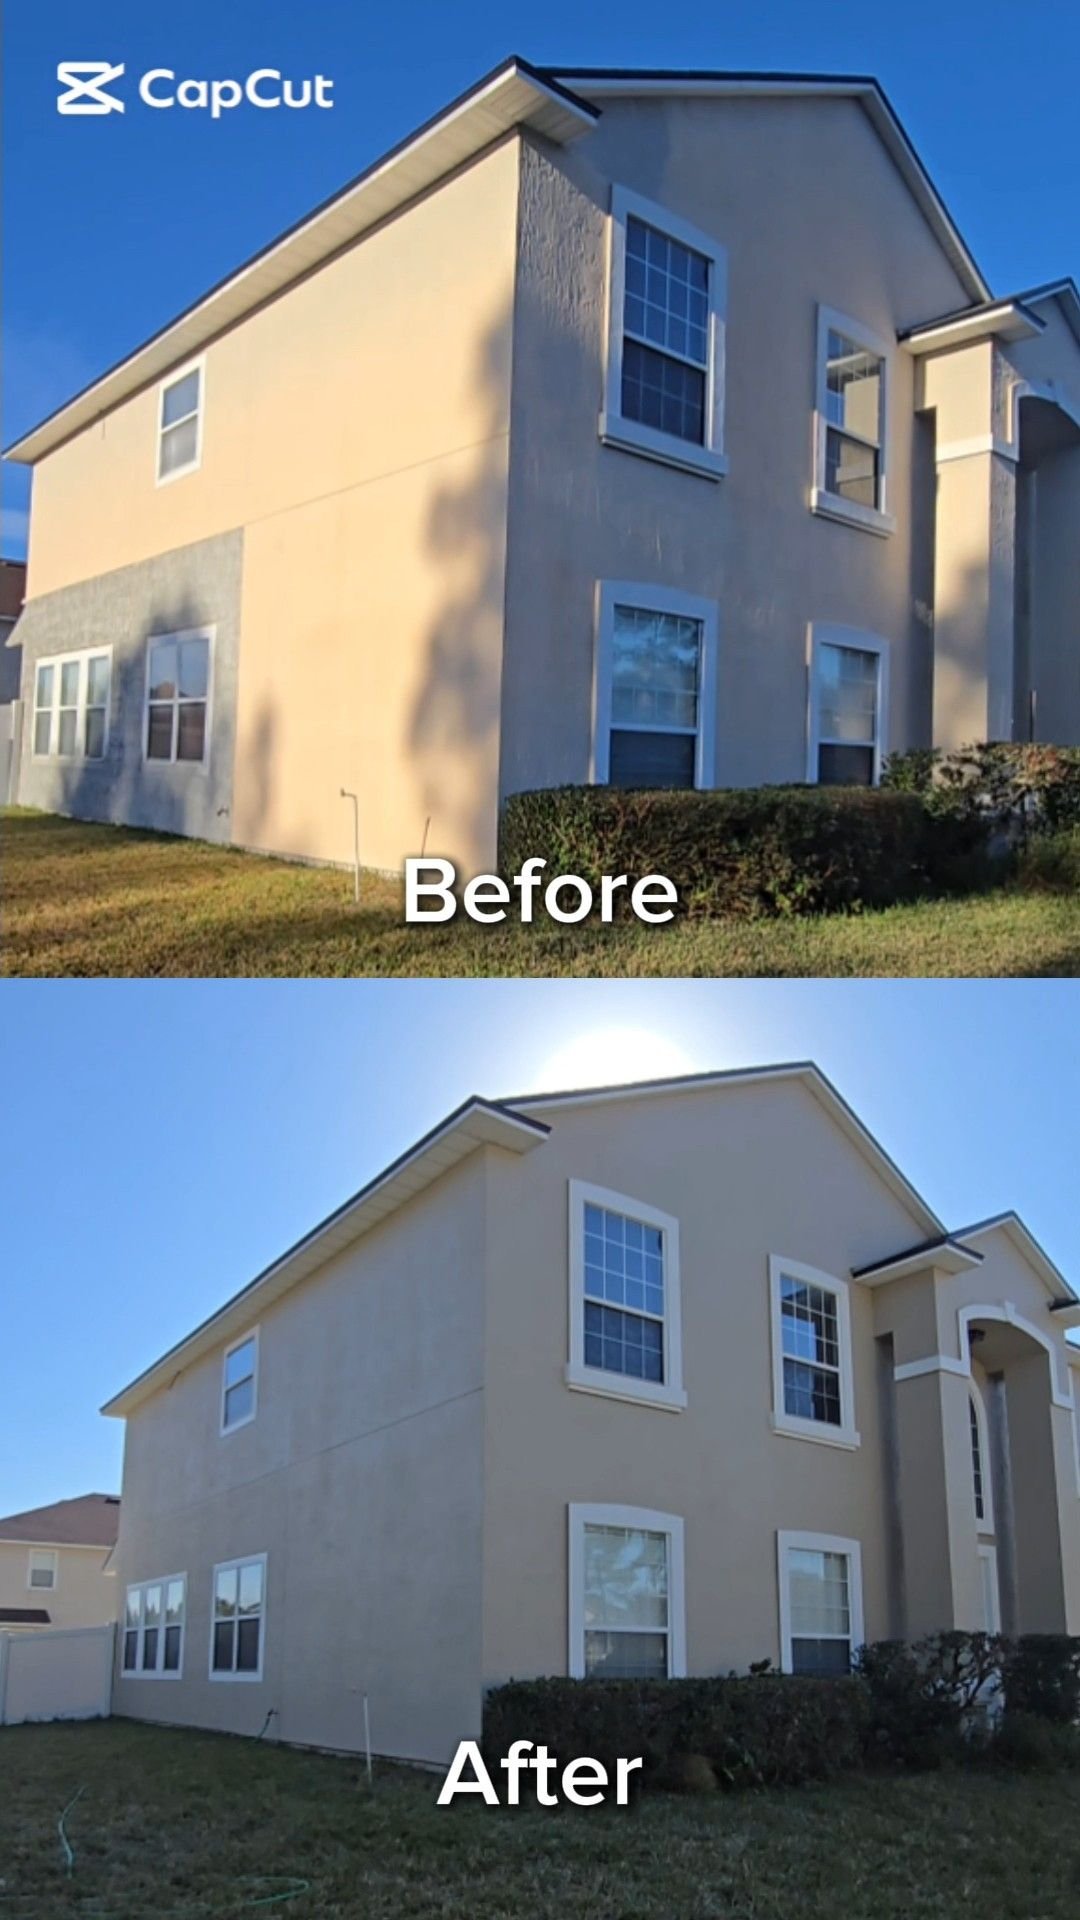
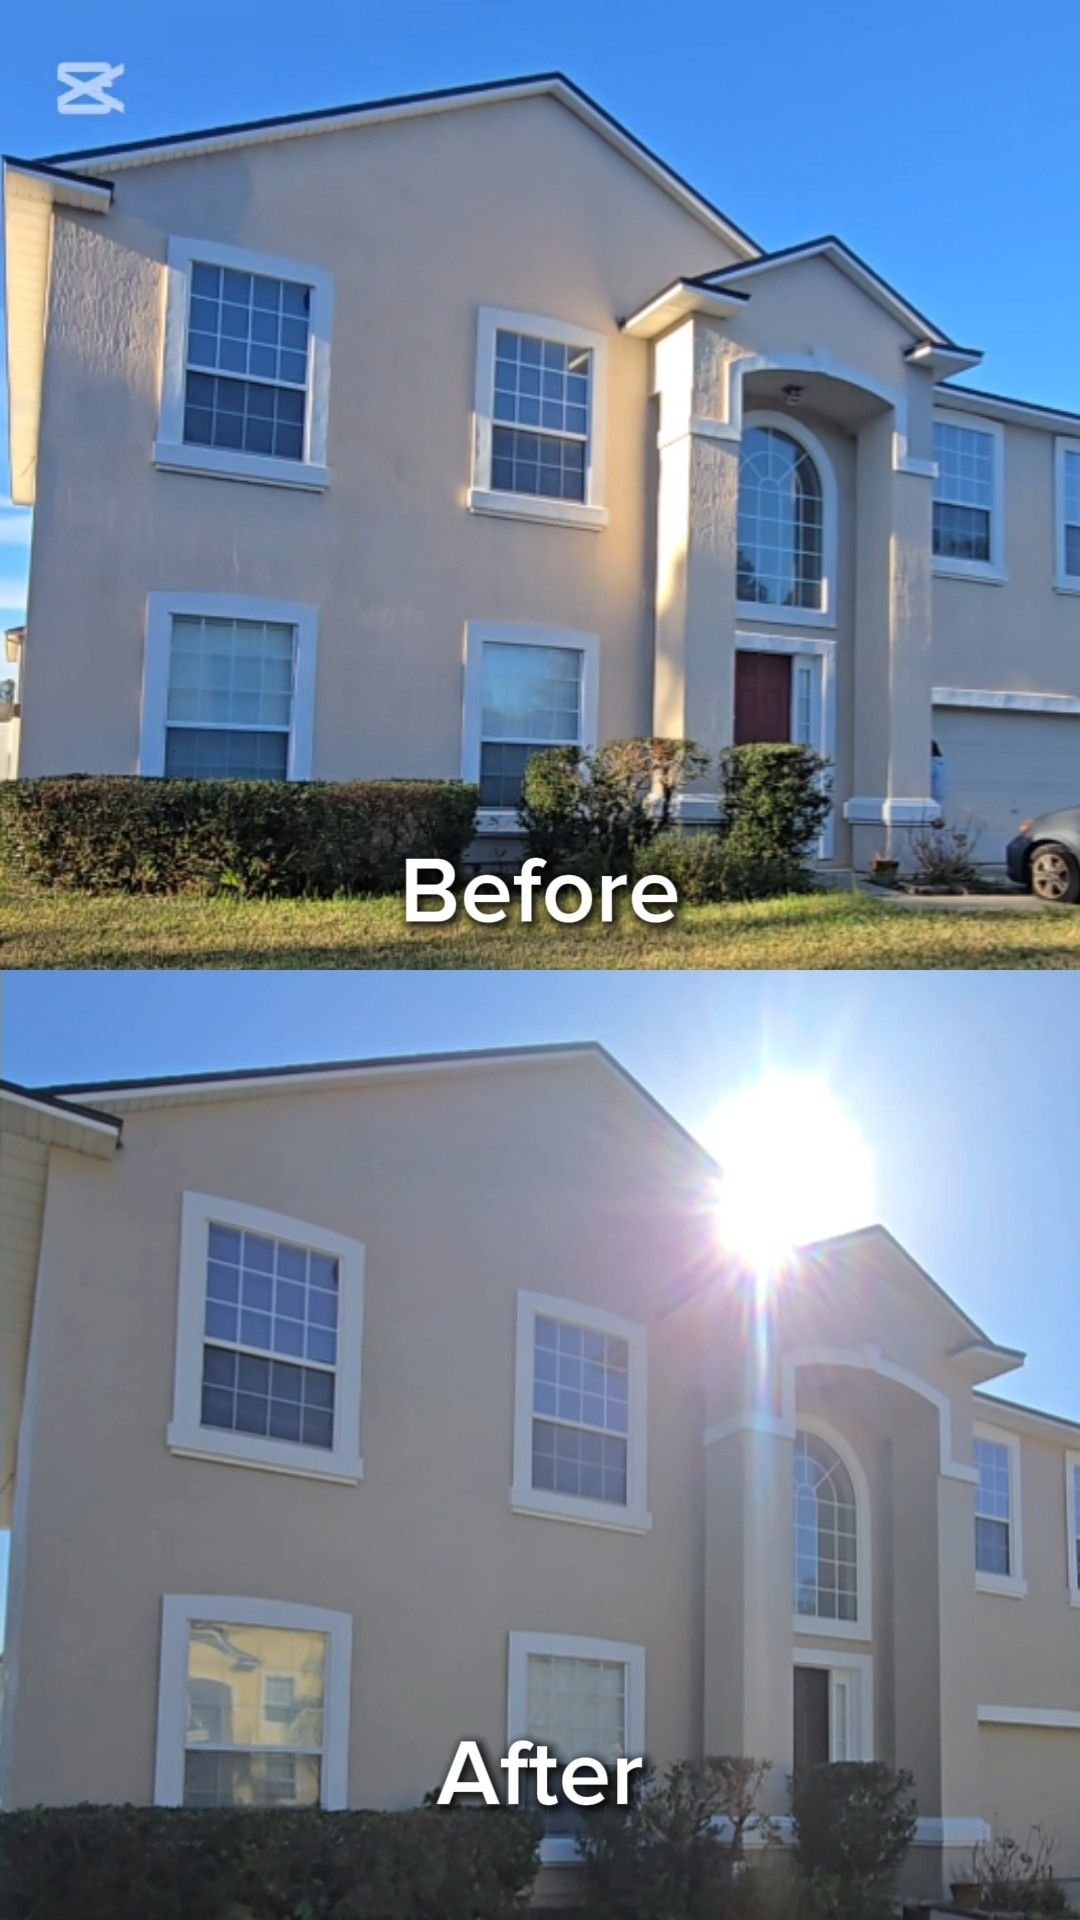
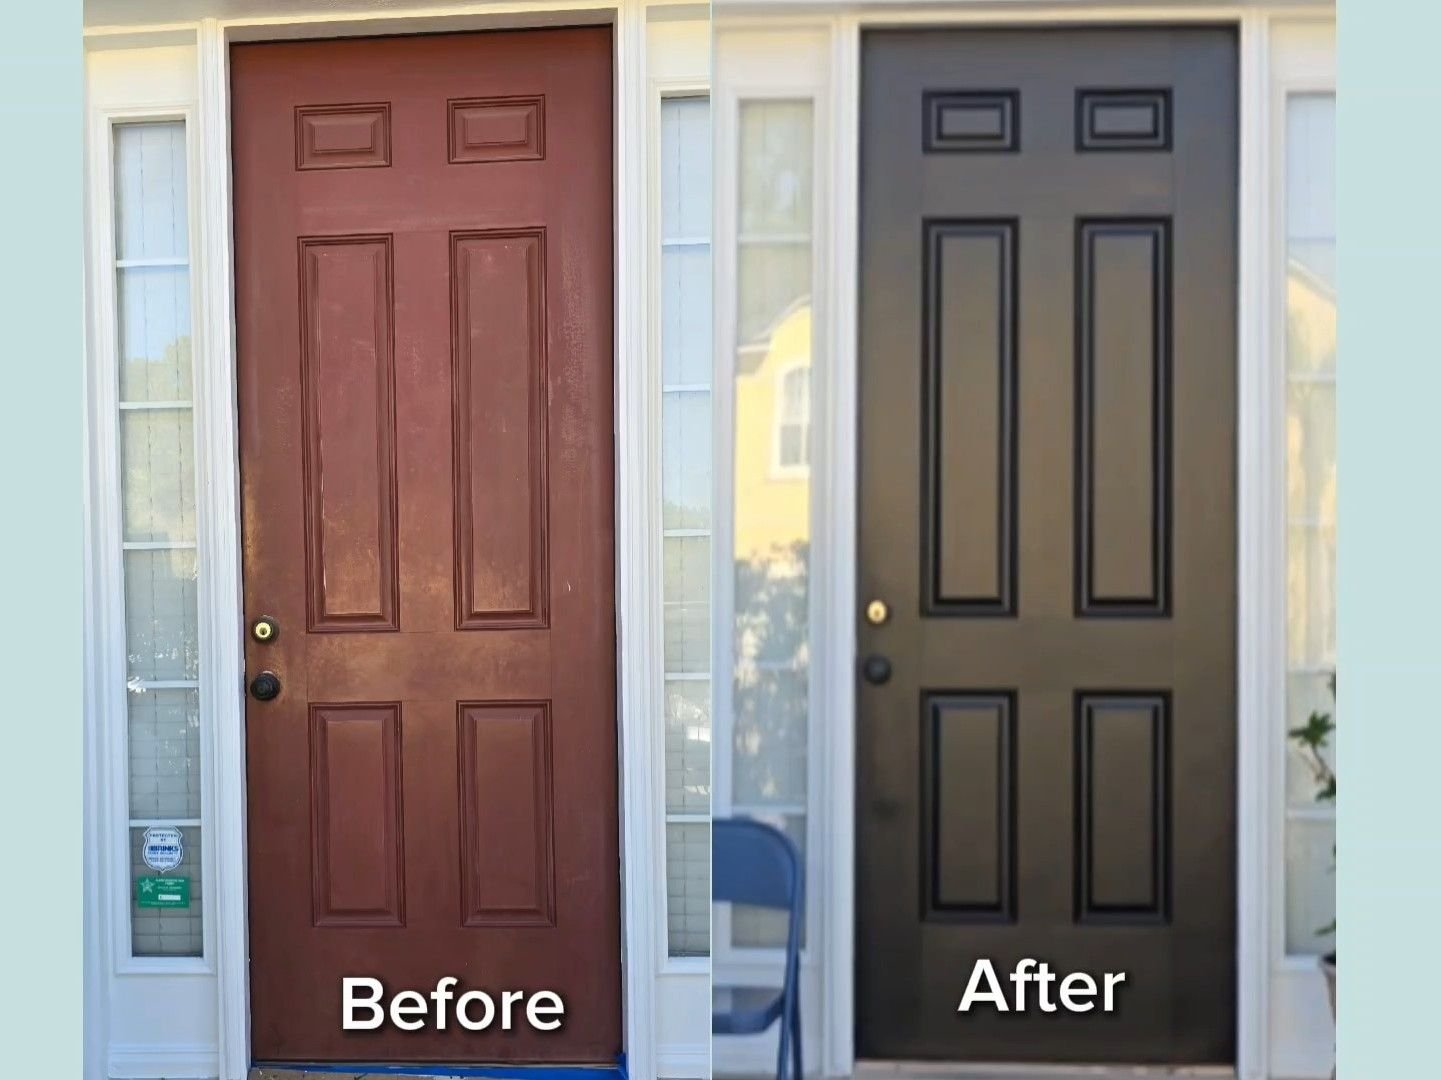
The repairs are in three to four locations across this exterior. In the finished photographs, they’re not what you notice — which is the point of the texture work.
What This Jacksonville Stucco Project Demonstrates
- Exterior painting starts with the substrate, not the paint.
- Loose or delaminated stucco should not simply be coated over — a coating is only as secure as what it’s bonded to.
- Removing failed material can reveal conditions that were not visible from the finished surface.
- Damaged substrate should be addressed before the exterior finish is rebuilt over it.
- Stucco texture repair matters, because patch visibility affects how the finished exterior reads.
- Caulking, priming, and preparation are part of the coating system rather than optional extras.
- Different exterior surfaces may call for different coating products.
- Paint should be the final protective and decorative layer of a properly prepared project — not a method for covering unresolved deterioration.
Nothing on this page establishes why the sheathing deteriorated. We can describe what we found once the wall was opened. Determining the original cause sits outside a painting and stucco repair scope.
Related Reading
- Stucco repair before painting — which conditions need real repair, which are handled by ordinary preparation, and when painting should wait.
- Stucco bubbling, bulging and delamination — how to tell coating failure from stucco that has lost bond.
- Types of stucco cracks — reading crack patterns on a Jacksonville home.
- Jacksonville stucco painting — how wall condition drives the coating specification.
Planning a Stucco Repair or Exterior Painting Project?
If your Jacksonville home has cracking, loose or hollow stucco, failed caulking, peeling coatings, visible repairs, or an exterior that simply needs substantial preparation before repainting, we can evaluate the visible conditions as part of the estimating process and explain what falls within the painting and repair scope.
We’re exterior house painters in Jacksonville, FL who also handle professional stucco repair. We assess visible exterior conditions — we don’t perform invasive moisture testing or engineering analysis, and we’ll tell you when a condition needs another professional before anyone paints it.
Explore Exterior Painting Services Request an Estimate
Or call or text 904-615-6599.
A New Leaf Painting Contractors
Jacksonville, Florida — serving Jacksonville and Northeast Florida since 2001.