
A paint job that starts peeling at year three didn’t suddenly become bad paint. Something was wrong long before the first chip came off.
That’s the uncomfortable part of early exterior failure. Homeowners usually reach for the brand first — wrong product, cheap paint, should have spent more. Occasionally that’s a factor. Far more often the cause is somewhere in the preparation, the moisture management, the condition of the coating underneath, or the conditions on the day the work was done. The paint is just what finally gave way, which is why an exterior painting assessment has to start with what’s beneath the finish rather than the finish itself.
This is a diagnostic guide. It walks through the failure mechanisms we actually find on exteriors in Fleming Island, FL, what each one looks like from the driveway, what’s usually happening underneath, and what has to be corrected before anything gets recoated. It also covers the cases where you don’t need a repaint at all.
Reviewed by A New Leaf Painting Contractors. Serving Northeast Florida since 2001, with more than 5,000 residential painting projects completed. The failure patterns described here come from inspecting exteriors throughout Fleming Island and Clay County.
Quick Answer: Why Does Exterior Paint Fail Early in Fleming Island?
Early exterior paint failure almost always traces to one or more of these: painting over chalk, moisture behind the coating, inadequate cleaning, failed sealant or unrepaired cracks, wood rot that was covered rather than fixed, an unstable old coating underneath, painting a surface that wasn’t dry, application outside the product’s required conditions, insufficient film build, or a coating that was wrong for the substrate. What you can see is usually the symptom. The cause is underneath it.
That distinction matters more than it sounds, because it changes what the fix is. Recoating a wall without finding the cause buys you another two or three years of the same problem — this time with an extra layer of film to remove.
Failure #1: Painting Over Chalking
What you see: The new paint releases in sheets or flakes, often over broad areas rather than at specific joints. Underneath, the old color looks intact and dusty.
What’s happening: Chalking is the residue left when UV degrades the binder in an existing coating and pigment particles release as loose powder. It’s normal on aging exterior paint, and it’s especially heavy on south and west elevations that have taken years of direct sun.
Here’s the problem: if a new coating is applied over that powder, it bonds to the powder — not to the wall. The new film can be perfectly good paint and it will still come off, because the layer holding it on has no structural integrity. This is one of the most common causes of early failure we find, and it’s entirely preventable.
The homeowner test: Rub your hand or a dark cloth firmly across the wall. Light residue is normal on aging paint. If powder transfers heavily — enough to see clearly on the cloth — the surface needs real preparation before anything goes over it.
What has to happen first: Thorough washing to remove the loose material, with the method matched to the substrate and the coating’s condition. Depending on how much chalk remains after cleaning and what the topcoat manufacturer specifies, a bonding or masonry conditioning primer may be needed. Adhesion should be verified on questionable areas rather than assumed. There isn’t one primer answer for every chalked wall — it depends on the substrate, how much residue remains, and what system is going over it.
Failure #2: Moisture Behind the Paint Film
What you see: Bubbling or blistering, peeling concentrated in specific areas rather than spread evenly, dark staining, mildew that keeps returning in the same spot, soft wood, or efflorescence on masonry.
What’s happening: Water has found a path behind the coating, and it has no easy way back out. It sits, it moves with temperature, and it works the bond apart from the inside. The failure appears where the water pools or exits — which is often not where it got in.
Common sources on Fleming Island homes:
- Failed or missing sealant at windows, doors, and trim intersections
- Stucco cracks, particularly ones that were coated over rather than repaired
- Roofline and flashing issues
- Plumbing and utility penetrations
- Irrigation spray hitting the wall directly
- Grading and drainage that hold water against the foundation
- Wind-driven rain on exposed elevations
- Existing wood decay drawing and holding moisture
- Moisture moving through masonry from the inside
- Moisture trapped by a previous coating with the wrong permeability for the wall
The core point: painting over a moisture problem does not fix the moisture problem. It hides it for a season. The source has to be identified and corrected first, and on a wall showing localized bubbling that identification is the single most valuable thing an inspection produces.
Failure #3: Mildew and Algae Were Painted Over Instead of Removed
What you see: Dark green, gray, or black staining that comes back within months of a repaint, usually on the same elevations it was on before.
What’s happening: The wall was washed until it looked clean, but the biological contamination wasn’t actually treated. Pressure alone moves what’s on the surface; it doesn’t reliably address what’s established in the coating’s texture and pores. Coating over that contamination can interfere with adhesion, and the growth reappears through the new finish quickly because its source was never removed.
Why this hits Fleming Island harder: The mature canopy in established communities such as Eagle Harbor is a real factor. Shaded elevations under live oaks stay damp far longer after rain and morning dew than exposed walls do. Add heavy landscaping close to the structure and you get surfaces that spend a large share of the year in conditions that favor growth. This is more of an issue here than in the newer, more open subdivisions elsewhere in Northeast Florida.
What has to happen first: Cleaning with agents appropriate to the substrate and the type of growth, given adequate dwell time to work, thoroughly rinsed, and allowed to dry — without using pressure levels that damage the coating or drive water into joints.
Important: recurring mildew doesn’t automatically mean your paint has failed. If the coating is otherwise sound and adhesion is intact, proper cleaning plus some environmental correction — trimming vegetation back, redirecting a sprinkler head, improving airflow along a shaded wall — resolves a meaningful share of these cases without a repaint.
Failure #4: Failed Caulk and Open Joints
What you see: Peeling that starts at window and door surrounds, at trim intersections, or around penetrations, and radiates outward from there. Visible gaps, hardened or split sealant, or sealant that has pulled cleanly away from one side of a joint.
What’s happening: Sealant generally reaches the end of its service life before the coating around it does. As it hardens, shrinks, cracks, or loses adhesion, it opens a direct path for water into the assembly. Every storm pushes more in, and the paint nearest the joint is the first to go.
Areas worth walking with your eyes: window and door surrounds, trim transitions and terminations, fascia and soffit intersections, utility and plumbing penetrations, and — where the siding manufacturer’s installation details specify sealant — those particular locations on the siding itself.
One technical caution. On fiber cement siding, sealant should be renewed where the manufacturer’s installation details call for it — appropriate trim transitions, terminations, and penetrations. Not every siding joint is meant to be caulked. Some installations are designed with specific joint details that allow the assembly to manage and release moisture, and indiscriminate caulking can work against that. Get this right rather than assuming more sealant is always better.
Failure #5: Wood Rot Was Painted Over
What you see: Peeling concentrated around joints and end grain rather than in the middle of a board. Cracked paint following the grain. Dark staining bleeding through the finish. The same small area failing repeatedly no matter how many times it’s touched up.
What’s happening: The wood underneath has decayed, and the coating is sitting on material that can no longer hold it. Wood in that condition also moves differently and holds moisture, so anything applied over it releases quickly.
Paint protects sound wood. It does not restore rotten wood. Coating over decay conceals the condition without arresting it, and the deterioration continues underneath a surface that now looks fine. By the time it shows again, the repair has grown from one board to a run of fascia.
Where to look on a Fleming Island home: fascia and soffits, window and door trim, decorative wood, porch and column components, siding on older properties, and roofline transitions. Press firmly with a thumb. Any softness, sponginess, or give means water has been in there for a while.
Deteriorated material has to be repaired or replaced before coating — that’s carpentry and wood rot repair, and it comes before primer, not after.
Failure #6: Stucco Cracks or Previous Repairs Weren’t Corrected Properly
What you see: Cracks reappearing in exactly the same lines within a year or two of a repaint. Patches that read differently in texture or color through the finish. Peeling or staining concentrated along crack lines.
What’s happening: Rolling paint over a crack doesn’t close it. The crack is still moving with thermal cycling, and the coating spanning it — even a high-build one — eventually splits along the same line. Meanwhile water has been using that crack the whole time.
Previous repairs are their own category of problem. On homes that have been patched over the years, we commonly find repairs made with materials that weren’t masonry-compatible, patches that were never properly textured or coated, and areas where a dissimilar product creates a visible and structurally different zone in the wall.
What has to happen first: Cracks evaluated for whether they’re stable or active, and repaired with materials appropriate to the substrate. Previous patches assessed for compatibility. Persistent, widening, or patterned cracking may warrant further evaluation before any coating decision — some cracking reflects movement that a coating isn’t the right answer to at all. That’s stucco repair territory before it’s a painting conversation.
And to head off a common sales pitch: not every stucco home needs an elastomeric system. Higher-build coatings help where crack-bridging genuinely addresses what the wall is doing. They are not a substitute for repair.
Failure #7: The Wrong Coating Was Used for the Surface
What you see: Failure that doesn’t match any obvious moisture or preparation cause — poor adhesion from the start, unusual sheen or texture problems, coating that never quite cured properly, or trapped moisture showing up on masonry.
What’s happening: The product wasn’t right for what it went on. Examples we run into:
- A coating with the wrong permeability on masonry, trapping vapor that needed to move out of the wall
- The wrong primer — or no primer — on bare or tannin-rich wood, producing bleed-through and adhesion loss
- A topcoat applied directly over a factory-finished metal or fiberglass component without appropriate preparation
- An interior-grade or general-purpose product used on an exterior substrate it wasn’t formulated for
- A new system that simply isn’t compatible with the coating already on the wall
The brand name matters less than whether the product suits the substrate and the existing coating system. A premium exterior line used on the wrong surface will underperform a mid-tier product used correctly. Our guide to choosing an exterior paint system by substrate covers how that selection should work.
Failure #8: The Surface Was Still Wet When Painting Began
What you see: Blistering that appears early in the coating’s life, poor adhesion across whole elevations, or a finish that never looked quite right from day one.
What’s happening: Moisture in or on the substrate at the time of application prevents the coating from bonding and curing properly. It’s a quiet failure — nothing looks wrong at the end of the job.
There’s no universal drying rule, and anyone who quotes you a fixed number of hours is guessing. Drying time depends on the substrate and its porosity, how much shade the elevation gets, humidity and temperature, recent rainfall, the cleaning method used, and airflow. A porous stucco wall that was washed thoroughly behaves very differently from a fiber cement elevation that got a light rinse.
The Fleming Island angle: this is where the tree canopy shows up again. A north elevation under mature oaks can still be holding moisture when a fully exposed south wall on the same house has been dry for hours. Treating both the same way on a schedule is how one side of a house ends up failing while the other holds. On questionable surfaces, moisture readings or a professional judgment call are worth more than the calendar.
Failure #9: Paint Was Applied Outside the Product’s Required Conditions
What you see: Poor adhesion, uneven sheen, lap marks, blistering, or a film that seems soft or under-cured.
What’s happening: Every coating has a manufacturer-defined application window — air temperature, surface temperature, humidity, and recoat timing. Working outside it compromises how the film forms and cures, regardless of how good the product is.
Conditions that matter here specifically: rain threat within the recoat window, surface temperature on a wall in direct afternoon sun (which can run well above air temperature), high humidity slowing cure, and evening dew forming on a surface coated too late in the day.
To be clear, this is not an argument that Florida summers can’t be painted. Professional crews work here year-round by adjusting the daily plan — starting on the shaded side, following the sun around the house, watching the afternoon storm pattern, and selecting products formulated for a wider range of conditions where the schedule calls for it. The failure mode isn’t the season. It’s applying a coating outside the window its manufacturer specified because the schedule said so.
Failure #10: Insufficient Film Build
What you see: Premature fading, chalking that arrives years earlier than it should, poor hide with the previous color ghosting through, and general wear that seems ahead of schedule.
What’s happening: The coating wasn’t applied at the thickness the manufacturer specified, so it doesn’t have the film to deliver the performance it was designed for.
“One coat” and “two coats” are less meaningful than homeowners assume. What matters is coverage against spread rate, and that varies with substrate porosity, the degree of color change, application method, and the specific product’s requirements. A heavily textured, porous stucco wall drinks far more material per square foot than smooth fiber cement. Two thin coats sprayed too fast can deliver less film than one properly applied one — though on most exterior repaints, reaching specified build does mean more than a single pass.
The right standard: the coating has to be applied at the manufacturer’s required coverage rate and film thickness for that substrate. Material records at project completion are a reasonable thing to ask any contractor for.
Failure #11: The New Paint Went Over a Failing Old Coating
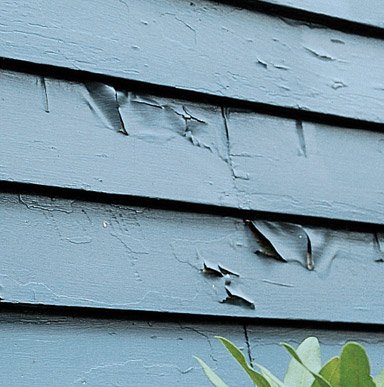
What you see: Peeling that goes down to an older color rather than to bare substrate. Multiple layers releasing together as a single sheet. Thick, brittle film buildup, particularly on trim and in corners. Areas that fail repeatedly no matter how often they’re touched up.
What’s happening: The new coating is fine. The one underneath it lost adhesion, and everything on top came with it. This is the failure mode that most often surprises homeowners, because the work looked flawless when it was finished — the problem was already in the wall.
This matters enormously on Fleming Island’s older housing stock, and it’s why a repaint on a thirty-year-old home is a different job than a repaint on a ten-year-old one. Somewhere in those layers may be an old chalked coating that got painted over, a partial repaint done in a different product, or a repair that was never properly bonded.
What has to happen first: Adhesion assessment across elevations — not just a glance. Unstable coating has to be removed down to a sound surface, and the edges of removal areas feathered so they don’t telegraph. This is the step that gets skipped when a bid comes in unusually low, and it’s the reason that bid was low.
You cannot build a durable new paint job on an unstable old one. No product solves this.
Failure #12: Irrigation, Landscaping, and Drainage Keep the Walls Wet
What you see: Deterioration concentrated on the lower portion of a wall — staining, peeling, or persistent growth in a band near grade — while the rest of the elevation looks fine.
What’s happening: Something is keeping that zone wet. The usual suspects:
- Sprinkler heads spraying directly onto the wall, often on a schedule nobody has watched in years
- Shrubs, hedges, or vines in contact with the surface, trapping moisture and blocking airflow
- Mulch or soil piled against the wall
- Grading that directs water toward the foundation instead of away
- Splashback from hard surfaces during heavy rain
- Dense landscaping shading an already-shaded elevation into permanent dampness
The lower band of an exterior — roughly the bottom foot or two, though it varies with the property — frequently ages differently from the rest of the wall for exactly these reasons. It’s also the cheapest failure on this list to prevent. Watching one full irrigation cycle and pulling vegetation back from the structure costs nothing and eliminates a genuine cause of premature coating failure.
Why One Side of a Fleming Island Home Can Fail Before the Others
This is one of the most useful things to understand about exteriors here, and it explains a scenario we’re called out to constantly: three sides of the house look fine and one side looks like a different property.
North and Shaded Elevations
Under mature canopy and on north-facing walls, the dominant stressor is moisture and time. These surfaces dry slowly after rain and dew, accumulate organic debris and pollen, and develop mildew, algae, and dark biological staining well before the sunny sides show any wear. Color on these elevations often still looks good — the problem is what’s growing on it and how long it stays damp.
South and West Elevations
Here the dominant stressor is UV and heat. These walls fade, chalk, and lose film integrity first. Surface temperatures run high enough to drive real thermal movement in the substrate, which shows up as cracking in stucco and stress at joints. Biological growth is rarely the issue — degradation is.
What That Means Practically
Same house. Same paint. Same day of application. Two completely different aging patterns and two different sets of problems. It also means that a diagnosis based on looking at one elevation is incomplete, and that the right correction may differ from one side of the house to the other — different cleaning approach, different attention during prep, sometimes different sheen.
If a contractor walks one side of your home and gives you a number, they haven’t seen the job.
Why 20- to 30-Year-Old Fleming Island Homes Need More Than a Basic Repaint
A significant portion of Fleming Island developed through the 1990s and 2000s. Many of those homes are now on their third or fourth exterior coating system.
That changes the nature of the work. On a newer home, painting is largely a specification exercise. On an older one it’s a diagnostic exercise, because the early failure you’re looking at may have been set in motion two paint jobs ago.
We see this when evaluating older homes throughout Fleming Island, including established sections of Eagle Harbor, where an exterior may have been through several coating cycles, repairs, caulking applications, and partial repaints over the years. What we commonly find on these exteriors:
- Multiple coating layers of unknown type and uncertain compatibility
- A chalked coating that was painted over rather than properly prepared
- Several generations of sealant layered into the same joints
- Stucco cracks coated instead of repaired, reopening in the same lines
- Patch repairs that were never textured, matched, or properly coated
- Fascia and soffit deterioration under sound-looking paint
- Different products on different elevations from partial repaints
- Rusting or backed-out fasteners bleeding through the finish
None of this is universal — plenty of older homes here have been maintained well and present no surprises. But it’s common enough that on a home of this age, the estimate should identify these conditions before the price and the coating system are finalized. A bid produced without that assessment is a guess, and the difference usually shows up as a change order or as another early failure.
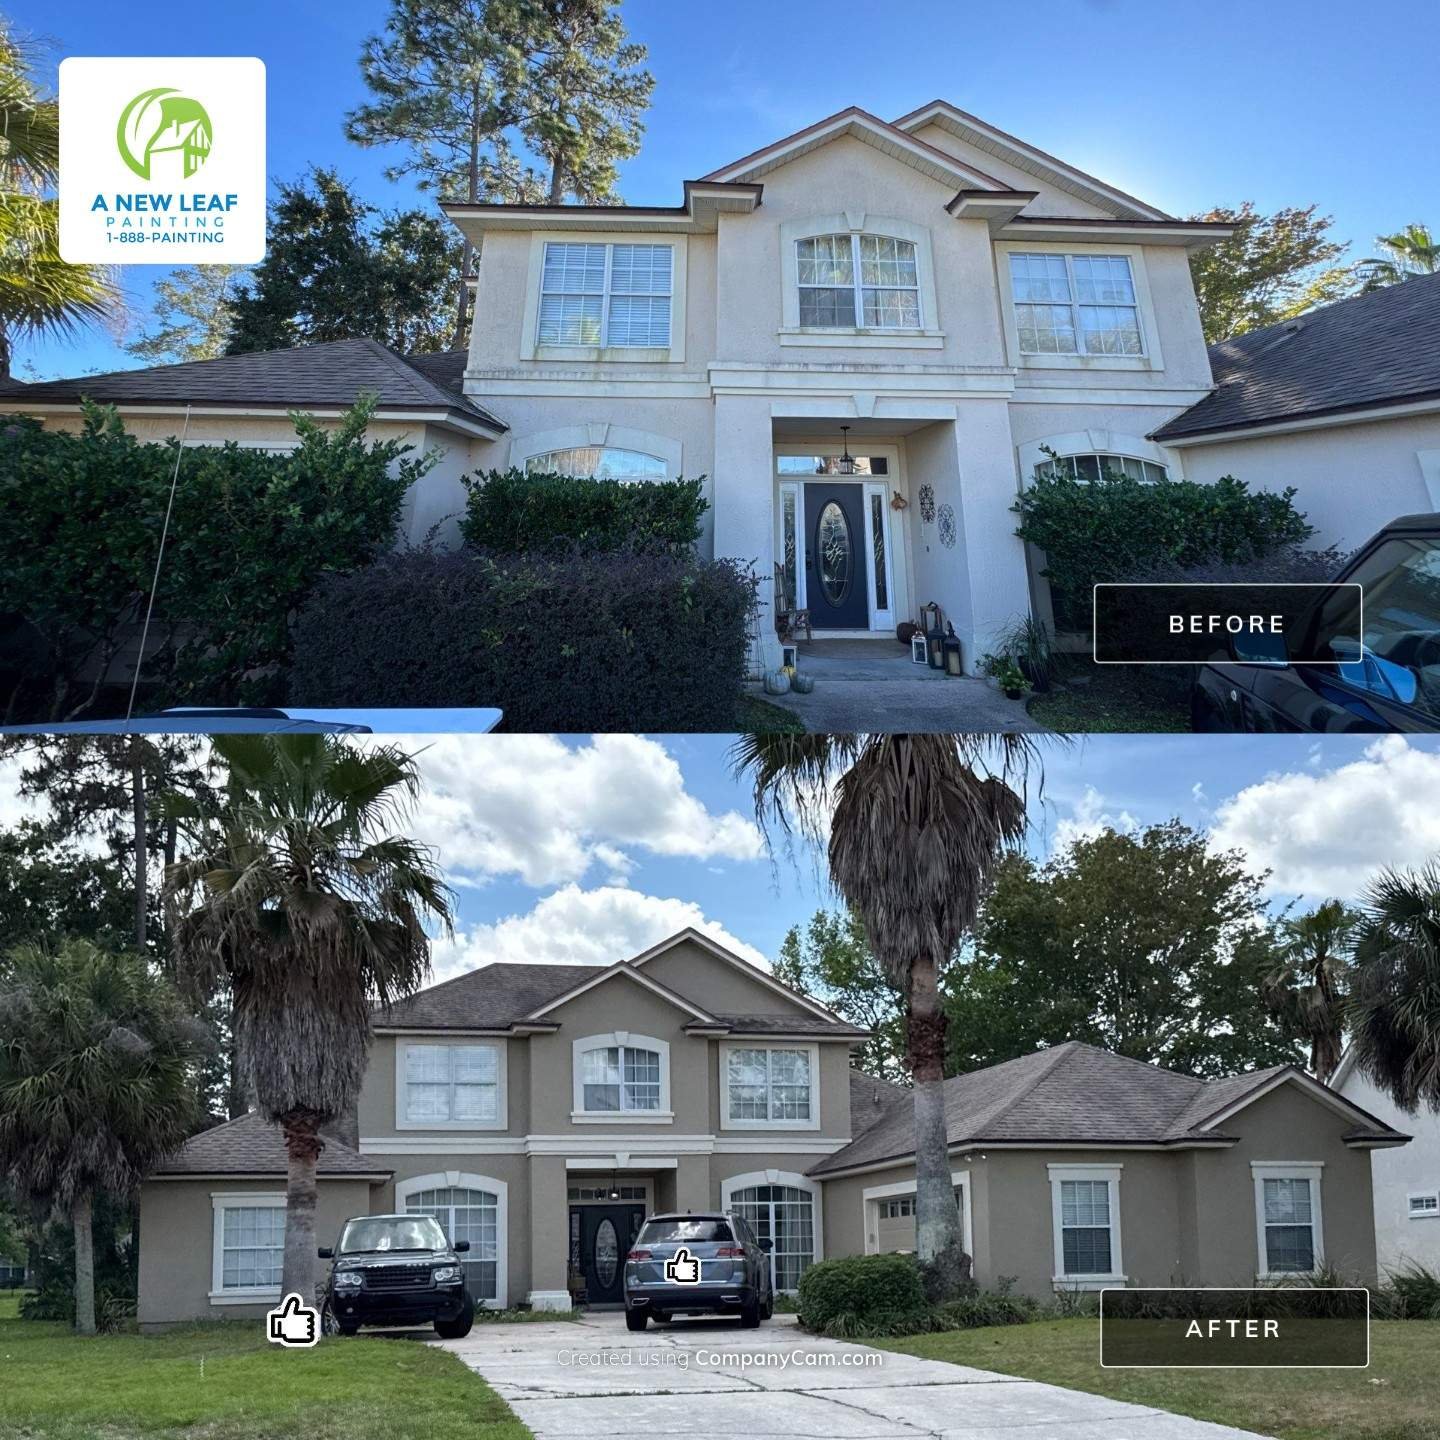
A Fleming Island Example: Stucco Exterior in Eagle Harbor
A recent residential project in Eagle Harbor illustrates most of what this article covers. The home is stucco, and the existing coating had reached the point where fading and weathering were obvious from the street. That’s usually where a homeowner’s attention starts — and it’s rarely where the actual work does.
The inspection found stucco cracking along with areas that needed repair before any coating could be applied, and aging sealant that was no longer doing its job at the joints where it mattered. None of that is unusual on an established Fleming Island exterior, and none of it is solved by paint.
So the sequence ran: exterior cleaning, evaluation of the stucco’s condition, crack and stucco repair where required, sealant work where it was appropriate, preparation of the repaired and deteriorated areas, priming where surface condition called for it, and then application of the masonry coating system — Sherwin-Williams Loxon XP, which is designed for above-grade masonry and stucco.
The point isn’t the product. It’s the order. This exterior didn’t need another layer of paint on top of what was already failing; it needed the cracking, the deteriorated areas, and the sealant addressed so the new system was going onto a substrate that could actually hold it. Skip that and the same conditions reappear through the new finish within a few years — which is exactly the failure pattern the rest of this article describes.
More about our Fleming Island exterior painting work.
Peeling, Bubbling, Chalking, or Fading: What Does Each One Usually Mean?
These are diagnostic clues, not remote diagnoses. Use them to know what to ask about — not to conclude what’s wrong from the driveway.
| What You See | Possible Cause | What Should Be Checked |
| Peeling in sheets | Adhesion loss — often chalk, moisture, or an unstable coating underneath | What layer it’s releasing from; prep history; moisture |
| Bubbling or blistering | Moisture behind the film, or application over a wet or hot surface | Moisture source; sealant; nearby penetrations and drainage |
| Chalking | UV degradation of the existing coating’s binder | How much transfers; whether the film is otherwise sound |
| Fading | Pigment aging under UV; accelerated by exposure and color depth | Compare a shielded area to an exposed one; check elevation by elevation |
| Mildew or algae | Moisture, shade, organic contamination | Landscaping contact; irrigation; drainage; coating condition |
| Cracking or crazing | Brittle coating film, or movement in the substrate below it | Whether cracks are in the film only or in the stucco/wood |
| Rust bleed or staining | Corroding ferrous metal or fasteners under the coating | Fastener condition; metal prep and primer used previously |
| Failure at one elevation only | Exposure difference — shade and moisture, or UV and heat | Orientation; canopy; drainage; whether prep differed by side |
Does Every Paint Problem Mean You Need a Full Repaint?
No — and we’d rather say so than sell a job that isn’t warranted.
Cleaning May Be Enough When
- The coating is still sound with intact adhesion
- Mildew or staining is superficial rather than through the film
- Color is still acceptable to you
- The problem is concentrated where an environmental cause explains it — a sprinkler, a shrub, a shaded corner
Localized Repair May Be Enough When
- A single sealant joint has failed
- One board or a short run of trim has deteriorated
- Peeling is confined to a small, identifiable area with a known cause
- Damage is from impact rather than coating failure
A Full Repaint Becomes the Reasonable Answer When
- Failure appears across multiple elevations
- Chalking is heavy across the majority of the exterior
- Adhesion is failing broadly rather than in defined spots
- Repairs would cover enough area that spot work won’t blend acceptably
- The coating system has simply reached the end of its service life
For more on timing generally, see our guide on how often Fleming Island homes need repainting.
What Should Be Fixed Before Repainting?
Not every job needs every item on this list. But every job needs someone to have looked at all of them.
- Identify and correct moisture sources before anything else
- Clean biological contamination properly — treated, not just rinsed
- Remove loose and failing coating down to a sound surface
- Address chalking, and verify adhesion where the result is uncertain
- Repair or replace deteriorated wood
- Repair stucco cracks and evaluate previous patches for compatibility
- Renew failed sealant where the details call for it
- Treat rust and address bleeding or backed-out fasteners
- Prime bare and repaired areas with a primer appropriate to that substrate
- Confirm the surface is genuinely dry before coating
- Verify the new system is compatible with what’s staying on the wall
- Apply within the manufacturer’s stated conditions and at specified coverage
We use Sherwin-Williams and Benjamin Moore systems — Emerald, Emerald Rain Refresh, Duration, Latitude, and Loxon XP, along with Aura and Regal Select — selected by substrate and condition. But that selection is the last decision, not the first. No premium coating compensates for unresolved substrate failure.
Homes Near the Water
Properties along Doctors Lake, the St. Johns River, or Black Creek see some conditions the interior streets don’t: stronger wind-driven rain against the water-facing elevation, reflected sunlight, prolonged dampness, and more exposed metal in railings, fixtures, and dock-adjacent components. Recurring biological growth tends to be more persistent as well.
Worth stating plainly, because it gets exaggerated in this market: Fleming Island is inland in Clay County and does not experience the direct marine salt exposure that affects oceanfront properties at the beaches or coastal Ponte Vedra. If someone is telling you salt air destroyed your Fleming Island paint job, look harder at the moisture, the prep, and what’s underneath.
A Note on Color Changes After Repairs
If correcting a failure means recoating enough of the exterior that you’re considering a color change, check your HOA or architectural review requirements before scheduling. Some Fleming Island communities require approval for a substantial color change and some neighborhoods have no HOA at all. Repainting an existing approved scheme in the same colors is generally not an issue. We can help prepare the paint and color information a review request needs when it applies.
Frequently Asked Questions
Why is my exterior paint peeling after only a few years?
Most commonly because it was applied over something unstable — a chalked surface, an old coating that had lost adhesion, biological contamination, or a damp substrate. Moisture entering through failed sealant or unrepaired cracks is the other frequent cause. Where the peeling releases to matters: down to bare substrate points toward preparation or moisture, while peeling down to an older color points to the previous coating failing.
What causes exterior paint to bubble in Florida?
Usually moisture behind the film, or application onto a surface that was still wet or too hot. Bubbling that appears in defined areas rather than across a whole wall is a strong signal of a specific water source nearby — a joint, a penetration, a downspout, or an irrigation head.
Can you paint over chalky exterior paint?
Not without proper preparation. The surface has to be washed thoroughly to remove loose residue, and depending on how much remains and what’s going over it, a bonding or conditioning primer may be required. Painting directly over heavy chalk is one of the most reliable ways to produce a failure within a few years.
Why does mildew keep coming back on my house?
Often because the conditions producing it haven’t changed — shade, poor airflow, landscaping against the wall, irrigation overspray, or slow drying on a north elevation. It can also mean the growth was painted over rather than treated. It does not automatically mean your coating has failed; if adhesion is sound, cleaning plus environmental correction frequently resolves it.
Can failed caulk cause paint to peel?
Yes, and it’s one of the most common causes we find. Once sealant hardens, splits, or pulls away, water has a direct path behind the coating. The peeling typically starts at the joint and spreads outward from there.
Can you paint over wood rot?
You can, and it’s a mistake. Coating deteriorated wood conceals the condition without stopping it, and the material continues to break down underneath. Rotted wood needs to be repaired or replaced before anything is applied over it.
Why does paint peel off stucco?
Usually moisture in the wall, a coating with the wrong permeability trapping vapor, painting over chalk or an unstable previous coating, or cracks that were coated rather than repaired. Stucco failures are more often about what the wall is doing than about the product on it.
Why does one side of my house fade faster than the others?
Exposure. South and west elevations take substantially more UV and surface heat, so they fade, chalk, and lose film integrity first. North and shaded elevations usually hold color longer but develop mildew and organic staining sooner. On homes under mature canopy here, that contrast can be dramatic.
Does Fleming Island humidity damage exterior paint?
It’s a real factor, mainly through long surface-wet periods that favor mildew and algae and through narrower application windows during the work itself. Combined with heavy shade in the established neighborhoods, it makes biological growth the dominant local maintenance issue. Fleming Island is inland and doesn’t see the marine salt exposure that affects oceanfront homes.
Does expensive paint prevent peeling?
No. Premium exterior products are generally formulated for better color retention, adhesion, flexibility, and mildew resistance, and that shows up over time. But a premium coating over chalk, moisture, or an unstable old film will still fail. Product quality raises the ceiling; preparation sets the floor.
Can exterior paint fail because the previous paint was bad?
Yes — this is one of the more common and least understood causes. If the coating underneath loses adhesion, everything on top of it releases together, no matter how good the new product was. It’s why unstable coating has to be identified and removed rather than painted over.
How do painters know if an old coating is stable?
Through assessment across elevations rather than a single spot check: visual inspection of edges and existing failures, chalk transfer testing, checking how the film behaves under scraping, and adhesion testing where the result is uncertain. On a home with several coating layers this takes real time, which is one reason a thorough estimate takes longer than a quick walkaround.
Do I have to repaint the whole house if only one area is peeling?
Not necessarily. If the failure is confined to a defined area with an identifiable cause and the rest of the coating is sound, a localized repair can be appropriate. The practical limits are blending — a spot repair on a faded elevation will show — and whether the same underlying cause is present elsewhere and simply hasn’t surfaced yet.
Related Guides
- Exterior Painting Services
- Stucco Repair
- Wood Rot and Carpentry Repair
- Best Exterior Paint for Fleming Island Homes
- How Often Should You Paint a House in Fleming Island?
- Painting James Hardie® Siding Guide
- Exterior Painting Cost Guide
About A New Leaf Painting Contractors
A New Leaf Painting Contractors has served Northeast Florida homeowners since 2001 and has completed more than 5,000 residential painting projects. We work as exterior painters across Fleming Island, Orange Park, Oakleaf Plantation, Middleburg, Green Cove Springs, Jacksonville, and the surrounding communities.
In our experience inspecting older Fleming Island exteriors, the visible peeling is usually not the first problem. The real failure is more often an old chalked coating, deteriorated sealant at a trim joint, moisture at a window transition, or wood decay underneath a surface that still looks sound. Finding that is the job. Choosing the product comes after.
We’re experienced with stucco, fiber cement, wood, and masonry exteriors, we specify Sherwin-Williams and Benjamin Moore systems matched to substrate and condition, we’re fully insured, and we back our work with a written warranty on workmanship and materials. We hold 750+ verified five-star reviews from homeowners across Northeast Florida.
More about our work as exterior painters Fleming Island, FL.
Not Sure Why Your Exterior Paint Is Failing?
The right next step isn’t choosing a new paint. It’s finding out what went wrong.
An exterior assessment establishes where the failure started, what coating is actually underneath, whether moisture is present and where it’s entering, what repairs the substrate needs, and how each elevation is holding up relative to the others. That’s what determines the correction — and sometimes it determines that you don’t need a full repaint at all.
We’ll walk it with you, show you what we found, and tell you honestly what the exterior needs. If part of the answer is “clean it and watch it for another two years,” we’ll say that.
Call or text 904-615-6599 to schedule an exterior assessment.
Serving Fleming Island • Orange Park • Oakleaf Plantation • Middleburg • Green Cove Springs • Jacksonville • Ponte Vedra