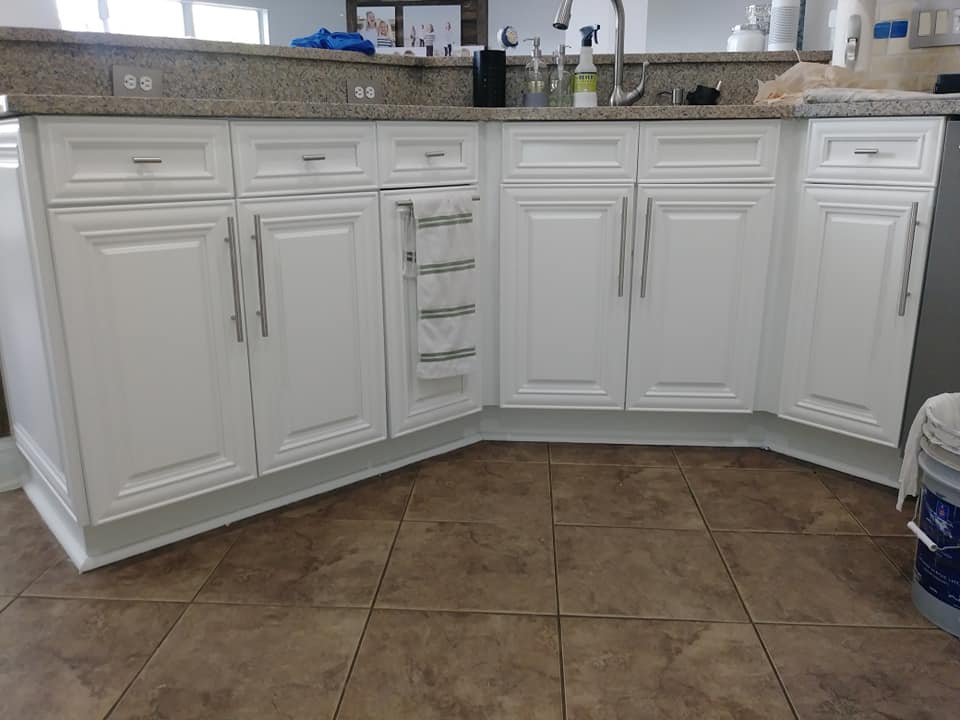
Kitchen renovations can feel overwhelming, especially when you’re staring at outdated cabinets that no longer match your style. The good news? You don’t need to demolish your entire kitchen to create a stunning transformation. Cabinet painting offers a cost-effective way to breathe new life into your space without the hassle and expense of a full replacement.
Whether you’re considering a DIY project or hiring professional painters, this complete guide walks you through everything you need to know about painting kitchen cabinets. From cost comparisons to color trends, surface preparation to long-term durability in Florida’s humid climate, we’ll cover the essential details that determine whether your cabinet makeover succeeds or fails.
“According to recent industry reports, more than 70% of homeowners prefer refinishing or repainting kitchen cabinets to full demolition and replacement” [2].
How Much Does Cabinet Painting Cost Compared to Replacement?
The financial difference between painting cabinets and replacing them is substantial. Professional cabinet painting projects typically cost between $6,000 and $10,000 for a medium-sized kitchen, depending on factors like cabinet count, condition, and the complexity of the job. In contrast, a complete cabinet replacement can easily run $15,000 to $30,000 or more, potentially saving homeowners over $10,000 by choosing to paint instead.
For budget-conscious homeowners, DIY cabinet painting offers even greater savings. You can tackle the project for as little as $1,000 if you purchase the necessary supplies like quality paint, primer, a paint sprayer, sandpaper, and other materials. However, the time investment is significant—expect to dedicate around 40 hours of labor to complete the entire kitchen.
The cost breakdown for professional services typically includes:
- Surface preparation and cleaning
- Primer application
- Two coats of premium cabinet paint
- Hardware removal and reinstallation
- Workspace protection and cleanup
When comparing costs, consider that painting kitchen cabinets extends the life of your existing cabinetry by years while delivering a fresh, updated look. For homeowners in Jacksonville and Northeast Florida, where humidity can impact wood surfaces, proper preparation and quality materials become even more critical to achieving long-lasting results.
If you’re curious about specific pricing for your project, check out our detailed cabinet painting cost guide that breaks down factors affecting final estimates.
Understanding the Cabinet Painting Process
Successful cabinet painting projects depend 90% on preparation work and 10% on the final application. This ratio surprises many DIYers who underestimate the importance of proper surface prep. Professional painters know that rushing through preparation leads to peeling paint, visible brush strokes, and a finish that won’t stand up to daily kitchen use.
Step-by-Step Process Infographic

[A simplified 4-phase step-by-step process infographic for kitchen cabinet refinishing.]
Step 1: Removing Hardware and Cabinet Doors
Before you start painting, you’ll need to create a clean workspace. Remove all cabinet hardware, including hinges, knobs, and drawer pulls. Label each door and corresponding opening with painter’s tape to ensure everything goes back in the right place. Taking cabinet doors and drawer fronts off allows you to work on flat surfaces, which produces superior results compared to painting cabinets while they’re still mounted.
Step 2: Deep Cleaning Cabinet Surfaces
Kitchen grease and grime create adhesion problems for new paint. Clean the cabinets thoroughly with a degreaser like TSP (trisodium phosphate) to remove any buildup that would prevent primer and paint from bonding properly. Pay special attention to areas around handles and the upper cabinet surfaces near cooking areas where grease accumulates.
Step 3: Sanding for Better Adhesion
Using medium-grit sandpaper (100 to 150-grit) to lightly sand cabinet surfaces before painting helps improve paint adhesion without removing the existing finish entirely. This scuff-sanding creates a rough texture that gives the primer something to grip. After sanding, wipe down all surfaces with a tack cloth to remove dust and debris.
Some painters prefer 120 to 220-grit sandpaper for scuff-sanding, depending on the existing finish condition. The goal isn’t to strip the old finish completely, but to create enough surface roughness for excellent adhesion.
Step 4: Applying High-Quality Bonding Primer
Using a high-quality bonding primer is crucial for preventing paint from peeling and ensuring adhesion to surfaces. Products like Zinsser B-I-N Shellac-Based Primer or similar high-adhesion primers seal the wood, block stains, and create the ideal foundation for your top coats. This step is non-negotiable for achieving a durable finish and preventing issues like yellowing or bleed-through from old stains.
Step 5: Painting Kitchen Cabinets with Premium Paint
For best results, apply at least two coats of paint to kitchen cabinets, allowing each coat to dry completely before applying the next. Two thin coats of paint deliver better results than one thick coat, which tends to create drips and runs. Professional painters often use specialized alkyd waterborne enamel paints that offer superior durability compared to standard latex paint.
Water-borne alkyd or hybrid enamels provide a hard finish while allowing for quicker drying times compared to traditional oil-based paints. Brands like Benjamin Moore Advance and Sherwin-Williams Emerald Urethane have become favorites among professional painters for cabinet work.
Step 6: Light Sanding Between Coats
Lightly sanding between paint coats with fine-grit sandpaper (220-320 grit) results in a smoother finish. This step removes any dust nibs or imperfections that settled into the wet paint. Wipe with a tack cloth after sanding to ensure a clean surface for the next coat.
Step 7: Final Coat and Hardware Reinstallation
After the second coat dries, inspect your work carefully. Touch up any areas that need attention, then allow the paint to cure properly before reassembling. While the paint may feel dry to the touch within hours, full curing time takes between 2 to 4 weeks. During this period, treat cabinet surfaces gently to avoid damage to the still-hardening finish.
Once fully cured, reattach cabinet doors, drawer fronts, and hardware. Consider upgrading to new hardware for an even more dramatic transformation—new knobs and pulls can completely change the look of painted kitchen cabinets.
Kitchen Cabinet Colors That Work Best in 2026
Choosing cabinet colors requires careful consideration since most people don’t frequently repaint their kitchen cabinets. Current color trends favor both bold statements and timeless neutrals, giving homeowners plenty of options depending on their style preferences.
Bold and Dramatic Cabinet Colors
Some favored hues for kitchen cabinets right now include burgundy, deep reds, green, and blue tones. These rich colors create stunning focal points and work particularly well in open-concept spaces where the kitchen flows into living areas. Specific recommendations include:
- Benjamin Moore Hale Navy (HC-154): A sophisticated navy blue that adds depth without overwhelming the space
- Benjamin Moore Greenwich Village (1413): A deep, forest green that brings natural warmth to modern kitchens
- Dark cabinets in charcoal or deep gray: These create high-contrast looks when paired with light countertops and backsplash
Classic Neutrals and Whites
Neutrals and whites remain popular choices for kitchen cabinets, offering versatility and timeless appeal. These shades make small kitchens feel more spacious and provide the perfect backdrop for colorful accessories and decor. Popular options include:
- Farrow & Ball Old White (No. 4): A more neutral “greige” tone that works in both traditional and contemporary spaces
- Benjamin Moore Simply White (OC-117): A crisp, clean white that stays bright without appearing stark
- Warm off-whites: These softer tones add warmth while maintaining the light, airy feel that white cabinets provide
When selecting your cabinet color, consider your entire kitchen design, including countertops, backsplash, walls, and flooring. Your interior painting professional can help coordinate these elements for a cohesive look.
Finish Options: Matte, Satin, or Semi-Gloss
The paint finish you choose affects both appearance and durability. Semi-gloss finish and satin finish are the most popular choices for cabinets:
- Semi-gloss: Provides a subtle shine and stands up well to cleaning, making it ideal for high-traffic kitchens
- Satin finish: Offers a softer look with good durability and easier touch-up capabilities
- High gloss: Creates a modern, polished look but shows imperfections more readily
Many professional painters recommend a durable finish like semi-gloss for cabinet doors and drawer fronts since these surfaces see the most use and require frequent cleaning.
If you’re struggling to choose colors, consider scheduling a color consultation to explore options that complement your home’s existing style.
DIY Cabinet Painting vs. Hiring Professional Painters
The decision between DIY and professional cabinet painting depends on several factors: your skill level, available time, desired quality, and budget constraints.
When DIY Makes Sense
DIY cabinet painting can work well if you:
- Have patience and attention to detail
- Can dedicate 40+ hours to the project over several weeks
- Feel comfortable using paint sprayers or are willing to master brush and roller techniques
- Own or can borrow/rent necessary tools like paint sprayers, sanders, and workspace protection materials
- Have a space where you can lay cabinet doors flat for painting and drying
The primary advantage of DIY is cost savings—potentially keeping $5,000 to $9,000 in your pocket. However, you’ll need to invest in quality supplies including:
- Premium primer (Zinsser or similar bonding primer)
- Cabinet-grade paint (Benjamin Moore Advance, Sherwin-Williams Emerald Urethane)
- Paint sprayer or high-quality brushes and rollers
- Various grits of sandpaper and sanding blocks
- TSP or other degreaser for surface cleaning
- Painter’s tape, tack cloth, and drop cloths
- New hardware (optional but recommended)
When to Hire Professional Painters
Professional cabinet painting makes sense when:
- You want guaranteed results without the learning curve
- Time is limited and you need the project completed quickly
- You lack the proper tools or workspace for a quality DIY job
- Your cabinets require extensive repairs or have complex details
- You prefer the peace of mind that comes with warranties and insurance coverage
Experienced painters bring efficiency, proper equipment, and proven techniques that deliver smooth, durable finishes. They understand how to work with different cabinet materials, navigate tricky corners and edges, and achieve the polished look that distinguishes professional work from amateur attempts.
At A New Leaf Painting, our cabinet refinishing specialists have completed thousands of kitchen transformations across Northeast Florida. We use premium paints like Benjamin Moore and Sherwin-Williams, backed by our industry-leading warranties that protect your investment.
How Long Will Painted Cabinets Last in Jacksonville’s Humid Climate?
Florida’s humid climate presents unique challenges for painted surfaces, including kitchen cabinets. Moisture in the air can affect paint adhesion, drying times, and long-term durability if proper techniques aren’t followed.
Understanding Humidity’s Impact on Cabinet Paint
Jacksonville’s average humidity levels range from 60% to 90% depending on the season. This moisture can:
- Slow paint drying and curing times
- Contribute to paint peeling if surface preparation was inadequate
- Encourage mold or mildew growth behind cabinets if ventilation is poor
- Cause wood grain to swell slightly, potentially affecting paint adhesion
Keys to Long-Lasting Cabinet Paint in Humid Climates
To ensure painted cabinets withstand Jacksonville’s humidity:
- Use moisture-resistant primers and paints: Water-borne alkyd enamels and 100% acrylic latex paints with stain-resistant properties perform better in humid environments than cheaper alternatives.
- Ensure proper surface preparation: Clean cabinet surfaces thoroughly and allow them to dry completely before priming. Any moisture trapped under the primer will cause problems later.
- Control indoor humidity: Run exhaust fans while cooking and consider a dehumidifier if your kitchen stays consistently humid.
- Allow adequate curing time: Don’t rush the curing process. Even though paint feels dry within hours, it needs 2 to 4 weeks to fully harden. During Florida’s humid summer months, this curing period may extend slightly.
- Apply proper coat thickness: Two thin coats provide better moisture protection than one thick coat. The paint film should be uniform without excessive thickness that can trap moisture.
Expected Lifespan of Professionally Painted Cabinets
With proper preparation, quality materials, and skilled application, professionally painted kitchen cabinets can last 7 to 15 years or more in Jacksonville’s climate. Factors affecting longevity include:
- Quality of initial surface preparation
- Type of paint and primer used
- Kitchen ventilation and humidity control
- How gently cabinets are used and cleaned
- Whether direct sunlight hits the cabinets
Our cabinet painting and refinishing services include surface preparation techniques specifically designed for Florida’s climate, ensuring your investment delivers long-lasting beauty.
“While the 2025 national average ROI for a minor kitchen remodel is 113%, some states deliver even higher returns” [1].
Statistics Infographic

[Statistics infographic highlighting the high return on investment for cabinet painting.]
Common Cabinet Painting Mistakes to Avoid
Even experienced DIYers can make mistakes that compromise the final result. Watch out for these common pitfalls:
- Skipping the primer: Some homeowners try to save money by painting directly over clean, sanded cabinets. This almost always leads to poor adhesion and early paint failure.
- Using cheap paint: Standard latex wall paint doesn’t have the durability needed for cabinets. Invest in cabinet-specific paints designed to withstand daily wear and frequent cleaning.
- Inadequate surface cleaning: Kitchen grease is invisible but deadly to paint adhesion. A quick wipe-down isn’t enough—use a proper degreaser like TSP.
- Not removing cabinet doors: Trying to paint cabinets in place leads to drips, uneven coverage, and visible brush marks. Taking the time to remove doors and drawer fronts makes a huge difference in final quality.
- Rushing between coats: Each coat needs adequate drying time before the next application or light sanding. Rushing creates a soft, easily damaged finish.
- Ignoring cabinet boxes and frames: Some DIYers focus on cabinet doors and drawer fronts but neglect the cabinet boxes and interior edges. A complete transformation requires painting all visible surfaces.
Maintaining Your Newly Painted Kitchen Cabinets
Proper care extends the life of your cabinet makeover and keeps your kitchen looking fresh:
- Clean gently: Use mild soap and water rather than harsh chemicals or abrasive scrubbers
- Wipe up spills promptly: Don’t let moisture sit on painted surfaces
- Avoid excessive moisture: Use exhaust fans while cooking to reduce humidity and kitchen grease buildup
- Touch up as needed: Keep leftover paint for small touch-ups that prevent minor issues from becoming major problems
- Replace worn hardware: If knobs or pulls become loose, tighten or replace them to prevent damage to the painted finish around hardware holes
“The modern concept of kitchen cabinetry arguably began with built-in cabinets which came into fashion in the 1920’s, creating more open space” [3].
Before-and-After Infographic

[Before-and-after visual infographic demonstrating the dramatic transformation of painted cabinets.]
Ready to Transform Your Kitchen?
Choosing to paint your kitchen cabinets is not merely a cosmetic upgrade; it’s a strategic investment that revitalizes your home’s aesthetic and significantly boosts its market value without the prohibitive costs and disruption of a full renovation.
Cabinet painting offers an incredible opportunity to update your kitchen without the time, expense, and disruption of a complete renovation. Whether you choose to tackle the project yourself or hire professional painters, the key to success lies in proper preparation, quality materials, and patience throughout the process.
For homeowners in Jacksonville, Ponte Vedra Beach, St. Augustine, and throughout Northeast Florida, A New Leaf Painting brings over 20 years of experience to every cabinet painting project. Our team uses premium Sherwin-Williams and Benjamin Moore paints, follows proven preparation techniques, and backs our work with industry-leading warranties.
“As Cindy shared, it felt like having friends working in their home, not just contractors. They were so impressed that they immediately recommended us to family and even felt sad to see our crew leave. Their story reflects our mission: treating every home with respect while delivering craftsmanship that lasts.” (A New Leaf Painting Testimonial)
Ready to see how painted cabinets can transform your entire kitchen? Contact us at 904-615-6599 for a free consultation and estimate. Let’s create the kitchen of your dreams together.
References:
[1] Fixr. (2025, September 30). How Much Value Does a Kitchen Remodel Add: ROI by State. Retrieved from https://www.fixr.com/articles/kitchen-remodel-roi
[2] Glennys Painting and Remodeling. Kitchen Cabinet Painting Trend For 2025-2026. Retrieved from https://glennyspaintingandremodeling.com/kitchen-cabinet-painting-trends/
[3] Cabinetmaker’s Choice. (2022, March 24). Cabinets Through History. Retrieved from https://cabinetmakerschoice.com/2022/03/24/cabinets-through-history/