
How to Tell If Your Home Needs Siding Repair: A Jacksonville Homeowner’s Guide
Last Updated: June 2, 2026 • Reviewed by: Thomas Drake, Owner, A New Leaf Painting Contractors • Serving Northeast Florida since 2001 | 750+ verified 5-star reviews
Yes, most vinyl siding can be painted when it’s clean, dry, stable, and properly prepared. The coating has to be specifically approved for vinyl, and the new color needs to be chosen carefully — excessively dark colors can absorb more heat than the siding was originally designed to handle, potentially leading to warping or distortion. Our exterior painters in Jacksonville, FL consider the existing siding color, condition, sun exposure, surface temperature, and coating manufacturer’s vinyl-safe color requirements before recommending a paint system.
After more than 25 years of exterior painting in Jacksonville, FL, we’ve learned that vinyl siding can often be repainted successfully, but paint will not fix siding that’s cracked, brittle, loose, warped, or already failing. Product selection, thorough surface preparation, color choice, application conditions, and Jacksonville’s heat, humidity, and intense sun all influence how well the finished coating performs. This guide walks through those factors in detail so homeowners can determine when painting vinyl siding makes sense — and when the siding itself needs attention first.
For more Jacksonville homeowner guides covering exterior siding, stucco, surface preparation, paint products, Florida weather, fading, coating failures, repairs, and ongoing maintenance, visit our Exterior Painting Resource Center.
Florida Tip
Florida’s combination of high humidity, heavy seasonal rain, and intense UV exposure accelerates nearly every type of siding damage compared to drier climates. A repair timeline that might stretch out for years up north often compresses into a single season here — which is exactly why catching problems early matters more in Jacksonville than in most parts of the country.
Signs Your Home Needs Siding Repair
We frequently find that homeowners have noticed one or two of these signs without realizing they’re connected to a bigger underlying issue. Here’s the full list of what to look for during a walk around your home:
- Loose siding — panels or boards that shift, flex, or pull away slightly from the wall when touched
- Warping or buckling — siding that no longer lies flat against the wall, often a sign of moisture trapped behind it
- Soft wood — any area that gives or flexes under light pressure, the clearest physical sign of rot in progress
- Visible rot — darkened, crumbling, or spongy wood, usually starting at joints, corners, and anywhere two pieces of trim meet
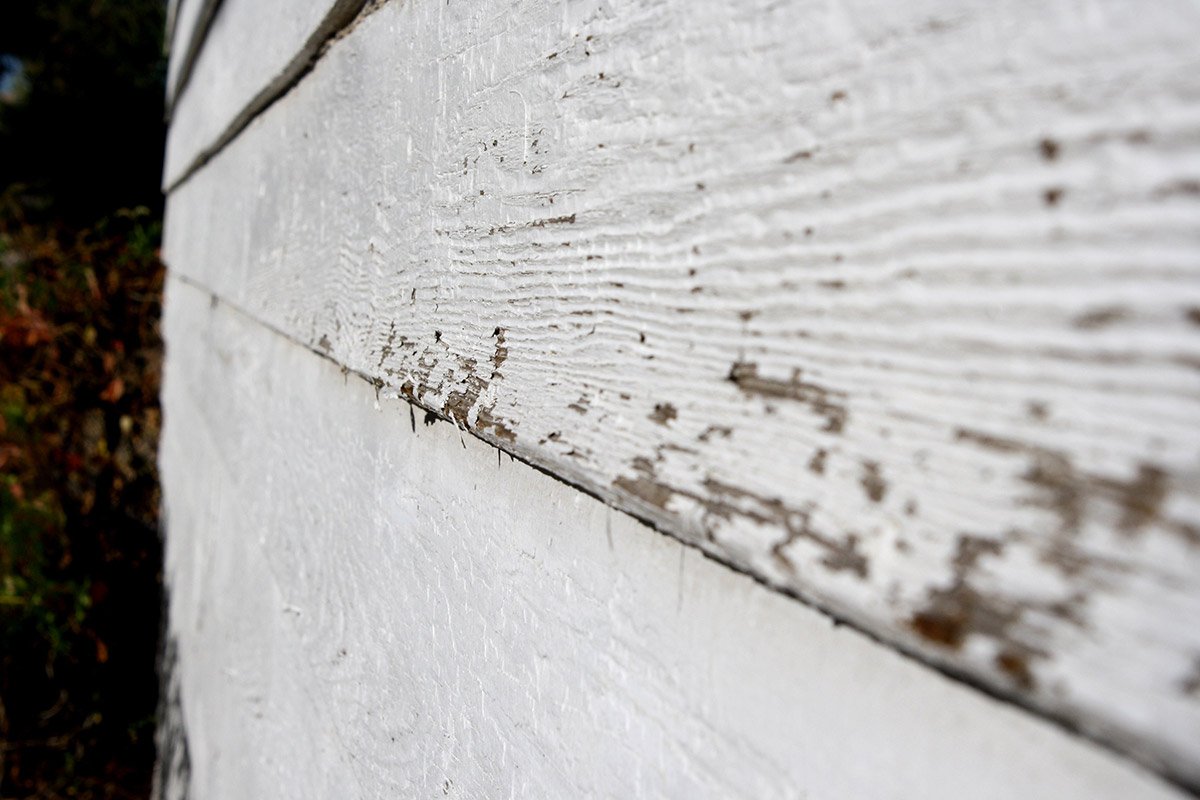
- Paint peeling — especially peeling that keeps returning to the same spot after touch-ups, which usually means moisture is coming from behind the siding, not just from surface wear
- Paint bubbling — small blisters in the paint film, typically caused by moisture trying to escape from underneath
- Cracked or missing caulk — gaps at joints, corners, and trim intersections where a continuous seal has failed
- Missing boards or panels — an obvious sign, but worth checking behind and around for damage that spread before the piece failed completely
- Water stains — streaking or discoloration below joints, window sills, or roof lines, tracing the path water has been taking down the wall
- Mold or mildew — dark spotting, particularly on shaded or poorly ventilated elevations
- Insect activity — small holes, sawdust-like debris (frass), or visible termite or carpenter ant activity near siding and trim
- Unusually high energy bills — gaps in siding and trim can affect a home’s building envelope, letting conditioned air escape more than it should
- Interior drywall staining — a sign that exterior water intrusion has traveled far enough to reach the inside of the wall, meaning the damage is likely more advanced than what’s visible outside
Many homeowners don’t realize that several of these signs can appear together as symptoms of the same underlying moisture problem — paint bubbling near a window, a slightly warped board below it, and a faint water stain on the interior wall are often one issue, not three separate ones.
The Screwdriver Test: How to Check for Wood Rot Yourself
This is the single most useful check a homeowner can do without any special tools — and one of the most frequently misused, so it’s worth walking through properly.
What you’ll need: a flat-head screwdriver (an awl or ice pick works too, but a screwdriver is what most people have on hand) and about fifteen minutes to walk the exterior of your home.
What to tap. Start with any area that already looks suspicious — discoloration, slight warping, peeling paint, or a spot where two pieces of trim meet. Corner boards, window and door trim, fascia boards, and the bottom edges of siding (where they’re closest to grade and irrigation spray) are the areas we find problems most often during inspections.
How to probe. Use the handle end of the screwdriver first — gently tap the surface every few inches along a suspect area. Sound wood produces a solid, consistent tap. Rot-affected wood sounds noticeably different: duller, hollower, sometimes almost spongy-sounding compared to the wood around it.
How much pressure. If a tap sounds different, switch to the pointed end of the screwdriver and apply gentle, steady pressure — not a hard jab. Sound wood resists the point. If the screwdriver sinks in easily, or you can push it in more than about a quarter inch without much resistance, that’s a reliable sign of rot.
What soft wood means. Wood that gives easily under light pressure has lost structural integrity — the wood fibers have broken down, usually from repeated moisture exposure. At this stage, the affected wood needs to be repaired or replaced; painting or caulking over it will not stop the damage.
When NOT to poke further. If you’ve confirmed rot in one spot, resist the urge to keep probing aggressively to “see how bad it is.” Excessive probing can open the wood further, let in more moisture, and turn a repair into a larger one before a professional even arrives. Once you’ve confirmed the presence of damage, note the location and move on to check the rest of the exterior — a professional inspection will map the full extent properly.
Pro Tip
Pay special attention to any spot where two different materials meet — where trim meets siding, where a deck or porch roof ties into the wall, or where a window sits in its opening. These transition points are where caulk failure happens first, and where we find the majority of wood rot during exterior inspections.
Common Types of Siding Damage
Not all siding problems come from the same root cause. Understanding which type you’re dealing with helps determine the right fix.
- Wood rot — fungal decay caused by sustained moisture exposure, breaking down the wood’s structural fibers over time
- Moisture damage — swelling, warping, and paint failure caused by water exposure that hasn’t yet progressed to full rot
- Impact damage — cracked or dented siding from storms, falling branches, lawn equipment, or accidental contact
- Termite damage — Florida’s climate supports year-round termite activity; damage often looks similar to wood rot but has a different repair approach, since active infestation needs to be addressed before any repair is made
- UV deterioration — fading, chalking, and eventual material breakdown from Florida’s intense, near-constant sun exposure, most visible on south- and west-facing walls
- Paint failure — peeling, bubbling, or cracking paint that, left unaddressed, exposes the underlying material to direct weather exposure
- Improper flashing — missing or incorrectly installed flashing at windows, doors, and roof lines is one of the most common root causes of water intrusion we find, even on homes with otherwise sound siding
- Poor original installation — gaps, incorrect fastening, or missing caulk from the original installation that create ongoing vulnerability regardless of how well the siding itself is maintained
Wood Rot Explained
What causes it. Wood rot is caused by fungi that break down wood fibers, and those fungi need sustained moisture to grow. In Florida, that moisture source is rarely a single dramatic event — it’s usually slow, repeated exposure from a failed caulk joint, a gap in flashing, or irrigation spray hitting the same section of wall day after day.
How it spreads. Once fungal decay starts, it continues to spread through connected wood fibers as long as moisture is present, which is why a small area of rot found early is a simple repair, while the same damage left for a year or two can require replacing an entire board or trim section.
Why paint cannot fix it. This is one of the biggest mistakes we see: painting directly over a soft or rotting area. Paint is a finish coating, not a structural repair material. Painting over rot seals in the moisture that’s already there, and gives the fungal decay a protected environment to keep spreading — often making the eventual repair more expensive than if it had been addressed immediately.
Repair vs. replacement. Small, isolated soft spots can sometimes be treated with epoxy wood consolidant and filler. Once decay has compromised a larger section or a board’s structural integrity, replacement of that piece is the right call — patching over structurally compromised wood is a temporary fix that fails again within a year or two.
Biggest Mistake We See
Caulking over a rotten or soft area to “seal it up” before painting. Caulk is not a repair material — it doesn’t restore structural integrity, and trapping moisture behind a bead of caulk over active rot often accelerates the damage rather than stopping it.
Can Damaged Siding Be Repaired?
In most cases, yes — but which approach makes sense depends on how far the damage has spread:
- Spot repair. Appropriate for small, isolated soft spots — typically addressed with wood consolidant and epoxy filler, then primed and painted to match. This works well when the surrounding wood is still structurally sound.
- Partial replacement. The right call when damage affects a full board, panel, or trim section but hasn’t spread to the surrounding structure. The damaged piece is removed and replaced, then properly primed, caulked, and painted to blend with the rest of the exterior.
- Complete replacement. Necessary when damage has spread across multiple connected sections, or when the underlying structure — sheathing, framing — shows signs of moisture damage as well. This is less common than homeowners often fear, but it does happen when damage has gone unaddressed for an extended period.
A professional inspection is the reliable way to determine which category your situation falls into — the extent of visible surface damage doesn’t always match what’s happening underneath.
Why Repairs Should Be Done Before Painting
This is one of the most important — and most frequently skipped — steps in a quality exterior project, and it’s worth explaining clearly:
Never paint over rot. As covered above, paint is cosmetic. Painting over active rot doesn’t stop it — it hides it, which often means the problem gets worse before anyone notices, since the visual warning signs are now covered.
Never caulk rotten wood. Caulk seals gaps between sound materials; it cannot restore or seal off decaying wood. Caulking over rot traps the existing moisture in place.
Never trap moisture. Any repair — filler, replacement board, new caulk — needs to happen on wood that’s fully dry and structurally sound. Sealing over anything less locks moisture in rather than keeping it out.
Done properly, repairs before painting dramatically increase how long the paint job lasts. A wall repaired correctly and then painted can hold up for a full decade or more; the same wall painted over unaddressed rot or failed caulk often shows renewed paint failure within a year or two, in the exact same spot, because the underlying cause was never fixed. This is why a legitimate exterior painting estimate always includes a real inspection and repair scope — not just a coat count.
Siding Materials Compared
| Material | Average Lifespan | Common Problems | Repair Difficulty | Paintability |
|---|---|---|---|---|
| Wood lap siding | 20–40 years with maintenance | Rot, warping, insect damage | Moderate — board replacement is straightforward | Excellent |
| Cedar siding | 25–40 years with maintenance | Rot if unsealed, UV graying, insect damage | Moderate | Excellent |
| T1-11 siding | 15–25 years | Seam rot, panel delamination, moisture wicking at bottom edge | Moderate to difficult — panel sections | Good with proper prep |
| LP SmartSide | 25–30+ years | Edge swelling if cut edges aren’t sealed, caulk failure at joints | Moderate | Excellent |
| James Hardie® / fiber cement | 30–50 years | Caulk joint failure, cut-edge moisture intrusion if unprimed | Moderate — durable but requires correct technique | Excellent |
| Vinyl siding | 20–40 years | Cracking, warping from heat, fading | Easy for panel replacement | Limited — requires vinyl-safe paint if painted at all |
| Composite siding | 25–30+ years | Moisture intrusion at seams, edge wear | Moderate | Good |
| Trim, fascia & soffits (wood) | 15–25 years, shorter without diligent maintenance | Most rot-prone exterior components; highest moisture exposure | Moderate — frequent repair candidate | Excellent |
Money Saving Tip
Trim, fascia, and soffits fail well before the main body of siding on most homes, simply because they take more direct moisture exposure. Budgeting for smaller, regular trim repairs is almost always cheaper over the life of a home than waiting until damage has spread into the siding field itself.
DIY vs. Professional Repairs
When homeowners can reasonably handle it themselves:
- Minor caulk touch-ups on sound, undamaged joints
- Small vinyl panel replacement, where damage is limited to one or two pieces
- Cleaning and monitoring — pressure washing, checking for early warning signs
When to call a professional:
- Any confirmed wood rot, regardless of size — proper repair requires matching material, correct fastening, and integration with existing paint and caulk lines
- Damage near windows, doors, or rooflines, where flashing and water management are involved
- Multiple areas of damage, which often points to a broader moisture or installation issue worth a full inspection
- Any situation involving working at height or on a ladder beyond what you’re comfortable with
- Termite or active insect damage, which needs to be addressed alongside — not instead of — the structural repair
Did You Know?
One of the biggest mistakes we see with DIY siding repairs isn’t the repair itself — it’s skipping primer on the repaired or replaced wood before painting. Bare or filled wood absorbs paint unevenly without a primer coat first, which is one of the most common causes of a repair patch showing through the finish within the first year.
Frequently Asked Questions
How do I know if my siding damage is rot or just cosmetic?
The screwdriver test is the most reliable homeowner check — if the wood gives easily under gentle pressure or sounds hollow when tapped, it’s rot, not just surface discoloration.
Can I paint over slightly soft wood if I catch it early?
No. Even mild softness indicates active decay. Painting over it seals in moisture and allows the rot to continue spreading underneath the new coat.
How much does siding repair typically cost?
Costs vary widely based on the extent of damage, the material involved, and accessibility — a small trim repair is a modest cost, while extensive rot requiring multiple board replacements is a larger project. A professional inspection gives you an accurate, specific number for your home.
Does homeowners insurance cover siding repair?
It depends on the cause. Storm or impact damage is often covered; gradual deterioration from age or lack of maintenance typically is not. Check your specific policy or ask your insurance provider directly.
How often should I inspect my siding?
An annual walk-around inspection is a reasonable baseline for most Jacksonville homes, with an additional check after any major storm.
Can termites damage siding even if the wood is painted?
Yes. Paint protects the surface from moisture but doesn’t prevent termite access from the interior or from ground contact points.
What’s the difference between wood rot and mold?
Mold is a surface growth that can often be cleaned; wood rot is structural decay caused by fungi that has broken down the wood fibers themselves. The two frequently occur together, since both need the same moisture conditions.
Is Hardie board siding immune to rot?
Fiber cement itself doesn’t rot the way wood does, but unsealed cut edges and failed caulk joints on a Hardie installation can still lead to moisture intrusion into the wall assembly behind it.
Should I replace all my siding if I find rot in one area?
Not necessarily. Isolated rot usually calls for spot or partial repair. Full replacement is typically only necessary when damage has spread extensively or the underlying structure is compromised.
How long does a siding repair take?
A small trim or spot repair can often be completed in a day; larger board replacement or multi-area repairs may take longer, especially if repairs need time to cure before painting.
Can I repair siding myself with wood filler from the hardware store?
For very minor, non-structural spots, consumer-grade fillers can work temporarily. For anything showing real softness or structural compromise, professional-grade epoxy consolidant and filler, or full board replacement, gives a far more durable result.
What causes caulk to fail faster in Florida?
Constant expansion and contraction from heat and humidity swings, combined with intense UV exposure, breaks down caulk’s flexibility faster here than in more temperate climates — which is why Florida homes often need caulk maintenance more frequently than the manufacturer’s general guidance suggests.
Siding Maintenance Checklist
| Frequency | What to Check |
|---|---|
| Every 3–6 months | Walk the exterior looking for new discoloration, peeling paint, or visible gaps at trim joints |
| Annually | Full screwdriver-test inspection of trim, corner boards, fascia, and any previously flagged areas |
| Annually | Check caulk at all joints, window and door trim, and material transitions for cracking or gaps |
| After any major storm | Inspect for impact damage, loosened panels, or new water stains near rooflines and windows |
| Ongoing | Keep irrigation heads and sprinklers from spraying directly onto siding and trim |
| Ongoing | Trim back landscaping in direct contact with exterior walls to allow proper airflow and drying |
Final Thoughts: Why Catching Problems Early Saves Thousands
Every siding problem on this page started small. A hairline gap in caulk. A slightly discolored board. A little give when tapped with a screwdriver. Left alone, any of these can turn into a repair that costs many times more than it would have if it had been addressed the first season it appeared — and in Florida’s climate, that timeline moves faster than most homeowners expect.
The habit that protects you most isn’t a major project — it’s a simple annual walk around your home with a screwdriver in hand, checking the areas covered in this guide. Catching a problem while it’s still a spot repair, rather than after it’s spread into a full section replacement, is consistently the difference between an inexpensive fix and an expensive one.
If you’re not sure what you’re looking at, or you’d rather have a trained eye do the full inspection, we’re glad to help. During every exterior painting estimate, we check siding, trim, fascia, and soffits as a standard part of the process — not an upsell — because painting over an unaddressed problem never ends well for the homeowner.
Why Homeowners Choose A New Leaf Painting Contractors
A New Leaf Painting Contractors has served Northeast Florida since 2001 — licensed and insured, with 750+ verified five-star reviews and 5,000+ completed painting projects. Beyond exterior and interior painting, our team regularly handles wood rot repair, stucco repair, drywall repair, trim replacement, and general carpentry repairs — the same kind of work you’d otherwise need a separate general contractor for.
Noticed signs of siding damage on your home? Schedule a free, no-pressure inspection and we’ll tell you exactly what we find — no guesswork. Call 904-615-6599.